Roden 1/144 C-124C Globemaster II Build Review
By Fotios Rouch
| Date of Review | January 2015 | Manufacturer | Roden |
|---|---|---|---|
| Subject | C-124C Globemaster II | Scale | 1/144 |
| Kit Number | 0311 | Primary Media | Styrene |
| Pros | Unique subject now in plastic | Cons | See text |
| Skill Level | Experienced | MSRP (USD) | $35.98 |
Background
Since I just finished the C-74 Globemaster, I wanted to do another iteration on the same theme and I decided to do another Globemaster II. The previous one was the resin Aningrand kit that can be found here. Since Roden did recently in plastic, I opted to do it thinking that it would be easier than the resin kit. An inbox review can be found here.
Well, for one thing the company that Roden contracted out for this Globemaster II is certainly not the same one that they used for the C-119. Day and night difference in the quality of the molding. The C-123 is rough and typical of the early days of limited run plastic injection. Some parts are very poor. Like the main landing gear doors, the radar nose that does not fit, the props and engines with parts that do not fit at all, etc.
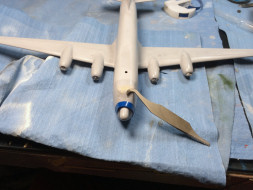
Construction started after all the parts were washed well. I added a little more weight than the instruction recommend for more nose down bias. The construction of the main parts was straight forward but they needed clamping to ensure good joints.
Areas of concern are the tail to fuselage top fit as the tail width is broader than the fuselage mating point. The chord too appears to be a bit longer making the rudder stick out a bit. The tail wings fit OK but they need attention as there is no positive lock. Same for the main wings that need careful filing and trimming to fit with the fuselage wing root butt joint.
After basic assembly was done, I used Mr Primer 500 to reveal all the blemished and imperfections. Basically the work will not be any less than what was required for the Anigrand kits.
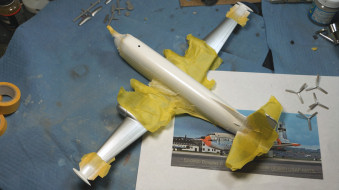
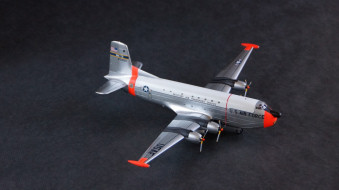
This C-124C will be done in a NMF/White top/Dayglo scheme so a smooth finish will be a must. After the final primer coat went on, it was time to rescribe the faded or lost panel lines with my trusty scribing tool. I prepped the model with my Polly-S surface cleaner and masked it before spraying Testors Insignia White in many light coats and progressively going heavier. I left the model alone in the sun room to bake for a few days. White is a very tricky color and it needs to cure well. Airliner modelers have my respect here!
Once the white was safe to handle I carefully applied masking tape for the blue cheat line and for the red-orange dayglo. It always helps when the dayglo goes over a light substrate. So when I was spraying the white coats, I accounted for that as well. The next step was to cover the blue cheat line and the white top in preparation for the NMF layers. I used Floquil Bright Silver as a base and many different shades of AlcladII on top of that for the various panels. Lastly, I masked the model one more time before applying the black antiglare and wing top exhaust areas.
After all the Alclad II paneling was completed, I used SNJ polishing metal powder to subdue the hues and blend things a bit. The decals applied were a mix from the Roden kit, some from the DRAW Decal C-124 set and some custom prints. The Roden set was so-so and the windows were represented by a light gray color that is not realistic. The DRAW Decal set needs cutting and trimming as it is covered by one solid clear film. The decals look OK on the paper but they are absolutely impossible to make them conform to a curved surface. Case in point was the yellow number plate that goes on the front of the aircraft. It was so hard that I had to dip it in the Microsol bottle and leave it there for a few minutes. It made no difference at all. It actually never quite hugged the front of the model. Very disappointing. I wonder what chemical works with these decals.
Once all that was done, I attached the props, the landing gear and some small fragile details. Exhaust stains were applied with a brush dipped in pastel gray powder.
The final result is OK but not head and shoulders above the Anigrand resin kit. Roden has some very nice new kits but this one was not to the latest standards.
My sincere thanks to Squadron Mail Order for this review sample!


