Anigrand Craftswork 1/144 Douglas C-74 Globemaster Build Review
By Fotios Rouch
| Date of Review | January 2014 | Manufacturer | Anigrand Craftswork |
|---|---|---|---|
| Subject | Douglas C-74 Globemaster | Scale | 1/144 |
| Kit Number | 4017 | Primary Media | Resin |
| Pros | Nice detail | Cons | See text |
| Skill Level | Intermediate | MSRP (USD) | $88.00 |
The Build
The C-74 Globemaster was Douglas' proposed solution to the US need for a very long range transport necessary after the Perl Harbor attack. The contract was awarded in 1942 but the first flight of the prototype (42-65402 - the subject of this build) did not fly until September of 1945. By the end of WWII only 14 aircraft were completed. The C-74 Globemaster evolved to the C-124 Globemaster II with which it shared wings and other components.
The Anigrand kit is typical to what one comes to expect from this company. Reasonably well molded with not many pinholes. The master was never refined and polished and this is evident on the resin copy. Since this aircraft and especially the prototype was polished natural metal finish, be prepared for lots of filling, puttying, sanding and polishing. The model as usual for all resin kits was washed well with detergent to remove all traces of the de-molding agent.
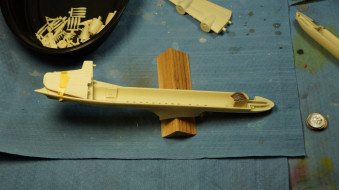
I started the build process with figuring out the weight that would be required to avoid having a tail sitter. I used dimes and made a roll wrapped in masking tape which I then superglued to the front bulkhead.
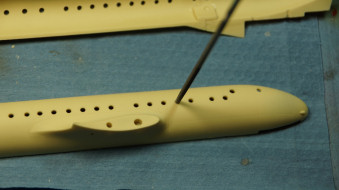
Simple work followed like cleaning the window openings and sanding the fuselage mating surfaces for a better fit.
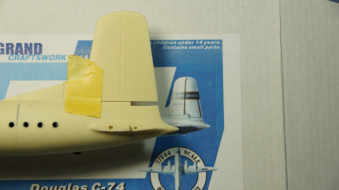
As I was test fitting the main parts, I realized that the large tail is missing the lower rudder part. I do not understand how this was missed when the master maker test fit their parts. I fashioned the missing rudder portion with styrene stock and all was well in the end.
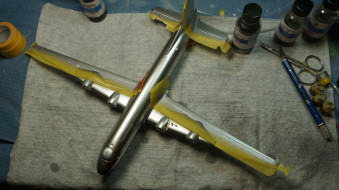
I decided not to use the clear resin parts for the side windows and instead I used Kristal Klear as a masking agent to block the metallic paint from entering the fuselage and altering the black painted interior.
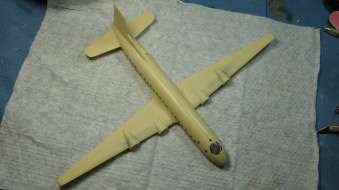
One positive thing to note is how well the front and rear fuselage plug fit. Rare for resin kits to fit so well. The left to right fuselage fit was OK and the fit of the wings to the fuselage was not so good.
Next step was to shoot primer to expose all the things that needed attention. There were gaps and a ton of surface blemishes, scratches, undulations, etc. I used 3M Acryl Red again for the fixes. Sanding, polishing, priming went on for a few cycles until I felt that the model was ready for Alclad II. I used polished aluminum as a base and various shades for the different metal surfaces.
One other big omission in this kit is the total absence of exhausts. I tried to replicate them with tiny stretched sprue that I glued in tiny groves that I carved.
Next, I removed the temporary clear resin piece that was meant for the production version of the kit which I used as a means to mask the cockpit and proceeded to paint the cockpit and the pilot seats. The tiny seats are OK looking with tiny armrests included but they sit too low. The pilot heads are clearly visible in period photos and are sticking out inside the bug eye canopies. It must have been funny back then for the pilot and the second in command to seat so close and yet look at each other through jet looking canopies! Yet the bug eye look is just too good to pass for the conventional but more colorful production version.
Once all painting was done I used a round file to push in the dried and painted over Kristal Klear and applied a fresh drop in each window. I attached the clear parts with Kristal Klear as well.
The decals are very plain on the prototype. They went down OK but they are nothing special quality wise.
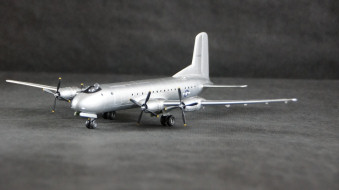
I wanted to finish this model and photograph it before the end of the year so that it would be done in 2014! The Kristal Klear is barely dry in the images!


