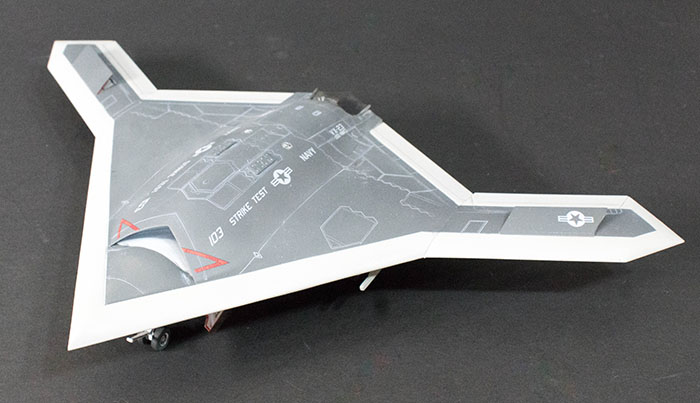
Freedom Models 1/48 MQ-47 (X-47B) Build Review
By Michael Benolkin
| Date of Review | July 2016 | Manufacturer | Freedom Models |
|---|---|---|---|
| Subject | MQ-47 (X-47B) | Scale | 1/48 |
| Kit Number | 18001 | Primary Media | Styrene |
| Pros | First kit of this aircraft in 1/48 | Cons | Nothing noted |
| Skill Level | Experienced | MSRP (USD) | $79.95 |
Build Review
The DARPA Joint Unmanned Combat Air System (J-UCAS) program was intended to advance the concept of unmanned combat aircraft that has been around since World War II. The X-47B built by Northop-Grumman and Lockheed Martin achieved new milestones with its demonstrated ability to air refuel and operate from the deck of an aircraft carrier. The US Navy is considering further development of the aircraft sometime in the future.
For a look at this kit out of the box, go here.
When we received this kit from Freedom Models, I was happy to see this subject in 1/48, but having just finished this same subject in 1/72, I wanted to do something different. I had an idea that would need a special module that took some time to acquire. When everything was together, the model moved to the bench.
The first step after washing the parts was to apply the white base coat that would go inside the various bays, engine duct, door interiors, etc.
It was time to modify the engine duct. I removed the exhaust splitter and added an opening to the middle to facilitate a power switch.
Here is the special module, a lighting unit from Tennacontrols that I found over at CultTVman's Hobby Shop intended for a different model. The module fits nicely in the intake duct and the switch extends through the new opening. I thought about changing the power source but decided to leave the 3 volt disc battery as-is since it is easy to access through the exhaust opening.
The fuselage halves are together and I used a grey wash to bring out the molded-in details in the bays/wells.
It took a bit of time, but I fitted all of the doors to close up the wheel wells and weapons bays. I used white glue to close them for painting as it will be easy enough to re-open them later.
I thought about posing the model with the wings folded (nice detailed option available in this kit) but I decided on flight position. For whatever reason, this option left some slight gaps in the wing-fuselage joint and I filled them with strip styrene.
I skipped taking photos during the painting process, but I decided to paint this model as an MQ-47 using a combination of F-22 and F-35/Have Glass details. The airframe was painted light gray and when that dried, I masked the model edges and applied Tamiya German Gray (close match to the F-35/Have Glass stealth gray). When that had dried, I applied a coat of Future and set the model aside to dry.
The problem with improvised subjects is decals, but I robbed the markings for an flight test F-35B from the Furball Aero-Design sheet which worked perfectly. When the decals had set, I applied another coat of Future to seal the decals.
Another test I wanted to try is using a wash intended for black camouflage on the Have Glass gray. I applied the wash to the panel and rivet lines, then used the dark gray wash on the light gray surfaces. Once the washes had dried, I used a towel to wipe away the excess washes leaving the recesses to hold the colors. The process was wrapped up with a coat of clear flat acrylic.
With painting finished, I painted and installed the JDAMS in the weapons bays and hung the weapons bay doors. I build up a pair of external pylons with Sidewinder rails and mounted them under the wings. The kit had flashed over holes there for pylons but didn't use them in their initial release of this kit. With the gear doors installed, this model is finished.
So you may be wondering what that electronics module was all about. In my demented thought process, I imagined what really kept the Navy from deploying the MQ-47...

This was an enjoyable project that shows what you can do when you want to have a little fun.
My sincere thanks to Freedom Model Kits for the review sample.


