Ultrasonic Cleaners
By Michael Benolkin
Editor's Note: After over three years of use, I thought it might be worth looking at tools and resources to see how they're doing after some mileage. The updated inputs will be appended to the end of this article.
This isn’t going to be your regular review. I have no particular product to tell you about, rather I thought I’d share some recent experiences that might be of interest to you as well. I happened across a posting on one of the chatrooms about using an ultrasonic cleaner to remove the chrome from plated parts. I have a few kits I’ve put off building because I hate dealing with that heavy chrome plating that kit manufacturers insist on using over detailed styrene parts, but I hate soaking parts in brake fluid even more.
I had been looking at ultrasonic cleaners in various specialty tool and hobby catalogs, but I just couldn’t justify over $100 USD on a gadget I wasn’t going to regularly use. That’s odd logic coming from someone who’d plunk down over $100 USD on a model kit and let it sit in my stash for years? But that’s just the way it is…
At any rate, I read that posting on Hyperscale and the author had shared two gems of information. First, he found an ultrasonic cleaner on eBay for around $50 USD, and second, he had found an automotive cleaner that would strip chrome. When you put this cleaning fluid in the ultrasonic cleaner, you could remove chrome from styrene in five minutes. That was definitely interesting. I thought I’d try this out for myself.
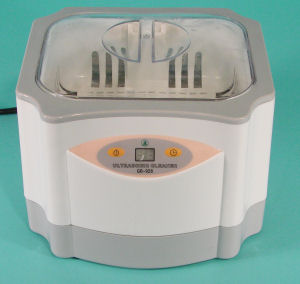
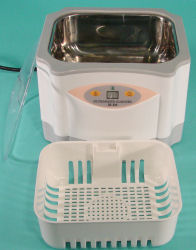
Step one, enter the words “ultrasonic cleaner” in the eBay search function and WOW! Over 500 entries! After a quick review of the listings, there is was a common thread around a group of these devices. A unit that had a tank dimension of 7” x 5.5” x 2.75”, operated at a vibration frequency of 44 KHz, and had a variety of timer settings ranging from 5-30 minutes (in 5 minute increments) cost around $50. I bought one.
Step two, the cleaning fluid discussed was a product called “Super Clean” which is a biodegradable cleaner, available in handy gallon jugs. I found some in the automotive section of my local ‘superstore’.
 A few days later, my new ultrasonic cleaner arrived and I whisked it up into the Cybermodeler Lab. As I filled the tank with the Super Clean, I saw some grimy tools that were left over from another job that I thought would be a good first test. Tools in the tank, put on the clear lid, turn on the timer for five minutes, sit back and observe. I watched the tools as grime and grease literally lifted off the surfaces. It was like watching one of those laundry soap commercials with the dirt lifting off your clothes.
The parts were clean in just a few minutes so I stopped the machine and removed the parts. WARNING, DON'T DO THIS AT HOME. I didn’t read the cleaning fluid’s warnings in advance. It says quite clearly that you shouldn’t expose bare skin to the fluid and don’t let it dry on anything. The stuff started burning my hand rather quickly, so I washed my hands and read the instructions. The cleaner did a great job on the tools (and I washed them of any cleaner residue), but I will limit that cleaner to chrome removal and other tough jobs. Also, DON'T put your hand in the operating machine.
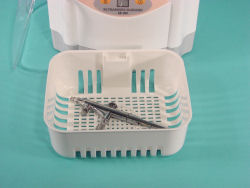
 I emptied the ultrasonic cleaner’s tank, washed out the remaining liquid cleaner, and returned to the Lab. This time, I’ll see what the ultrasonic cleaner would do with a tank of Formula 409 cleaner. I grabbed an airbrush I routinely use for detail work. I love the brush, but paint will sometimes get to places impossible to clean and will sometimes lock the needle in place after a few hours of non-use. I dismantled the airbrush as far as it would go, dropped the parts in the tank, and turned on the machine. Bear in mind that I do my best to clean my airbrushes after use and this one was ‘clean’. Not so fast. Within a few seconds, I could see wisps of color flowing out of different areas of the airbrush components. Within a minute, those wisps were long gone. I stopped the machine, reassembled the airbrush, shot some Iwata airbrush cleaning fluid through the brush and that airbrush behaved like new.
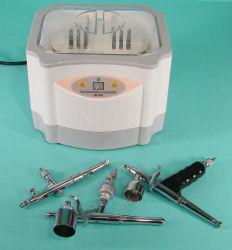
 I repeated this process with my other airbrushes. Same thing. Paint would wisp away from the airbrush parts from areas that are otherwise difficult to reach. After reassembly, they worked as good as brand new. Time for the Spousal Test. My wife has a Pasche H single action and a Badger double action airbrush in her workshop. Last year, she decided to try a new acrylic paint that is usually brush-applied through both of those airbrushes. The result was disastrous. When she told me about the experience, both airbrushes were still caked in acrylic residue and had been left to die. I couldn’t bear to look…
After these successful tests on my airbrushes, I found the box that her airbrushes had been ‘buried’ in and tried to dismantle them. No luck. With the tank still full with the 409 from my previous experiments, I dropped these two bad-acrylic victims in the tank, fully assembled, and turned on the five minute timer. After five minutes, not much had happened (I think one of them laughed at me) so I decided to drop them back in and run the machine for 30 minutes while I went off to do something else. When I returned, the surfaces of both airbrushes were clean. I was able to disassemble both airbrushes and re-ran them for another 30 minutes. It probably didn’t need that long, but I wasn’t taking any chances. When I returned after round two, I reassembled two clean airbrushes. I am impressed. And that was with Formula 409! Imagine something a little stronger!
Three Years Later...
I remember wondering how long my inexpensive ultrasonic cleaner would last given that it came from an eBay vendor. Well here we are, three years later, and my trusty ultrasonic cleaner is still running great. It still does a variety of routine tasks ranging from periodic maintenance on airbrushes to removing chrome plating from kit parts. So far, I have had no problems with the unit and it is a regular resource around my bench.
When I'm not doing the usual cleaning duties, I also use the ultrasonic cleaner to recycle empty Tamiya and Gunze acrylic paint bottles. When these bottles are clean, they are an invaluable resource for storing paint mixes, brush cleaners (enamel thinner, mineral spirits, Windex, and MEK). I simply keep the Ultrasonic Cleaner full of Windex with Ammonia and drop in empty bottles and their lids (removed, of course). When there are enough bottles in the unit, I flip on the switch and out come clean bottles and lids for reuse.
If you're wondering about Windex with Ammonia, this standard US window cleaner also dissolves acrylics. I always shoot a cup full of Windex through my airbrush between colors when I shoot acrylics, and MEK when shooting lacquers or enamels. Of course I shoot any of these cleaners directly into the Airbrush Cleaning Station to avoid spousal wrath from the vapors.
Conclusions
So, I thought I’d share this little experience with you. What started off as an experiment to strip chrome plating off of plastic parts turned into a very useful resource for keeping my airbrushes and other modeling tools clean. As I said at the beginning, I wasn’t interested in spending over $100 on an ultrasonic cleaner, but $50 was worth a try. I am still quite pleased with my machine that is mass-produced in Asia. The size, performance and price are just right and I effectively clean my airbrushes at the end of a day in under five minutes without having to blow quantities of cleaner through the brush anymore. Simply fill the tank and let the ultrasonic cleaner take care of the problem.


