Pacific Coast Models 1/32 Ta 152H-1 Kit First Look
By Michael Benolkin
| Date of Review | April 2009 | Manufacturer | Pacific Coast Models |
|---|---|---|---|
| Subject | Ta 152H-1 | Scale | 1/32 |
| Kit Number | 32008 | Primary Media | Styrene, resin, photo-etch |
| Pros | Beautiful molding, relatively simple build | Cons | See text |
| Skill Level | Experienced | MSRP (USD) | $69.95 |
First Look
 |
 |
 |
 |
 |
 |
 |
 |
 |
Doctor Kurt Tank was the designer of the Focke Wulf Fw 190 series and put the name Focke Wulf forever in the history books. Nevertheless, Tank was given his own design team to tackle the problem of developing a high-altitude interceptor. The resources of Focke Wulf were left to production of the existing Fw 190 line.
The task at hand was to develop an interceptor that could reach higher altitudes with a combination of greater lift and more power. To counter the effects of prolonged operations at altitude, the cockpit had to be pressurized. The result was the Ta 152H, an aircraft that bears a strong resemblance to the Fw 190D series, but was in fact a completely different aircraft. The wingspan alone was significantly greater.
Deliveries of the Ta 152H commenced around December 1944 with some 60 examples being produced before war's end. How effective was this aircraft? Rather than quote some book, let me share an insight from a friend who flew the Mosquito for 418 Sqn (Canadian) and became an ace, then was drafted into the USAAF to fly 'weather reconnaissance' (OSS) missions with the Mosquito for the rest of the war. According to him, as long as both Merlins were running, there wasn't anything that Jerry could put up that could catch him on his high-altitude profiles. That changed with the Ta 152. The aircraft could easily reach his flight level, but could not mount an effective intercept unless it got above or in front of him. Evidently a few came close. If I recall correctly, one of these close encounters resulted in the loss of an engine, but they still managed to get away and limp home.
Now here is a kit that has been greatly anticipated by the modeling community! Until now, the only Ta 152H option in 1/32 was Jerry Rutman's resin kit, but now we have our first rendition of this aircraft in styrene. The box art is interesting as it depicts a Ta 152 after flaming a Soviet Fokker. I think the Fokker was flying a Yak-9, but I digress...
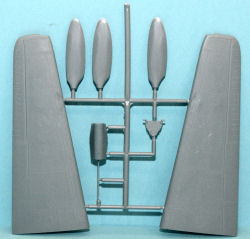
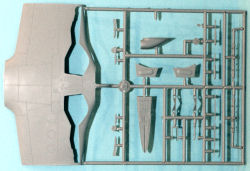
The kit is molded in gray styrene and presented on five parts trees, plus one small tree of styrene clear parts. This kit also features some nice resin details and a fret of color photo-etched parts as well.
The kit features a nice resin cockpit that is enhanced with color photo-etched seatbelts and shoulder harness. Since they were already doing color photo-etch, it would have been nice to have the color-printed multi-layer instrument panel that Eduard produces so well.
The aircraft has such a long wing for its high altitude work, PCM had to break the bottom half of the wing into three parts with the break just outboard of the wheel wells. You'll want to assemble the center section of the wing first, which means that you add the resin wheel wells and the resin tub that represents the exposed underside of the Jumo engine and its accessories. PCM got this distinctive detail right!
With the wheel wells in place, attach the outboard sections of the wing bottom to the center section and I'd suggest running styrene spars from behind each wheel well out an inch or two into the outboard wing panel to provide structural strength and hold the underside dihedral angle. Don't try to do both wings with one spar as you'll quickly see the wing go flat (zero dihedral) on the underside.
The landing gear is nicely detailed and the kit even features two styles of wheel hubs for the mains. The retraction mechanism looks identical to the Fw 190D update set that I purchased from Jerry Rutman to accurize my Dora (before Hasegawa released their new-tool kit). One of the distinctions between the Dora and the Ta 152 was the replacement of the electrically operated flaps and landing gear with hydraulic mechanisms. You'll have to dig out some reference photos and tweak the retraction mechanism accordingly.
The rest of the kit is very straightforward, and unless you want to surgically separate and reposition the flaps or flight control surfaces, this kit should pose no obvious problems.
This kit comes with one sheet of decals that will render one of four subjects, plus a small correction sheet that provides the aircraft numbers in a lighter shade (RLM 25). The aircraft presented on these sheet include:
- Ta 152H-0, Green 3, Stab./JG 301
- Ta 152H-0, Green 4, Stab./JG 301, W.Nr. 150010
- Ta 152H-1, Green 8, Stab./JG 301
- Ta 152H-1, Green 9, Stab./JG 301, W.Nr. 150168, as flown by Obfw. Willi Reschke
Note - pay attention to the correction sheet included in the box that updates the color callouts on the included color profile.
I have to confess that I pre-ordered this kit sight unseen as soon as I heard that Pacific Coast Models was going to produce it in 1/32 scale. While it is a simplistic kit, it does provide the opportunity for some AMS modeling.


