Airfix 1/24 Harrier GR.3/AV-8A/AV-8S Kit First Look
By Michael Benolkin
| Date of Review | January 2009 | Manufacturer | Airfix |
|---|---|---|---|
| Subject | Harrier GR.3/AV-8A/AV-8S | Scale | 1/24 |
| Kit Number | 18003 | Primary Media | Styrene |
| Pros | Interesting options, relatively simply build | Cons | |
| Skill Level | Basic | MSRP (USD) | $75-$90 |
First Look
 |
 |
 |
 |
 |
 |
 |
 |
 |
 |
 |
 |
 |
The Harrier first started as the P.1127 Kestral, which was the early concept for a Vertical Take-Off and Landing (VTOL) tactical aircraft. First flown in 1960, the aircraft was powered by a new turbofan engine, the Rolls Royce Pegasus and engine thrust alone lifted the aircraft and accelerated it into forward flight using four vectored thrust ducts. Evaluations of the Kestral led to an improved airframe that became the Harrier GR.1 in the UK and AV-8A in the USMC. Incremental improvements to the GR.1 included a laser rangefinder, electronic warfare equipment, and additional weapons capabilities, this version being designated GR.3.
While much can be written about the Harrier in combat over the Falklands (and much has been so written), I can remember when the AV-8A was still in early flight test at Patuxent River. Just before I was stationed in the DC area, the standing tradition of an Army-Navy game played at the Naval Academy included a fly-by of everything the Navy and Marines had available including the latest aircraft from Pax River.
As the story was related to me a few weeks afterwards, the usual fly-through commenced 'over' (into) the stadium with an F-8 Crusader, F-4 Phantom II, A-4 Skyhawk, etc., blowing through to the delight of the crowd. Suddenly a small and loud jet aircraft zoomed into the middle of the field, stopped, did a 360 degree turn in the hover, then zoomed back out of the stadium straight up. This was the first time most of these folks had seen a Harrier and every jaw was dropped squarely on the deck. That aircraft did everything a jet fighter was never supposed to do and it might has well have been a flying saucer as far as the spectators were concerned. The Harrier had been 'properly' introduced.
When Airfix produced their 1/24th scale Harrier GR.1 kit MANY years ago, it was a marvel in size and detail. The kit was one of the first to feature scribed details and even recessed rivets. The box was huge, there were endless parts inside, and you had a good presentation of the workings of this unique 'jump jet'. The kit was popular enough that Airfix issued new tooling to render the Sea Harrier, and also produced some new parts for the GR.1 kit to update the model to render the GR.3 as well. It is this version that we'll examine a little closer.
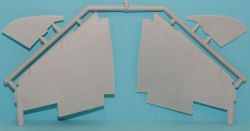
The kit is molded in light gray styrene and presented on nine parts trees, plus one tree of clear parts and one tree of black styrene parts for a display stand. The fuselage halves are loose in the box.
The kit cockpit is rather simplistic in this scale. With that nice sliding canopy, you'll want to add seatbelts/harnesses and other details to the ejection seat and definitely dress up that instrument and side consoles. In fact, Flightpath produces a rather extensive detail set for the GR.1 kit and had even produced a resin conversion to transform the GR.1 into the GR.3 before Airfix did that themselves. You'll need some good instrument faces as well since you should be able to read the time and other instruments in this scale.
One of the novel features of this kit is the Pegasus engine. Airfix developed an articulating mechanism to go inside the engine that will rotate the nozzles in unison when one is turned. The accessory pack that sits atop the engine is nicely done and the photos we have online will help you through those details.
The wheel wells and engine bay bulkheads go together next and are installed inside the fuselage halves. One detail that Airfix didn't do well are the intakes. Specifically the auxilliary inlet doors that surround the intake fairing a few feet aft of the intake lip. These are usually open when the engine is running on the ground, and are subject to gravity when the engine is shut down, meaning that the upper doors are open and the lower doors are closed. This is a distinctive detail on the early Harriers and you'll need to do a bit of surgery to replicate this detail.
As the fuselage halves go together, you're approaching a point where you'll need to decide which version of this aircraft you're building (if you haven't already done so). Many details are common between the GR.1, AV-8A, and AV-8S, but the GR.3 has a different nose and tail as well as antennas. The instructions clearly show you which options are needed in each step.
Something else you'll need to decide early-on is whether you'll retain all of Airfix's working details or if you'll fix a number of these in place. Case in point:
- Movable nozzles
- Movable canopy
- Movable horizontal stabs
- Movable rudder
- Movable ailerons
- Retractable landing gear
- Removable wing (to reveal engine)
Personally, I'll fix the landing gear and flight control surfaces as well as permanently mounting the wing. The sliding canopy and movable nozzles are keepers.
Additional options in the kit:
- Optional in-flight refueling probe
- Optional ferry wingtips
- Choice of ventral gunpacks or ventral strakes
- Choice of noses
- Choice of vertical stabilizers
- Positionable speed brakes
- Choice of antennas
- Display stand
Updates I'll be making to the kit:
- Dropped flaps
- Reconfigured inlet doors
- Superdetailed cockpit
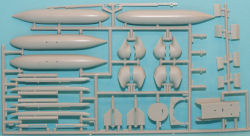
The kit does have a nice selection of armament to hang under the wings and centerline pylon. These include:
- 3 x RAF iron bombs
- 2 x Dual pylon adapters
- 2 x AIM-9D or AIM-9L Sidewinders
- 4 x RAF rocket pods
- 2 x US napalm cannisters
- 2 x external tanks
The kit comes with one HUGE (20"x14.5") decal sheet that was never going to fit on my scanner, so you'll have to live with the photo instead. The aircraft options in this kit are:
- Harrier GR.3, XZ969, 4 Sqn, RAF Guetersloh, Germany, 1992
- Harrier GR.3, XV788, 1453 Flight, Port Stanley Airport, Falkland Islands, 1983
- AV-8A, 158961, VMA-513, WF/2, MCAS Beaufort, 1977
- AV-8S, 01-804, Naval Air Arm, Rota AB, Spain, 1993
- AV-8A, 161174, 310 Sqn, U-Tapao AB, Royal Thai Navy, 1999
Despite their size, several of the decals are out of register but with a little care, this too can be overcome.
Despite the intimidating 1/24 scale, the model is not that large. You can see in the top photo that the fuselage is going to be 23-24 inches long depending on nose selection. With the large scale comes opportunity to have some AMS fun with the model, or simply build it out of the box and have some fun with the working features.
No matter which direction you choose, the finished product will be impressive-looking. Assuming that the old IPMS rule that a well-done large model will grab the awards still applies, you have a great starting point for the next context. A quick check online reveals that stocks of this recently reissued kit haven't made it too far away from the UK, but there are plenty to be had online and at kit swaps.
Have a little fun and build yourself Harrier!


