Zoukei-Mura 1/48 J7W1 Shinden Build Review
By Stephen Sutton
| Date of Review | July 2014 | Manufacturer | Zoukei-Mura Inc. |
|---|---|---|---|
| Subject | J7W1 Shinden | Scale | 1/48 |
| Kit Number | 48001 | Primary Media | Styrene |
| Pros | Best Shinden kit in 1/48 scale | Cons | Nothing noted |
| Skill Level | Experiened | MSRP (USD) | $48.00 |
Build Review
For a look at this kit out of the box, look here.
The first steps of the kit was to assemble the 2,130 hp Mitsubishi MK9D (Ha-43) radial engine and its supercharger, all the exhaust in intakes are delicate parts so careful removal of these parts was essential. All eleven parts fit together perfectly, mold lines and some flash was cleaned up with an X-Acto blade and sanding stick.
Next the propeller shaft assembly was built following the instructions, fit here again was excellent.
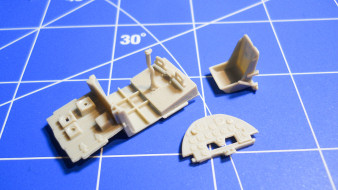
Now we start assembling the cockpit walls and the pilots' seat and control stick. In preparation for paint all molding lines and some flash was cleaned up, this is where I discovered the plastic is very soft so care must be taken when cleaning up seams with an x-acto blade.
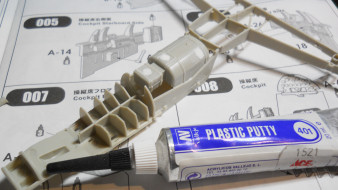
Next the unique canard shaped frame was removed from the parts tree and again lots of fine flash and mold lines needed to be cleaned up. The bottom of the cockpit tub had recessed molding tabs which required some filler I used Vallejo Plastic Putty for this.
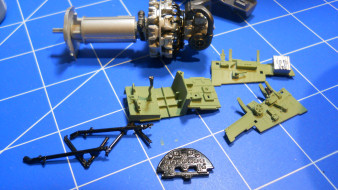
It's time to paint and assemble the cockpit and engine mount assemblies. The engine was painted an overall Tamiya Gloss Aluminum TS-17 and then the turbo chargers and gearbox components are given a coat of Vallejo Steel.
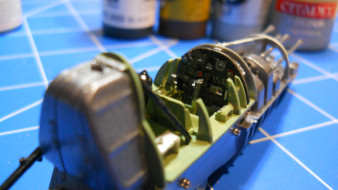
The cockpit was assembled and then airbrushed with Tamiya IJN Cockpit Green XF-71. Interior boxes and handles where painted with semi-gloss black and Citadel Chainmail colors. The instrument panel was painted semi-gloss black and the kit supplied instrument decal was applied. Walthers Solvaset was applied over the decals to get them to lay down over the kit instrument details. No seat belt detail was supplied with the kit so I purchased Eduards IJA Seatbelt photo-etch set 49005 and I used cyano to attach these to the cockpit seat.
Airframe part #A-16 was painted over all Tamiya Light Gun Metal TS-42, the oil tank part #A-15 was painted Vallejo Steel and the straps were painted semi-gloss black.
The cockpit gas cylinders and roll bars are painted semi-gloss black and glued into place. The four 30mm fixed machine guns are painted Gun Metal Gray Tamiya TS-42, and these where carefully glued in place along with a rear and parallel gun support structure. I suggest that you have all four guns painted and ready to assemble with the support structures as this can be a challenging step. There is no room for error because of the precise fit of these parts. Very nice parts configuration with side views and over assembly views are provided in the instructions.
This is at the point in this kit where you will need advanced modeling skills to assemble all the engine exhaust pipes and engine mount braces. Be sure to NOT paint over any of the mount holes and tabs for the braces as these are a precise fit. As the engine exhaust pipes are removed from the tree, I painted and glued one exhaust pipe assembly to the engine at a time so I would not get the exhaust pipes mixed up. This was a slow and tedious process but well worth it. The exhaust pipes where painted flat black and burnt umber using Vallejo colors. Finally, the overall engine was given a wash of thinned down flat black.
To mount the engine on the airframe, the forward part of the engine snaps into two oil tank support arms and the aft part of the engine gets a support brace on each side. This proved to be another challenge for me as I must have painted over the support brace holes. I would recommend you do not paint any of the engine support braces as these are a precise fit and when painted, they were hard to assemble.
Up next is to install the fuselage panels and wings. All fuselage interior parts are given a coat of Tamiya TS-42 Light Gun Metal. The forward fuselage exterior panels are test fitted then glued in place. Many clamps are used to hold everything in place to dry since I am using Tamiya Extra Thin plastic cement. The top instrument cowl was also glued in place.
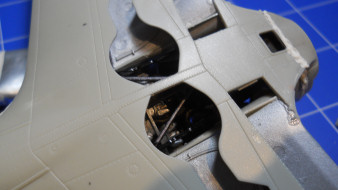
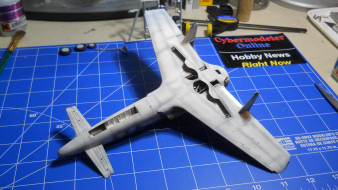
Now the bottom wing assembly is glued to the fuselage assembly, first you must clean up the mating surface of the wings where the sprue trees are attached, not a good design here, see photo. Clamps are again used to hold everything together. The top of the wings are glued to the bottom of the wings on both sides, very precise fit here and I only used Tamiya tape to hold these together. These are set aside to dry overnight. Minor putty was applied to the wing leading edges and roots. Lacquer thinner was used to clean off excess putty
Next the oil cooler panels are glued to the rear engine side panels, clamps are used to hold everything together. After these dried I then test fitted these engine cover side panel to the fuselage frame and found that I needed to trim the bottom forward edges so these would fit snug to the forward wing roots. The engine turbine blades and cowling was assembled as per the kit instructions. The engine intake cowls are attached next. It's really starting to look like a fighter now. Special note here is I really had to apply a lot of patience here to test fit all the fuselage panels over the sub frame and engine assembly, many clamps where used in this process and I felt like I was packing 20 pounds into a 10 pound container as everything is such a precise fit there is no room for error.
To prevent the tail from squatting I added some weight to the front of the nose panel area, this was glued in place with 5 minute epoxy. The front wing canard was glued in place along with the front nose panels and cone. Minor putty was applied to the nose panel seams. The side wings were glued in place as per the instructions. Pre-shading and painting are next.
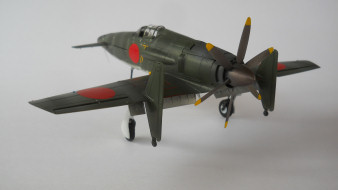
Now comes the fun part and I wanted to keep with the paint scheme found on the box art. First I pre-shaded all the panel line with Tamiya Flat Black XF-1. Next I airbrushed the bottom with Tamiya Flat White XF-2, lightly around the pre-shading, and then I slowly added more layers of flat white to give the underside a worn and dirty look.
Next I rolled up some Tacky tape and laid down the demarcation line for the IJN green. Using Tamiya J.A. Green XF-13 I then airbrushed the upper surface of the Shinden, I applied several layers of paint and added Tamiya Flat white to the paint to add highlights to the raised surfaces and panels. I removed the Tacky tape and I got what I wanted which was a soft demarcation edge between the JA Green and white. Next I applied with an air brush a generous amount of Future Clear Acrylic to seal the paint and prep for the kit decals. I let this dry for 24 hours.
Next I masked off the one piece canopy assembly for paint, when I test fit it, it would not sit correctly and I ended up breaking the canopy. So now I prepped the open canopy assemblies with Tamiya tape for paint. First I airbrushed the canopies with Flat Black, then I airbrushed them with Tamiya J.A. Green.
After the canopies dried I attached the front wind screen with Glossy Accents, which dries crystal clear and very solid.
Now it's time to apply the kit decals. The decals are pretty sturdy and a little thick for my taste. After I laid them down it took several coats of Walthers Solvaset solution, this took a long time as the decals just would not settle down in all the panels and such. But eventually the Solvaset worked.
Time to install the landing gear assemblies and gear doors, they assembles very nicely and I no issue with alignment or fit. Next the wing flaps where glued in the down position. Now to test the nose weight with the gear in place. No problem!! I highly recommend the nose weight.
The two antenna where glued in place and the wing pitot tube was replaced with a stick pin cut to length. Next I painted the propeller assembly with Tamiya Bronze X-33 and them I hand painted the yellow prop lines. The propeller was glued in place.
Next the Shinden needed a coat of clear flat to lock in the decals. Before airbrushing flat paint make sure all clear canopies are masked to prevent hazing of the canopies. I airbrushed Xtracrylix Flat Varnish, with a 90/10 mix with water. I let this dry overnight. All the canopy pieces are glued in place with Glossy Accents.
Now comes the weathering, I did not add any washes to the panel lines. I airbrushed exhaust lines and gun ports with Tamiya Flat Black, then I highlighted these areas with my own mix of gray. This was also used to highlight various areas all over the Shinden. Next I sparingly added chipping to various panels with Humbrol silver #11. The salty residue look was accomplished with Tamiya flat white, I simply dry brushed and stippled the various panels for this. Next all the navigation lights were glued in place.
Over all I'm pretty happy with this kit, however to was very challenging and required lots of skill to complete. Definitely not a weekend build.
My sincere thanks to Zoukei-Mura Inc. and Volks USA for this review sample!


