Trumpeter 1/144 H6K5-L (Mavis) Quick Build
By Michael Benolkin
| Date of Review | October 2004 | Manufacturer | Trumpeter |
|---|---|---|---|
| Subject | H6K5-L (Mavis) | Scale | 1/144 |
| Kit Number | 1323 | Primary Media | Styrene |
| Pros | Nice fit, windows and trailing edges are thin | Cons | Tiny porthole windows best replaced with Crystal Clear or white glue |
| Skill Level | Basic | MSRP (USD) | $16.95 |
Background
For a look at the H6K5's background and at this kit straight out of the box, check out the review
published earlier on Cybermodeler.
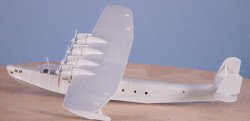
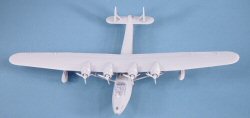
This is a quick-build review, meaning that assembly is straight out of the box with no fillers used to close any gaps, and no painting of the resulting model to show any problems that might have arisen in assembly. What you see is the result of the fit of the kit as designed, with a minimum of filing and/or sanding used to remove ejector pin marks, molding tabs, etc. All of the kit assembly was done using Testors Liquid Cement.
Assembly
In Step One, the assembly process begins by boring out some flashed-over holes in the fuselage sides for passenger windows. These port-hole window parts are so small that I'd recommend using Microscale's Crystal Clear or simple Elmer's Glue to make the windows after painting is complete.
With Step Two we build up the cockpit and wing floats. The completed cockpit is then trapped in the fuselage halves. When this is complete, the horizontal stab and vertical stabs are then installed.
Step Three, the wing halves are assembled and each of the four engines are assembled and installed.
In Step Four the wing is mounted to the fuselage on two centerline pylons. The liquid cement was handy here as had time to install the wing struts in the next step before the glue had set up. The cockpit glazing is also installed here.
With Step Five, we install the wing support struts and the wing strut braces. The only fit problem I had was with the wing struts as they weren't long enough by a fraction of an inch to get everything in alignment. I eyeballed the angles and used hobby clamps to hold the wing struts in place. On the flipside, the way that the four wing strut braces snap into place (parts A13, A21, B12 & B17) is brilliant and trouble-free.
In Step Six we would install the display stand to the underside of the kit using a hole that the instructions neglected to tell us about, so the stand was discarded.
Conclusions
This kit went together very quickly and without any real problems. As you can see with all of the photos, there weren't any glaring problems with assembly. I assembled the kit per the instructions and because no painting was done, I was able to complete this project in about three hours, which includes frequent breaks to allow the liquid cement to dry. You can see in the photos that filler isn't really required. Overall this kit is very well designed and should be an easy project for the average modeler.
My sincere thanks to Stevens International for this review sample!


