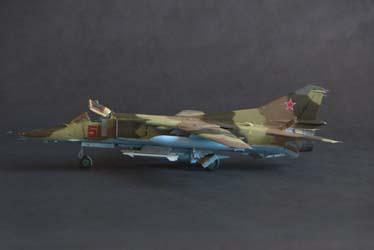
Trumpeter 1/48 MiG-23BN Flogger H Build Review
By Fotios Rouch
| Date of Review | May 2020 | Manufacturer | Trumpeter |
|---|---|---|---|
| Subject | MiG-23BN Flogger H | Scale | 1/48 |
| Kit Number | 5801 | Primary Media | Styrene |
| Pros | Builds into a nice kit using aftermarket items | Cons | See text |
| Skill Level | Experienced | MSRP (USD) | $69.95 |
Build Review
After a few days of modeler’s block, I decided to build another Flogger. This time I wanted to do a strike variant, the Mig-23BN.
I opened up my Trumpeter kit which had a bunch of upgrades I had purchased plus a bunch of other sets that I had in other boxes. The most important sets are the Cold War Studio nose fix and the exhaust set that can be purchased from different resin outfits. They make the biggest difference. The nose is a must because what Trumpeter offers is a caricature at best. Here is an image from the Cold War Studio Facebook page. Their nose profile and wind screen slope are really good. Maybe the detail is a bit heavy but that is fine. For reference, I bought the encyclopedic size Famous Russian Aircraft tome from Amazon. Thre are some good references here on Cybermodeler as well.
Construction started with cutting off the forward fuselage and testing out the resin replacement.
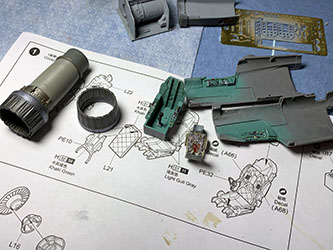
Then I moved on the cockpit. I chose to save a resin cockpit I had for another Flogger build and use as much of the kit parts as possible. It does not look awful although the cockpit tub side panel walls are horizontal and not inclined and merging with the cockpit side panels. The instrument panel is just okay. I used the instrument decals and they went down okay with lots of softener. The ejection seat received the Eduard LOOK harnesses. I did not use the amazing looking instrument panel because of its blue color which I did not have anything similar to for painting the rest of the cockpit with. This bright blue/green color did not like what I have seen in any of the photos I have seen.
The Metallic Details exhaust is a kit in itself with options for a powered exhaust or droopy unpowered exhaust nozzle.
The cockpit fits well between the resin halves. The resin halves were slightly deformed and benefited from a hot water treatment. The Cold War Studio set come with a small CD full of walkaround photos and PDF instructions. Very helpful.
The build continued with joining the resin forward fuselage and addressing a number of resin or mold imperfections. I really like the nose profile.
Then I concentrated on the intakes. The kit intakes were promptly thrown away and were replaced by the Eduard ones. The kit plates fit very well to them. The painting of the intakes, plates and backsides is complicated so I decided to do a basic paint layout so I could paint the areas that will be impossible to paint or mask properly later. I used AKAN lacquer acrylic color that I got from Linden Hill Imports. I used Hataka thinner for the airbrush with great results. I wish AKAN would put more paint in their little bottles. There is barely enough for one model. If this was a large single-color model, there would not be enough paint. Also make sure you store them in a cool dark place and tighten the cap. All my old AKAN paints stored in my Arizona garage are dry and I never got to use them...
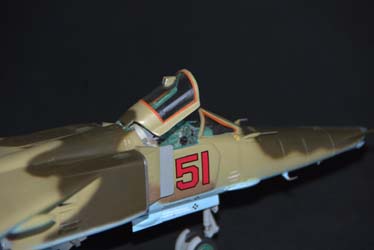
The gigantic Yefim Gordon compendium profile of Red 51 matches reasonably well with the Trumpeter painting instructions.
The tail assembly includes a small aux intake which was not designed correctly. You will need to add some styrene plastic for filler, so it sits flush to the tail. While you are at it, maybe drill out the tinny intake for effect.
Next up was polishing the clear resin canopy with Brasso and then dipping it in Future. It made a huge difference and I hope it looks great after all the details are added. I used the Cold War Studio masking cut outs that came with no instructions.
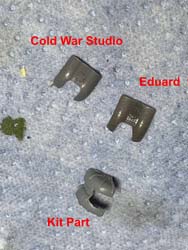
I have not decided yet on using the Eduard resin mud guard or the Cold War Studio ones. You can clearly see the difference with the plastic part which represents a different version.
I added most of the photoetch details on the forward fuselage underside but kept off the sensitive probes for later.
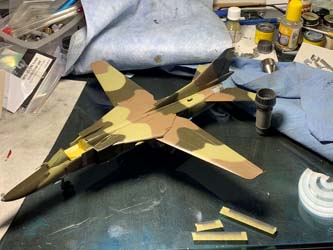
Then I used the Akan paints and sprayed the first layer of camouflage with the intent to follow up again with many small corrections.
The MiG-23 work continued with building the very complex landing gear which was made more complex by adding the beautiful Eduard resin and brass correction and detail parts. Then the landing gear was attached, and the model stance was tested on my glass surface in order to make sure that the model had the right stance and that the resin wheel depressions were flat with the glass.
The kit provides brass cooling or smoke diffuser brass intakes. They are okay looking but very difficult to make the back end close to a curvature. I used plastic rod that cut and polished to shape.
For the front sighting sensor, I used Bare Metal Foil cut in size and then I used clear orange on top of that.
The final camouflage touch-ups were performed and now the model is ready to receive its gloss clear coat before the decal application.
The Flogger was getting closer to being done and then I realized that I had forgotten to paint the bare metal intake lips. This was an ordeal that included careful masking. All the tiny photoetch bits went on afterwards, the canopy was unmasked and the final paint touch-ups were applied. A coat of gloss varnish went on prior to the decals. The decals were from the kit and they were pretty good as far as I can tell and also went down fine. A final semigloss coat sealed it all up and some dry brushing and pastel weathering was applied but not heavily.
This is my second Trumpeter Flogger. Out of the box it is not all that great but with the nose and canopy correction set and all the resin details it looks okay. I have three more variants to build when I work up the patience for tackling them.


