Trumpeter 1/32 MiG-23MF & MiG-23ML Flogger
by Michael Benolkin
| Date of Review | November 2010 | Manufacturer | Trumpeter |
|---|---|---|---|
| Subject | MiG-23MF & MiG-23ML Flogger | Scale | 1/32 |
| Kit Number | 3210 | Primary Media | Styrene, photo-etch, white metal |
| Pros | Nicely detailed kit | Cons | Kit ejection seat, ventral fin (see text) |
| Skill Level | Experienced | MSRP (USD) | $179.95 each |
The Kits
For a look at the MiG-23MF kit in the box, look here.
For a look at the MiG-23ML kit in the box, look here.
Introduction
I'd been planning to build Floggers in 1/48th scale for some time, but the only kits available were the ESCI/ERTL MiG-23MF and MiG-27 kits that have been reboxed by Hobbycraft, Italeri, and others. One aftermarket company had produced a series of vacuformed conversions to correct both kits, and perhaps I'll tackle this project one day, but then I found something on eBay that changed my priorities - a 1/32 MiG-27M Flogger J kit in resin ( look here).
With Trumpeter announcing the 1/32 scale Flogger family and a beautiful resin MiG-27M on hand, I knew that the 1/48 scale project could wait while I have some fun with the larger kits! While the MiG-23MF was essential to have for these projects, I really had my sights on the MiG-23ML kit, and now it is here.
War Story Alert
Before we launch into this project, I remember a story my mentor Bill Norris told me a number of years ago. He'd flown with Jimmy Stewart in the 735th Bomb Squadron/453rd Bomb Group (Heavy) in B-24s (Bill piloted 'Squee-Gee'). His son Bob flew the F-14 and later the F/A-18 with the Navy, and one of Bob's cruises took him off the Libyan coast. A Libyan MiG-23 pilot came up to 'escort' Bob's Tomcat from entering Libyan airspace. Bob swept the wings full aft, then full forward, then pointed at the Libyan pilot. The Libyan swept and unswept the MiG's wings as well. Bob rolled the aircraft to a knife edge and rolled level, then pointed at the Libyan who copied the maneuver. Then Bob pulled the wings full aft while gradually slowing down, then rolled to the knife edge and back. When Bob pointed at the Libyan, the MiG's wings went aft, the aircraft rolled 90 degrees to the knife edge, stalled, and dropped several thousand feet. After the MiG pilot recovered and climbed back up to the Tomcat. Bob repeated the maneuver and pointed at the MiG again. This time the pilot merely shook his head and broke off toward home...
Back in the days when the MiG-23 was still the Soviet's mainstream fighter, similar encounters were flown in the Baltic with various pilots from NATO going out to drag race the Flogger. At a nominal airspeed, one pilot would signal and both would slam their throttles full forward to see who had the hottest machine. The Bitburg F-15s thought they'd get this easily, but on cue, the MiG-23 would blast away while the F100 engines on the Eagle were still deciding on optimum thrust and ramp positions. The F-16 didn't fare any better. The Luftwaffe had some luck with the F-4F, but it still wasn't quite up to muster. It was an F-104G that finally won the day. The MiG's engine was similar to the Phantom's J79, but the larger Phantom had too much drag to effectively drag race. The answer was simple, an aircraft with the J79 and no drag - the F-104.
The Project
| Products Used | ||
|---|---|---|
| Manufacturer | Part Number | Description |
| Trumpeter | 3209 | MiG-23MF |
| Trumpeter | 3210 | MiG-23ML |
| Aires | 2133 | MiG-23 Wheel Bays |
| True Details | 32403 | KM-1 Ejection Seats |
| Zactomodels | 32031 | MiG-23 Pylons |
| Zactomodels | 32032 | MiG-23 Intake Corrections |
| Zactomodels | 32033 | APU-60-1 Aphid Launch Rails |
So here we are on my dream build and these two builds are actually Phase One: building the MiG-23MF in Soviet service and I can't resist the tiger-striped MiG-23ML in Czech service. When these are finished, Phase Two willl commence on a second MiG-23ML built as the MiG-23MLD Flogger K and a bashing of the MiG-23MF with the LEM MiG-27M to build a super-detailed Flogger J.
To get started, I spotted the Two Mikes MiG-23 cockpit set at the IPMS/USA 2010 National Convention in Phoenix and pre-ordered two. They'd indicated that the set would probably include a resin KM-1M ejection seat, but instead it shipped without the seat and a note that the kit seat is good as-is. Peachy. The resin parts were nicely cast, but the underside of the cockpit floor and the underside of the instrument panel cover/HUD both had large casting blocks that had to be removed. Much to my surprise, the cutting wheel on my Dremel tool was ineffective with their resin. I'd never seen that before from resin, but my X-Acto saw and other tools were equally ineffective. It was finally a Dremel jig saw that I'd picked up at a garage sale that saved the day, and even that took some effort.
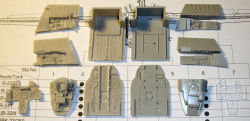
Was the Two Mikes MiG-23 cockpit set worth that effort, let's compare the resin parts (left) to the kit parts (right):
You can see more detail on the resin cockpit floor, but unfortunately that area is mostly covered up with the ejection seat installed. The resin rear bulkhead also has more details, but again, you won't see them with the seat installed. The resin instrument panel isn't bad, but I suspect that many folks will want to wait for the Eduard color photo-etched parts. If so, the resin side consoles and cast integral with the side walls so you're going to have some fun painting those details, and good luck trying to use color photoetched side consoles over that very hard resin. The resin instrument panel cover is nicely done compared to the kit part, but was this set worth the $30 USD? I'm not convinced, but it did convince me to pay closer attention to what comes out of the box before looking at aftermarket alternatives. Take a closer look at each here and you can see which works better for you:
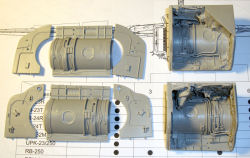
Contrast the cockpits with the wheel wells. Aires just released resin wheel wells for this kit and I nabbed a few sets, but after the above comparison experience, I decided to run the Aires set through the same scrutiny. Here are the kit main wheel well parts (left) and the Aires resin parts (right):
| Products Set Aside | ||
|---|---|---|
| Manufacturer | Part Number | Description |
| TwoMikes | 32010 | MiG-23MF Cockpit |
While the kit parts aren't bad straight out of the box, they don't capture the duct that runs through one of the wells nor all of the detailing in the top of the wells. The Aires wells not only capture those missing details, they also have more plumbing and detailing, and they are somehow cast as a single piece for each well. The casting blocks come right off these parts (molded onto the top of each well) and clean up with a sanding stick. As nice as these look out of the package, the real test is how they fit in the airframe. The instructions indicate that the small lip molded around each main well opening needs to come off which took only a few minutes with a file. With the lips removed, these Aires wheel wells literally snap into place. In fact it took some wiggling to get them back out again. The fit is spot on, but see for yourself:
The Aires wells have not been glued nor even taped into place, yet there are no gaps. These are keepers and are going into all four MiG builds! The image on the right is the nosewheel well also included in the Aries set.
Assembly
| Tools Used | ||
|---|---|---|
| Manufacturer | Part Number | Description |
| Billings Boats | PTW1131 | Pick & Place Tool |
| Dremel | 1100-01 | Stylus |
| Flex-I-File | 711 | Touch-N-Flow |
| Generic | Needle File Set | |
| Iwata | HP-AH | Airbrush |
| Iwata | HP-CS | Airbrush |
| Mission Models | MM09 | Micro-Chisel |
| Xuron | 2175ET | Professional Sprue Cutter |
Step One: The first stop is the cockpit. According to the TwoMikes instructions, the KM-1M ejection seat is not bad out of the box, so I decided to give the seat a go. You can see in this image the seat does capture the look of the KM-1M but the seat pan is empty. There is no part in the kit for the survival kit/seat block that the pilot sits on. I'd really hate to fly the MiG-23 with my butt all the way down in that seat pan! Looking at the instructions, one illustration shows a part in place over the seat pan, but no part is provided nor is there a step to put that part in place. In short, the seat is not usable without some work. The quilting on the back pad under the headrest needs to be redone as the quilting pattern of the seat is much tighter than portrayed.
When looking at a modern aircraft on the contest table, the eye is usually drawn to the cockpit and the first thing seen is that ejection seat. While the kit seat has a photo-etched harness provided, it doesn't have the lap restraints, nor does it really capture the look of the harness. Eduard hasn't released any photo-etch for the MiG-23 kits so far, but they have done set EDU32651 which is the color photo-etch set for the KM-1M ejection seat for the Trumpeter MiG-21MF kit. Same seat, older aircraft.
While TwoMikes didn't do the KM-1M for their cockpit set, there are others out there including the original TAC Scale Dynamics seat that was rebranded into the CAM Resin line (32004). True Details has also produced a nice set of KM-1 seats (two per set) in their 32403 release. Here's a look at one nice aftermarket KM-1M seat to illustrate how the seat should look:
Since I didn't want to steal the resin seat out of my MiG-21MF, I ordered the True Details KM-1 seats and you can see what it looks like out of the package below (only one set of parts shown, two sets are included). The instructions are what you see in the image and aren't the easiest to follow. I used my resin seat above as a reference and assembled both seats. The instructions say to dry fit the parts before assembly and this is definitely required as you have to remove some of that nice artistic detailing in order for the seats to go together.
Once the seats are together, they are a joy to paint. Ignoring the color call-outs in the True Details instructions, I simply went online to see what the colors are supposed to look like. The basic seat is a light gray, almost white, but most hobby paints that are labeled light gray are too dark. The best color to my eye is FS 35622. I painted the seats overall with this gray and then started working through the details to build up the color and detail, finishing up with the silver buckles and hardware, and then applying a light wash of dilluted Lamp Black to make the details 'pop.
One note about the KM-1 ejection seat. Don't get hung up between the KM-1 versus KM-1M. They're the same seat, they simply have different interfaces to the aircraft. In the MiG-21, the rear seat adapter is a central telescoping pole that extends as the seat fires to guide it up and on a trajectory above and clear of the tail. The MiG-23 replaced the telescoping pole system with simple rails similar to many US and other fighters like the F-100 Super Sabre. If you opt for the True Details or other seat for the later MiG-21 for your Flogger, simply remove the upper portion of the pole from the back of the seat and use the lower portion to align the seat between the cockpit's rear bulkhead rails.
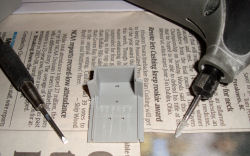
I decided to set aside the resin cockpit and use the kit cockit parts. First off, I decided to see about adding some of the floor detailing to the kit part using a combination of the Mission Models chisel to remove the kit-molded floor track, my trusty Dremel with a pointed bit to grind out the stiffening 'dents' in the flloor, and the UMM Rivet Wheel to add rivet details to the floor. When this first bit of work was completed, I dry-fit the kit's ejection seat into place and found that none of this work will be visible after assembly.
The instrument panel is the next feature that will take a little time. The kit provides decals for the instrument faces which go behind a clear-molded instrument panel. If you mask the instrument glass faces and paint the clear part, when the masks are removed, you can see instruments behind the glass.

The cockpit tubs are assembled and ready for paint.
The rest of the cockpit parts are affixed to the adhesive strip of a Post-It Note for painting.
Here are the cockpits after the first round of painting. Note how well the aftermarket KM-1M sits in the cockpit.
Now that the cockpits can be handled as an assembly, it was time to dry-fit them into the forward fuselage halves. For whatever reason, the ledges that are molded into the fuselage halves to hold up the cockpit are a little out of place. I checked this against both cockpits and forward fuselages and the solution to this was simple - I took the Micro-Chisel and removed the areas where the ledges obstructed the fit of the cockpit. Now the cockpits both fit inside the fuselage halves, but there will still be some tweaking required as the rear bulkhead doesn't quite reach the top of the fuselage. This will be rectified with some strip styrene.
Step 2: Since Aires produced a nice nosewheel well, and since we're not assembling the landing gear until much later, there isn't anything left to do here. The nosegear will be assembled with the main gear struts in steps 13-14 below.
Step 3: As I mentioned above, there is some minor gap issues between the cockpit rear bulkhead and the top of the fuselage cockpit opening. For now, I installed the cockpit into the right fuselage half along with the Aires nosewheel well. Tamiya Thin Liquid Cement was used to install the cockpit subassembly and cyano was used for the wheel well. When all is in place, one edge of the wheel well touches the rear of the cockpit and I applied a bit of cyano to give both some extra strength.
Step 4: The intakes are on hold while we await the new splitter plates from Zactomodels.
Steps 5 & 6: The wings go together very nicely. The trailing edge flaps need a bit of dry-fitting to the wing hinges to get a good fit. I did some sanding to get any mold lines and other gltches clear for a clean fit. I installed the leading and trailing edge flaps in the up position and glued them into place.
The instructions have you install the spoilers in the deployed position, but I removed the stubs that hold those spoilers up and they mount flush to the surface of the wing.
Steps 7 & 8: The wing fold mechanism is simple and straightforward. The wings and gears are held in place with a hinge plate (part C15) and then the top and bottom parts of the wing glove and fuselage center section come together to trap the wings in place. There isn't too much strength in this subassembly until it is mounted onto the lower fuselage half.
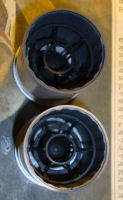
The rear intake ducts come in a real convenient shape. I assembled the two halves, painted some Mr. Surfacer 500 along the inside seams, wet-sanded the excess, then shot the insides with Tamiya Light Gray (which is not realy a light gray by the way).
The intakes are installed on the wing assembly and set aside to dry.
Note: There is a flashed over slot on the upper fuselage plate that becomes part of the wing subassembly. The instructions don't mention this, but if you're building the Flogger B, you need to open that slot! The forward portion of the vertical stabilizer needs to go into that slot and you're not going to have a good time if you need to open this up after the fuselage is assembled. This slot stays flashed over for the Flogger G.
Steps 9-11: This would have been the steps to assemble the main wheel wells and install them in the lower central fuselage half. Since Aires had done the hard work as shown before Step 1, I simply applied cyano to the wheel wells to keep them in place.
Step 12: The engine comes together in this step and it is nice to see the compressor and turbine faces finally designed properly. Trumpeter provides the various accessory drives and packs that go around the engine and this really would look nice posed on an engine stand. In this case, I am only using the engine to put a compressor face in the proper place in the mid-fuselage in the unlikely chance you can actually see it through the intake ducts, plus the afterburner section that will be visible from behind. Consequently, while I did paint the afterburner section and compressor face, I left the details and paint off the engine exterior since this won't be seen again once the fuselage goes together.
Step 13-14: I wondered how Trumpeter would address the landing gear differences between the MiG-23MF and MiG-23ML. The early Floggers sit on the gear with a distinctive nose-up stance, and in the second generation Flogger that includes the MiG-23ML, the gear was altered to give the airframe a more level stance. The two MiG-23 kits have different landing gear in styrene. The metal strut cores and trailing link arms for the main gear are common to both kits, but there are two sets of trailing link arms in both kits. If you're not careful, you could use the wrong ones. If you don't want to use the metal parts, Trumpeter does provide all of the landing gear parts in styrene as well.
Once I built up both sets of gear and starting dry-fitting the gear on the airframe, it was evident how MiG (and Trumpeter) addressed the change in airframe attitude on the ground. The nosegear struts are different in detail between the MiG-23MF and ML, but they are identical in length (height). The main gear struts are identical between the two aircraft (and kits), but the trailing link arms that extend aft of the strut and have the main wheel axles on the ends have different angles from the strut to the axle. The MF arms extend aft and almost horizontal to the ground, so this would put the airframe lower in the rear as it should be. The ML arms extend aft and downward, so they'll lift and level the airframe. Interesting and simple approach to the kit as well as to the full-scale aircraft. If you're interested in how MiG designed the landing gear to origami itself into those wheel wells, check out this YouTube video
of a gear extention test. Once the gear is down and locked, you can hear another snap as the lock disengages and the folding fin in the background folds up out of the way.
Step 15: The rear fuselage halves come together in this step and the engine has two alignment pins that go into the starboard half of the rear fuselage. As you can see above, the engine sits nicely in the rear section and the forward half of the engine goes into the mid-fuselage section up against the main wheel wells that double as part of the intake duct. The folding fin will need some corrections to get it right, this will be revisited later.
Step 16: Whoever designed the mechanical join between the forward fuselage and the center wing section is a genius. The way that the whole thing goes together is nearly fool-proof. In fact, with the slightest pressure at key points around the joint where the upper and lower halves of the fuselage/wing center section come together, there are no gaps either. The forward and center sections are gap-free. I applied liquid cement all around the joints and I don't think I'll need filler. This model is starting to look like a Flogger!
Step 17: Speaking of genius, Trumpeter also designed a pair of ribs that go on the rear of the mid-fuselage and at the front of the rear fuselage. The array of pins on one end lock into the holes on the other and allow the rear fuselage to mount to the rest of the airframe with friction so it can be removed at will. I glued these two ribs together and mounted them into the rear fuselage section. This rib holds the shape of the rear fuselage so that it aligns perfectly with the rest of the fuselage. As you can see below, the result is a nice tight seam that will require very little filler when we're finally ready for paint.
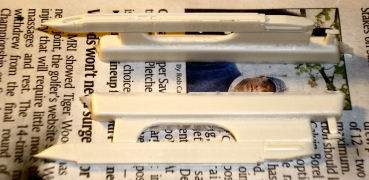
Steps 27-28: When I heard that Chris 'Zactoman' Wilson was going to tackle some of the details for the MiG-23, it was an easy decision to incorporate his beautiful castings into these MiGs. Wait until you see the new replacement intake splitter plates. Chris sent some early castings, but the new ones will be on these models shortly. Zactomodels already produces a nice set of R-60 Aphids which work with any of the modern 1/32 Soviet/Russian fighter kits, but he is also producing other enhancements targeted to these MiG-23 kits. One set replaces the APU-23 missile rails and pylons that are mounted under the wing gloves to carry the R-23R and R-23T (AA-7 Apex) missiles. If the MiG-23 is tasked as a mud-mover, the APU-23 is replaced with the BD3-60-23 pylons which can carry a range of bombs and rocket pods under the gloves. Check these out:
Steps 29-30: Zactomodels is also producing the distinctive intake trunk missile rails for the R-60 (AA-8 Aphid) missiles. The kit comes with the twin-rail launcers that came later in the MiG-23's career to give the aircraft six shots (4 x R-60 and 2 x R-23). Zactomodels is producing an updated set of these for the kit, but here are the first releases which are the single-shot rails that are still used by the MiG-23:
Stay tuned! I'll be doing frequent increments as this project moves forward.


