Trumpeter 1/48 MiG-23ML Flogger G Build Review
by Fotios Rouch
| Date of Review | April 2017 | Manufacturer | Trumpeter |
|---|---|---|---|
| Subject | MiG-23ML Flogger G | Scale | 1/48 |
| Kit Number | 2855 | Primary Media | Styrene |
| Pros | Builds into a nice kit using aftermarket items | Cons | Nothing noted |
| Skill Level | Basic | MSRP (USD) | $49.95 |
Background
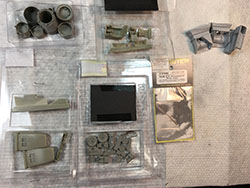
For a non-wiki history of this aircraft, refer to the introduction in the 1/32 scale MiG-23ML kit here. The 1/48th scale kit of this model seems like a scaled down of its 1/32nd scale brother with the notable and sadly missing exception of the dropped slats and flaps. I acquired most of the aftermarket stuff before starting this build, including the Linden Hill Imports decals and AKAN acrylic-enamel specific paints.
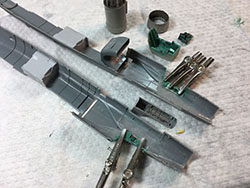
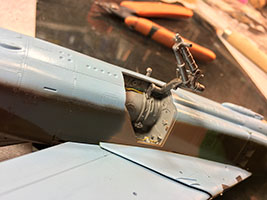
I started by toothbrush-washing all the resin and plastic parts with Formula 409. I thinned down the fuselage walls before installing the cockpit. The side walls would not fit right until I realized that the sidewall sill on the fuselage halves also have to be removed since the resin sidewalls have them incorporated.
I painted all the cockpit parts but I will install the instrument panel, ejection seat, and other small parts later in order to preserve them from damage.
The resin wheel wells fit pretty good for the most part but I used cyano glue liberally just in case.
The Eduard engine nozzle is very nice and it includes a bit of the characteristic exhaust petal droop but I wish it was a bit more pronounced.
The fuselage went together with all of the accessories better that I thought. It is now going to be left alone to set before the top fuselage panel and wings go on next.
Test fitting the top and bottom parts of the fuselage showed that I would need a spacer to push out the bottom fuselage walls so they would meet the top fuselage part with less putty.
The parts for the swing wing mechanism were tested and after some test fitting I assembled the fuselage parts and the wings and all worked well.
The resin intakes look great but they did not fit as well as the kit intakes. I went for the look and fiddled with them quite a bit to make them fit. I am not happy with how the tops of the intakes do not blend with the top of the fuselage. I also did not like how the nosecone fit on the fuselage. I would have liked the nosecone to slope downwards more for this variant of the Flogger.
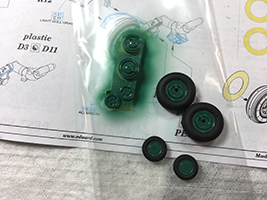
Next I worked the wheels and I discovered that the resin set was missing one of the front wheels. I decided to drill out the kit's plastic front wheels and insert the resin hubs in it. It worked well but I also had to thin out the plastic wheel halves a lot to match the smaller thickness of the resin parts and to ensure that they would fit inside the mudguard.
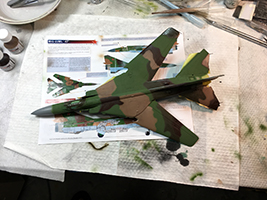
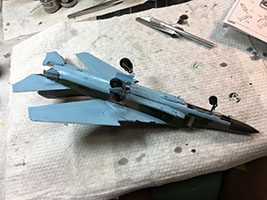
I next painted the wheel hubs in their peculiar green which I had from Xtracolor. For the camouflage I am using the enamel line from AKAN I started with the underside blue and also did two browns. Next are the two greens and the gray nosecone.
The Akan paints were applied completing the camouflage. Surfaces were masked to apply the dielectric gray on the nose and body.
I followed the decal instructions for the color selections and improvised for all the metallics using mostly Alclad II.
The last stage was to apply Future in preparation for the decals. The extreme Arizona heat helps a lot with drying the paints really fast!
The last big hurdle was the landing gear assembly. It is fairly complex as it is but even more so with the resin wheel well assembly. Locating holes were not all present or sufficient to accept the plastic parts so a little rework was necessary. I am not sure if it was me or the aftermarket parts but the model does not sit nose high enough for my taste.
One item of note is that the model is a tail sitter when the resin is added and maybe without the resin as well. I had to stuff a bunch of lead weight inside the center tank to get the nose down.
Trumpeter provides a lot of detail in photoetch format and you need a tool for bending all the tiny parts such as the tiny cooling intakes in the nose area.
So more little things were added, like antennas, and other fiddly bits and in the process, I managed to brake one of the fuel dumps. I fixed it later with styrene rod.
Next the decals went on. Very nicely done and went down great but I had to use the Trumpeter stencils since this Linden Hill set did not include any.
Weathering was done with pastels and various shades of browns and greens.
I was contemplating if I should add the pinkish/red sealant around the canopy frames. I thought it adds a lot to the look of the canopy but should I mask and spray or apply decals. In the pictures it varies a lot in looks. Jennings gave me a great idea about how it is done on the real planes. So reluctantly I took a very fine brush and applied it by hand! It definitely adds character!
Lastly, I sprayed the model with Mr Paint semi-matt clear coat. First time I used and I liked it. The model is finally done. Overall I am pleased with the model and I hope to build the rest of the Flogger family down the road.


