Tarangus 1/48 Bulldog T.1 Kit Build Review
By Fotios Rouch
| Date of Build Review | October 2021 | Manufacturer | Tarangus |
|---|---|---|---|
| Subject | Bulldog T.1 | Scale | 1/48 |
| Kit Number | 4806 | Primary Media | Styrene |
| Pros | Nice subject | Cons | See text |
| Skill Level | Basic | MSRP (USD) | OOP |
Build Review
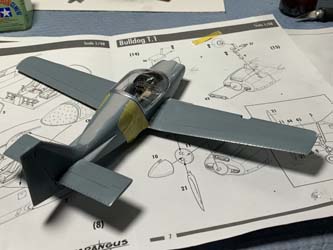
This is a limited run kit by Tarangus of the beautiful little British trainer. I remember building the old Airfix kit back in the late seventies as a teenager and I loved the look of that plane. It took decades before it appeared in 48th scale. I bought this kit from the Tarangus representative when it first came out at an IPMS Nationals show. The kit is limited run lower pressure injection so expect some cleanup and careful sprue cutting. There are also no locator pins and little help for positioning main landing gear struts and wings. The clear parts look okay, and they look just fine after dipping them in Future. As always, the plastic was carefully washed in detergent to get the mold release oils off. Sprue cutting for the main parts was a bit challenging and some minor marring did occur. Easily fixable with a dab of putty. I used the Tarangus accessories made for this kit. One set of photoetch and a set of custom canopy masks.
The first mistake I made was to expect the cockpit parts to fit inside the fuselage. If you assemble the kit with the sidewalls in place as they are then the cockpit floor and seats will not fit. Best thing to do is to thin down the side walls. I did not do that and it looked like I was going to destroy them if I were to pry them off. Instead, I sanded the floor and thinned the seat sides. It is a good idea to thin the seat sides anyway to bring them closer to scale thickness. Thinning the seats also provided room for the photoetch lap belts to fit.
This model is definitely a tail sitter, so I added led weight from cut up wheel balancing weights.
The fuselage was glued together after all the fit checking was completed and was left to dry together with the wings. The instrument panel came out pretty good with the sandwiched photoetch and it look like the coaming will fit fine too. There is also photoetch provided for the center console and I think all that will show well under the glass bubble canopy.
The build continued with the Bulldog by adding on the wings and using plenty of filler for the wing roots. As much as I tried, I could not get a perfect fit.
The UHF antenna had a horrendous ejection tab which had to be carefully removed and sanded down.
The canopy fit was very good and caused no problems at all. After a dip in Future it was very transparent but with some expected distortions from the thick clear plastic. I also added scratch built detail inside the canopy to represent the canopy opening mechanism.
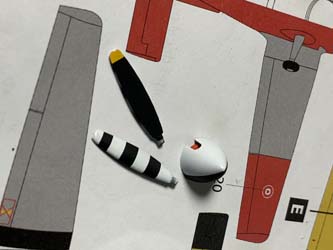
Painting came next. I had very bad luck with the True North white paint I used as it would peel very badly after Tamiya masking tape removal. The Xtracolor Signal Red was very dark and brown and I decided to stick with Humbrol's Signal Red. The whole model was given a coat of Future prior to adding the decals. Once the decals were dry, I used a coat of Testors semi-gloss. The tail aerials were added last as they are long and very easy to damage.
This is really a limited run kit and attention is needed. The end result is pleasing to the eye.


