Tamiya 1/48 P-38F Lightning Build Review
By Fotios Rouch
| Date of Review | August 2020 | Manufacturer | Tamiya |
|---|---|---|---|
| Subject | P-38F Lightning | Scale | 1/48 |
| Kit Number | 61120 | Primary Media | Styrene |
| Pros | One of the best-fitting kits on the market | Cons | Nothing noted |
| Skill Level | Experienced | MSRP (USD) | $79.95 |
Build Review
We sometimes get into a mode, a rut, or we carve out a niche, or whatever and we build certain models and maybe we get good at it and start a specific collection but maybe sometimes by doing that we ignore or we miss out on other subjects and different experiences. So, I have not built a 48th scale WWII subject since I graduated high school. Plenty of subjects out there to keep a modeler busy, right? I have been buying WWII subjects, but I have been stashing them away and have been just collecting for a later time.
Then the Tamiya P-38 came out and it caught my eye and I said, why not? The real reason actually is that fündekals was working on a set for a long time, researching and collecting info and I was seeing how many amazing subjects they were putting together and how mistaken the research has been so far by other decal companies and publications and somehow it got my WWII mojo on.
So, I got one and many accessories and started studying the subject and the photos and came up with what I wanted to build. Looking at the fündekals pdf file is like going through a history book. I spent some good hours reading about the subjects, the histories and the peculiarities of each aircraft subject. Even if you do not buy a set (and you should if you want a well-researched set) you should read the pdf file here. I chose to do the Japanese Sandman. Great story with a follow on subject and great research.
Before starting the project I also looked at what paints I had. Boy did I ever. I had all the Olive Drabs collected through the ages from companies that do not even exist anymore. I had never opened them because I never built WWII subjects. Dark, light, faded, Aeromaster, Floquil, Modelmaster and what not. As I was advised by fündekals, the important part was to get the Neutral Gray right and that most modelers choose a too light shade. I chose ANA 603 by Floquil for the job.
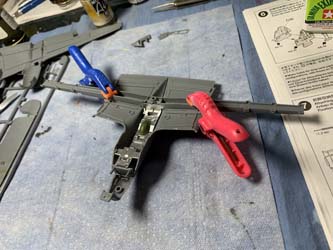
Assembly followed the instructions closely. What a treat! What a superbly researched model. What amazing tolerances. After trying to put together blobs of plastic and resin for so long this feels like sipping on the finest wine!
I did not have to improve on this model really. I chose to use the Eduard LOOK instrument panel. The rest is stock with the addition of fine lead wire for the SCR-247 equipment electrical connections.
I will use the rest of the accessories on another build, but I know fully well that this kit is so finely toleranced that any variations or mismatches will cause issues. Even the addition of the LOOK instrument panel required lots of fiddling with the instrument panel coaming and the targeting sight for everything to fit just right and not interfere with the clear windshield part.
So far, the assembly has gone great. The only sensitive part I found is the top to bottom assembly of the forward fuselage that needs to be absolutely perfect so you do not lose any of the riveting detail ahead of the wing roots and behind the machine gun access panels.
Work continued on the P-38 with the landing gear. I like the idea from Tamiya for including chrome decals for the oleo struts and the mirrors, but these decals are tough to use and very delicate due to the chrome plate. If you get them to set correctly, the results are good.
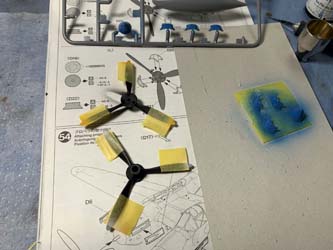
It is nice that Tamiya provided masking material for the clear parts but in today's world of precision designed custom masks it makes no sense to try to trim each one of the masks individually. I also used the Eduard resin wheels that offer amazing detail and are easy to paint and detail.
Next, I pre-shaded the panel lines and applied the camouflage. Extra time was spent to contemplate how to recreate the residue left from the sealant tape that was applied over some panel lines during transit to the war theater. This specific aircraft had very visible sealant markings when it was fresh in action, but they had faded away by the time the nose art was applied. So, I went light on the effect.
The decals went down magnificently as one would expect from Cartograph. Fundekals has included better stencils as well that have the correct hue for red. After the decals were dry, I removed the nose and installed the resin machine guns. The kit guns are not to level I expected from Tamiya.
The P-38F was a very nice and easy build. It is so refreshing to see so much planning and thought going into designing this kit. It is close to perfect. One thing that I found a bit challenging was the top/bottom forward fuselage joint. It leaves a bit of a seam line and as you work to smooth it out you could potentially obliterate the vertical rivet lines along the way. The kit is very much recommended and I am sure it will be all over the competition display tables once there are competitions again.
I would be remiss if I would not put out a very hearty recommendation for the amazingly researched and executed fündekals . I had great fun using them but also going through the small PDF instruction encyclopedia that covered all the subjects in detail but also the plentiful pointers and corrections to the generally accepted knowledge on this subject. You might be surprised when you see the artwork and documentation provided in this set and you bounce it off the other already published color profiles and decal artwork by other outfits.


