Tamiya 1/48 F4D-1 Skyray Build Review
By Fotios Rouch
| Date of Review | November 2018 | Manufacturer | Tamiya |
|---|---|---|---|
| Subject | F4D Skyray | Scale | 1/48 |
| Kit Number | 61055 | Primary Media | Styrene |
| Pros | Easy build | Cons | See text |
| Skill Level | Basic | MSRP (USD) | $36.00 |
Build Review
So here we go again with another Navy early jet. The Skyray is one of my favorites to be surpassed only by the Skylancer, which I will build soon as well.
One thing that benefited me a lot with Dimitri of DMold living in Tucson was teaching me how to get a better "eye" and look at shapes of models and compare them to the real thing at the Pima Air and Space museum. Sometimes I get complacent and I make myself think that a model looks pretty good. Point in case, the Tamiya Skyray - I always thought it was fine. It is not. I mean it is acceptable, but once you see something you cannot un-see it! The front fuselage in the kit is a bit long and wide, the nose is a bit fat, and the canopy is not so great.
DMold made the fix and I got one of his sets. It was not a full production set back then so some small issues with the clear resin were present, but I thought it was great and I hated for him to toss it as a pre-production test run. So here we are many years later after I got the set and a four-day weekend, so let's see what we can get done.
I started with the DMold forward fuselage correction set, the DMold intake set, the Cutting Edge cockpit, the Eduard photoetch, and the Furball decals. I decided to save the intakes and resin cockpit for an unmodified Skyray build so the parts can fit properly.
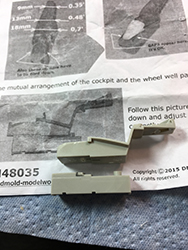
The DMold resin set washed and then tested with the plastic parts. The fit was not bad, but it needed a little help. The plastic cockpit was trimmed per the instructions and fit pretty good. Painting was done and the assembly was attached to the fuselage. Strangely, the Tamiya kit offers only the early Douglas ejection seat. Your decal choices must account for an early Skyray. Also strange for Tamyia's research standards, the model's rear fuselage is of the late configuration that had the Martin Baker ejection seat. Make sure you buy the Ginter book on the Skyray for all that and view the indispensable Tommy Thomason references here.
I decided to ignore the rear fuselage minor differences and build an early Skyray with the colorful NATS gray/yellow/dayglo scheme. The Furball decals are nice for the most part (if it was not for eagle-eyed Jennings pointing at all the small details!) and I will leave them alone.
I used Xtracolor gray and Testors yellow and dayglo red.
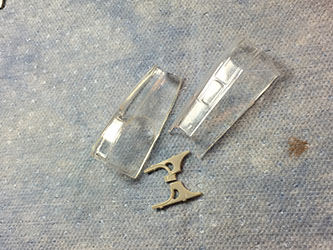
The resin canopy was worked next and it is totally different from what Tamiya supplies. It has different framing just like in the photos and it is narrower just like the real thing. The inside brace was modified to fit the new canopy.
The Furball decals look very nice and went down very well. The intake red lips were provided in decal form, but I could not get them to work even with decal softener. I masked the area and painted it instead. It took forever to mask the inside of the intakes, but the end result looks OK.
I also had to scratchbuild the fuel dump or smoke generator, not sure what it is but is evident in the photos of the drone aircraft and it is located between the right fuel tank and its pylon.
All in all I am happy with the DMold correction set and how it changed the look of the Skyray to what I am accustomed to seeing at the museum.


