Special Hobby 1/48 Blackburn Skua Mk.II Build Review
By Larry Horyna
| Date of Review | December 2014 | Manufacturer | Special Hobby |
|---|---|---|---|
| Subject | Blackburn Skua Mk.II | Scale | 1/48 |
| Kit Number | 48046 | Primary Media | Styrene, Resin, Photo-Etch |
| Pros | Nice detailing, unique subject matter | Cons | Needs lots of work at the wing roots |
| Skill Level | Intermediate | MSRP (USD) | Out of Production |
Build Review
Although the Blackburn Skua had a relatively short service career in World War Two, the airplane holds a few distinct "firsts". First flown in 1937, the Skua was the first all metal low wing monoplane employed by the British Fleet Air Arm. More interesting, in April of 1940 Skuas of 803 NAS attacked and sank the German cruiser Koningsberg in Bergen Harbor during the German invasion of Norway. This was not only the first major warship sunk by dive bombing in WWII, it was indeed the first time a major warship was sunk by air attack. However, the Skua soon fell victim to far superior enemy aircraft like the Bf 109 and was withdrawn from frontline service in 1941.
Special Hobby's 1/48 kit of this historically important aircraft is a welcome addition for fans of unique FAA aircraft. I would define this model as a typical short run injection molded kit. It has its problems but none of them cannot be overcome with a little extra patience and effort. The kit comes with resin and photo-etch detail parts and markings for three aircraft from the Norwegian campaign.
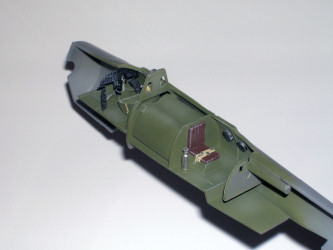
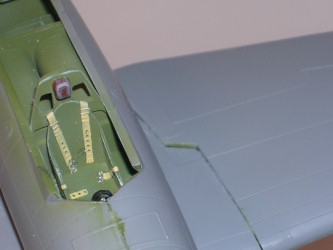
Assembly is straight forward with no problems until you hit the wings. The wing assembly is a bit complicated, most likely in order to produce the unique slight gull effect. Unfortunately fit was pretty well compromised to do it! The resin wheel well inserts were a bit too thick and required a little grinding down with a motor tool to fit. Then there were the gaps. At the wing root as well as the gulled section there were problems with both space and thickness. Lots of sanding and fidgeting were required to get these looking halfway decent.
Once the wings were fought into place, the engine was the next challenge. The kit provides a very nice resin Bristol Perseus XII, but the attachment system, which requires attaching the engine to the exhaust collector ring via 18 resin exhaust pipes was a challenge. This was a bit tricky to say the least! Once that hurtle was overcome, the rest was fairly simple. The landing gear doors were a hair too long for the gear but that was a pretty simple fix.
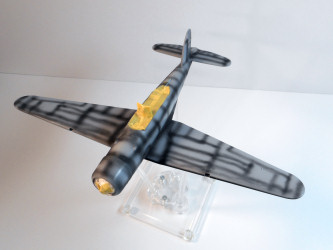
On a really good note for fit, the clear parts were excellent, at least as far as the canopy is concerned. I actually painted and attached the canopy separately. I don't recall ever doing that on an aircraft kit. The clear parts were attached with Testors clear parts cement and there were virtually no gaps. One last little headache, the wing leading edge lights. The lenses on my kit looked like they were for another kit, they were so far off in size and shape. I chose the path of least resistance and just filled in the lenses with several treatments of Micro Kristal Kleer. If you build up thin layers and let each one dry thoroughly, the effect is very nice.
The model was pre-shaded with flat black and painted with Tamiya acrylics. The colors were mixed using FS equivalents. The kit decals worked very well and reacted fine with Micro Sol. Following an oil wash using MIG pigments, I post shaded the model with a thinned mix of Tamiya flat brown and flat black. This was followed by a coat of Testors acrylic flat. I then added the little detail bits, canopy and antenna wire.
While this was a bit of a fight it was probably not much more than one might expect with a short run kit. The wings definitely could have been better but otherwise, this was not too difficult a build for such a unique subject. If you're a big fan of FAA aircraft, this is one you should probably have in your collection. Just be prepared to do a bit of extra work!


