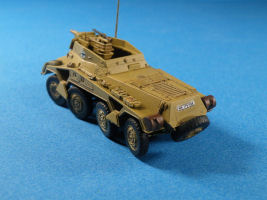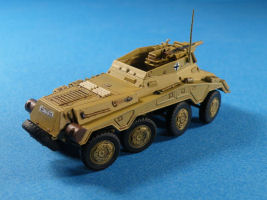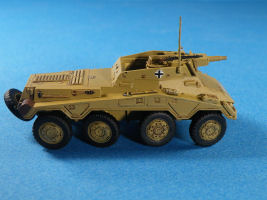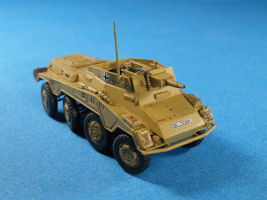
Roden 1/72 Sd.Kfz.234/3 Schwere Panzerspähwagen Build Review
By John Kelley
| Date of Review | March 2011 | Manufacturer | Roden |
|---|---|---|---|
| Subject | Sd.Kfz.234/3 Schwere Panzerspähwagen | Scale | 1/72 |
| Kit Number | 0707 | Primary Media | Styrene |
| Pros | Excellent wheel detail; open stowage bins; positional wheels; good details and ease of assembly | Cons | Shallow tire tread |
| Skill Level | Basic | MSRP (USD) | $6.98 |
Background
The Sd.Kfz.234 series of armored cars first entered use in 1943. The subject of this review is the 234/3 Stummel, which was used for infantry support as well as reconnaissance. It was a replacement for the Sd.Kfz 223 and 88 examples were produced between 1943 and 1945. Most served with the 116th Panzer division at Normandy.
The Kit
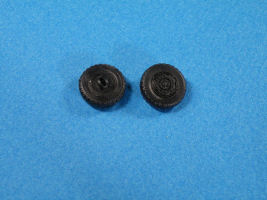
The Roden release in 1/72nd scale of the Stummel is a welcome addition. Molded in light gray and black plastic, it contains options for open stowage bins and wheels that can be turned. It also has one of the most accurate wheel hubs of any of the current 234 series of armored cars in 1/72nd scale.
Construction
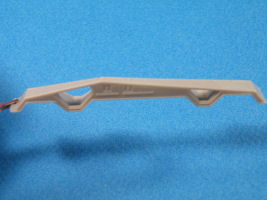
Construction begins with the mud guards/stowage bins. The instructions have you add all of the tools and fuel cans to the mud guards before you attach them to the hull. I find it is best to leave them off for a better fit. If the accessories are glued too close to the edge, it could affect the fit of the mud guards to the hull.
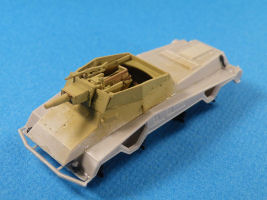
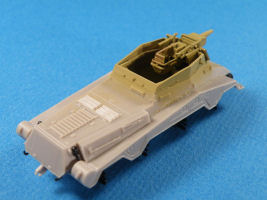
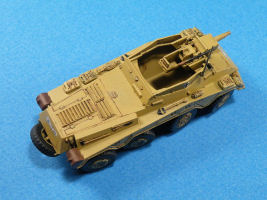
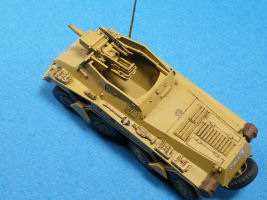
The interior of the stowage bins stuck a little bit out from the mud guards, so I used a sanding stick to file these down even with the guards. All four stowage bins have separate doors and I choose to leave the left side bins open.
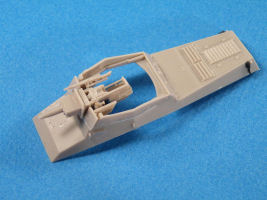
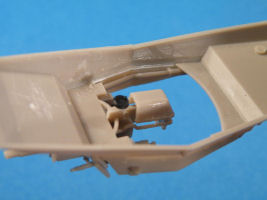
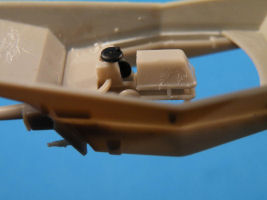
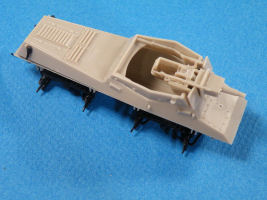
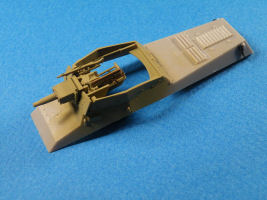
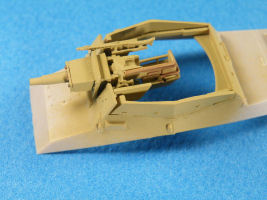
Next came the assembly of the main gun. After building this kit, I would recommend leaving Part 5d, the gun shield, loose on the gun until after it is installed on the model. I glued the shield up against the raised lines on the box of the main gun and when I attached the assembled gun to the hull, I found that the gun shield interfered with the front armor plates Part 3d and 4d. To correct it, I had to cut down the front of Part 17d. This could have been avoided simply by leaving the shield loose and gluing it at the last, making sure it did not interfere with Parts 3d and 4d.
When I assembled the shell casing basket on the main gun Part 10d, I found that Part 13d had two missing locator pins. I added these with .020 rod, trimmed them to the same height as the remaining one, and then glued Part 10d onto Part 13d.
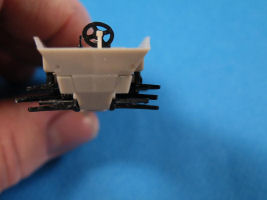
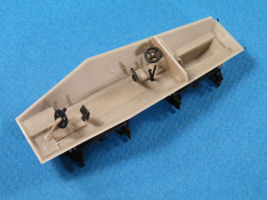
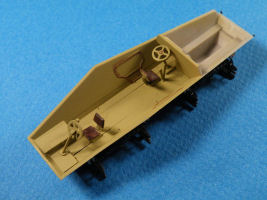
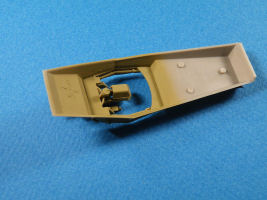
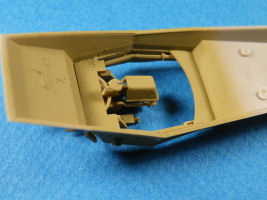
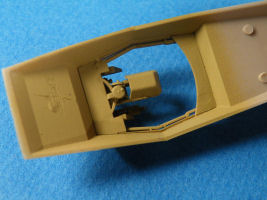
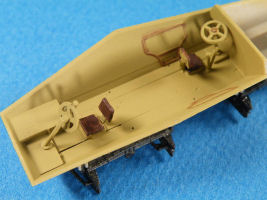
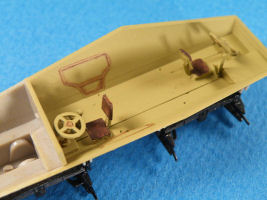
The interior went together with no problems and while a main gun ammo box would have been nice to have, much of the interior cannot be seen once the upper and local hull are put together. Part 6 involves the suspension and wheel assemblies.
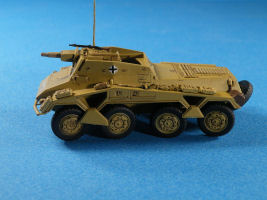
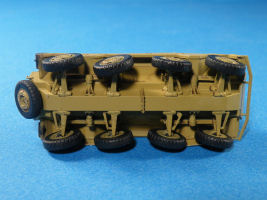
When you assemble the wheels, each one has a movable center, Part 18a, that should be left loose and not be glued in. If it is left loose, the wheels can be positioned at an angle to show a vehicle that is being steered. To accomplish this place the wheel on the completed axle assemble and simply turn it - if the center part is not glued in it can be turned on the axle and set in place with cement. The front four sets of wheels were turned to the left slightly and the back four were turned to the right to show the unique way the 234 series were steered.
After carefully assembling these wheels, I began building the suspension units. Make sure that the main spring Part 17a does not overlap the axle Parts 26a. If it does, this could cause interference with Part 10a which is mounted on the lower hull and attaches to Part 26a. While this part of the kit is a little tedious, if care is taken, the wheels and axles will line-up perfectly.
The only real issue I found on the lower hull was with the guards that attach to the bottom of the hull Parts 5b and 8b. Care should be taken to make sure that the beveled edge is set flat on the bottom hull. These pieces fit at an angle and on the front are even with the bow plate but on the back, they should be moved in half way between the axles and the rear bow plate. If glued in according to the instructions, they will be even with the front of the rear plate and they should moved back this much.
After assembling the lower hull, I then began work on the upper hull and there was a bit of a fit problem with side armor. The armor plating Part 21d fit just fine, but the left side Part 20d had a gap between it and the hull. I filled this with .010 plastic and putty but in the process, sanded off the tie downs. I remade these with .015 plastic rod.
There also were some slight gaps between the mud guards and the hull as well as a pin hole on the glacis plate next to the access hatch and I filled these with putty as well.
Before closing up the hull, I painted the interior the same color as the outside and gave it a wash of Van Dyke Brown. I then added the assembled the gun to the upper hull. After this had dried I glued the two hull halves together and attached the fenders and tools. This completed the assembly except for the wheels and antenna which I attached after the base coat was applied.
Painting and Finishing
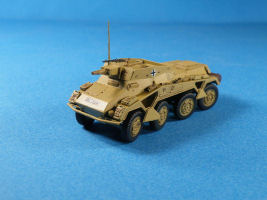
The model was given an overall Dark Yellow paint scheme. For this I used a 50/50 mix of Tamiya Desert Yellow XF-59 and XF-60. I added 30% XF-2 Flat White to this mixture to lighten the color.
For the tires I used XF-69 NATO Black and for the wooden handles of the tools I painted them Model Master 4673 Wood. The metal portions of the tools was painted Gun Metal. I chose to leave the jack in the body color.
I then gave the model a coat of Pledge Floor Wax with Future and applied the decals. Here is where I encountered a problem. To keep the crosses in register, Roden gives you the white background and black cross separate to be added together, however, I'm not certain if it was this particular sheet or the series, but the decals did not come off the sheet easily. In fact, the crosses broke up and I could not use them. The license plate broke in two as well, but I was able to put that together, but not without getting the one for the back plate crooked! Fortunately, I had a Roden 231 kit for the crosses and I had no problem applying these.
After the decals dried, I gave them a final coat with the Future. I then made a wash of Van Dyke Brown and Turpinoid which was applied to bring out the details of the kit. I dry brushed the model with the base coat mixture and after this, I used Tamiya Flat Coat in the rattle can to finish off the kit.
Conclusions
Except for the issues mentioned, this was a good and relaxing build. I used very little filler on the model at all and the wash brought out the excellent detail on the wheels that Roden has put on them. I really liked the fact that you can turn the wheels without doing any major cutting. The open stowage bins are really nice, however, I do recommend replacing the antennae as it is very thick.
The tire tread pattern is pretty thin and easily sanded off. It would have been nice to see a little bit deeper pattern on the treads, especially since the wheels are in two halves and the seam needs to be sanded down. I highly recommend this kit to any modeler interested in German armored cars of WWII.
I want to thank Squadron/MMD for this review sample to build.


