Roden 1/144 Fairchild C-119C Boxcar Build Review
By Fotios Rouch
| Date of Review | December 2014 | Manufacturer | Roden |
|---|---|---|---|
| Subject | Fairchild C-119C Boxcar | Scale | 1/144 |
| Kit Number | 0321 | Primary Media | Styrene |
| Pros | Nice kit, more variants coming | Cons | Not for the novice |
| Skill Level | Experienced | MSRP (USD) | $33.99 |
Background
For an inbox first-look and history please visit here.
Build
This is another build I am doing to augment a good friend's collection for his office. Being the Chief Engineer on his line of programs he can get away with some things that other engineers cannot!
The kit looks pretty good in the box and we shall see how it all goes together.
My first thing of concern is the total absence of an interior. You do not need much for a 144th scale kit. Just a floor, a bulkhead, a couple of seats and an instrument cover. There is none of that and there is just a hole behind the clear plastic that might make the modeler to paint the clear plastic black. I decided to build a basic cockpit from plastic stock. Just very basic stuff so the eye gets fooled when looking through the clear windshield.
I added lots of lead weight before closing the fuselage halves. I also chose to join the clam-shells with their respective fuselage parts prior to fuselage assembly. I felt that they would line up better. Also the little rear side doors do not fit well and they have sink marks on them as well. Some adjustments and putty is required.
I then moved to the wing assembly which was OK but required clamps to set together properly.
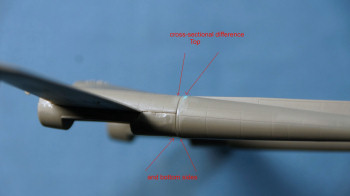
The booms went together fine with small gaps here and there. The problem and largest challenge with this model was the boom to wing joints. As you can see from my images the mating diameters do not agree leaving large steps on the top and bottom of the assembly. Lots of sanding and puttying was required. Then after that lots of rescribing was necessary to restore the lost panel lines. The joint of the wing assembly to the fuselage was a bit problematic as well.
A few primer coats were applied to the problem areas to check my work and add further corrections.
The booms went together fine with small gaps here and there. The problem and largest challenge with this model was the boom to wing joints. As you can see from my images the mating diameters do not agree leaving large steps on the top and bottom of the assembly. Lots of sanding and puttying was required. Then after that lots of rescribing was necessary to restore the lost panel lines. The joint of the wing assembly to the fuselage was a bit problematic as well.
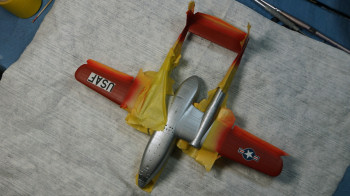
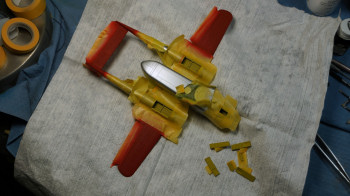
Then Old Silver was sprayed, was let alone to dry for a couple of days and then masked to spray red for the wings and booms.
The props are tiny but nice and required careful masking for painting. I chose not to paint them all black as the instructions indicate but to follow images showing them silver, black and yellow. I do like how Roden designed the engine cowlings to fit in such a way that they leave a little gap behind the cowling cooling fins and the firewall.
The decals went down OK for the most part. They are wing walk stripes are fragile. The larger pieces are very hard and it took a lot of decal softener to get them to conform and comply. Especially the nose red/white decal was a total pain to get to conform.
I used CrystalCleer for all the windows. The result is good for this scale and easier than getting the plastic to fit and mask.
Overall, this is nice representation of this classic transport but it will take some work. Not for the novice.


