Revell/Renwall 1/32 Atomic Cannon
By Fred Lue
| Date of Review | October 2011 | Manufacturer | Revell/Renwall |
|---|---|---|---|
| Subject | Atomic Cannon | Scale | 1/32 |
| Kit Number | 7811 | Primary Media | Styrene |
| Pros | Unique and classic kit back for a limited release | Cons | Decals: vehicle serial numbers are the original Renwall kit number, not one of the actual atomic cannons |
| Skill Level | Basic | MSRP (USD) | $53.95 |
Background
For a look at the kit out of the box, click here.
The Project
As I held the box a flood of memoires came back to me. I save my allowance to get my model. Be it first time modeler or advanced modeler, there are things you can do to improve the model. 300 parts were staring me in the face and all I could do is sigh. Okay Grandpa Lue, let’s get started.
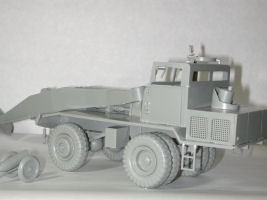
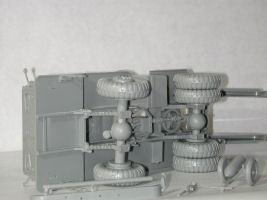
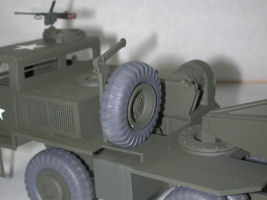
I decided to do the tractors first. I assemble the long bottom housing. Attached it to the front springs. Attach the complete assemble to the chassis support. Springs support were next. Short drive shaft and torque converter are next. Rear springs were built and connected to the chassis. Fuel tank and storage box were connected. Flip the chassis over and we are almost finished. Front cab, engine compartment, winch assembly, spare tire winch and swivel seat added.
Bumper, ladders rear bumper were added. There is a decal for the front bumper. The clevis and cable guides should be added after the decal is in place.
I left off the cab roof because this Grandpa is going to do some detailing.
Rear Tractor is much the same as the instructions show. What I thought was interesting was Revell left the little circles with the part number on them.
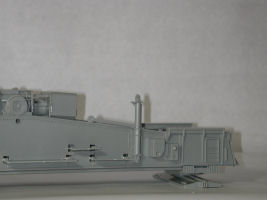
Now to the cannon. Assemble the forward deck as instruction. Glue it into position on the right carriage frame. In the middle of the carriage frame is where to place the gears that elevate the cannon. Not difficult but take your time. Rear floor is assembled and glued to the right carriage frame. Glue the left frame together to the right frame making sure everything lines up. to complete the chassis add the
turntable and carriage float.
Cannon assembly is pretty straightforward. No Problems. Attach the cannon to the frame, add various details, add the platforms, and you are done with the cannon.
Paint is next. Olive Drab, Olive Drab and Olive Drab. I found a large can of Olive Drab that will do.
After I complete this build, it will be going to the 123 FA BN in Milan, Illinois to be placed in their display case.
Conclusion
You need a lot of shelve space. Being a Grandpa who likes military models its size and fit for kit at the time was amazing. Revell has done a good job on the plastic. However, there is some trimming to be done. I am sure the 12 year old will enjoy putting this one together. The AMS modeler will start thinking as he opens the box, what improvements can I do. Even though it is 1/32 scale, I am sure there are some 1/35 scale figures that can be modified.
This is a model that is fun to build. The advanced modeler will find it a challenge to improve the model. The idea is to have fun building models. Back when it first came out, we didn’t have video games, computers, etc. I am going to buy a few to keep in my stash. I still remember that snowy night, glue in hand, and ready to build my Atomic Cannon. Overall it is still a good kit.
On Nov 4th, 2011, this model was presented to the new commander of the 123rd Field Artillery Battalion in Milan, Illinois. This unit was deployed over in Egypt during the turmoil there. They were on the border as security. I am doing this because the National Guard has conducted many deployments. When this grandpa modeler was 8 years old, my parents would let me stay up past midnight as this unit left for training to Camp McCoy, Wisconsin.
My sincere thanks to Revell for this review sample!


