Monogram 1/48 B-17G Flying Fortress Kit Build Review
By Joe McCaslin
| Date of Review | September 2017 | Manufacturer | Monogram |
|---|---|---|---|
| Subject | B-17G Flying Fortress | Scale | 1/48 |
| Kit Number | 5600 | Primary Media | Styrene |
| Skill Level | Intermediate | MSRP (USD) | $34.95 |
Build Review
My love for history began when I was a boy. Growing up there were not as many options for television programming as there are now. I have fond memories of sitting and watching the many documentaries on World War 1 and 2. After a while I began to draw the vehicles I had seen. The bug had bitten. Over the course of time I discovered I had an affection for several vehicles and aircraft. The B-17 is one of my favourite aircraft. One of my first builds was of a 1/48 B-17F. They occupy my bench whenever I can fit them in.
Over time one kit has been a very pleasant subject many times. The Revell 1/48 B-17G. Every time it is built my skills are tested just a little more. This time is no different. The challenge for this build is to add as much of the detail as I can. My plan is to do this as a cut away. There is so much that can be added to a build like this. Where do you stop? At what point do you say enough is enough? This build will push those limits for me.
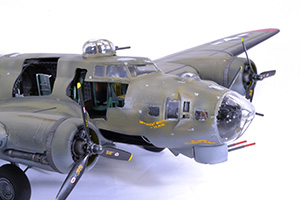
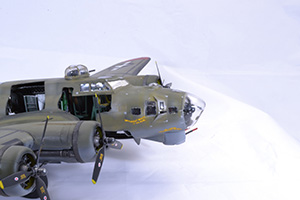
At times, an opportunity arises that gives you a chance to do something you enjoy for what you consider a very good reason. Such an opportunity came my way recently. A group of model builders proposed a tribute build for a long-time member of YouTube. The subject of the build was up to the builder provided it had something to do with a dog. My first thought was the Revell (Monogram) B-17G in 1/48. I love older Revell aircraft kits. They allow so much opportunity for added detail. The 1/48 B-17G has the option of markings for the aircraft "Chowhound", perfect. My decision is made. Now how to put my personality stamp on it? Got it, another cut away.
To prep for the interior work, some items are required to be removed. All the entry doors are removed. They are all cleaned up and thinned down. Using a Dremel, large sections of the fuselage are removed. This is planned to be able to show some of the interior areas that extensive detailing is planned. The next step is to remove all the moulded in detail. After removing the interior detail and sanding the interior of the fuselage smooth the fun begins. Some prep work is needed to make sure all will have the chance to go to plan. The entries to the crew access area are cut out and cleaned up. Final prep is the removal of the interior doors and the clean-up of the interior of the fuselage. Construction can begin following this.
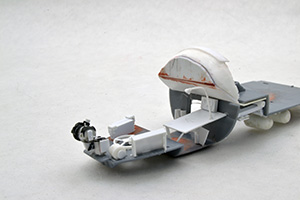
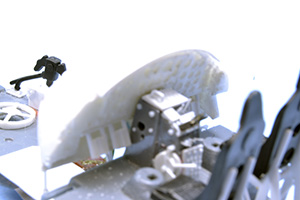
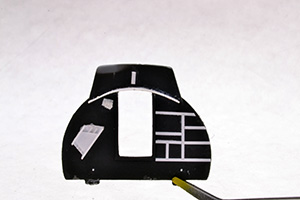
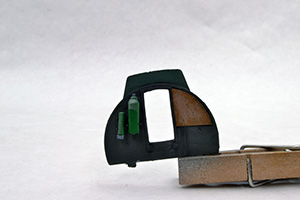
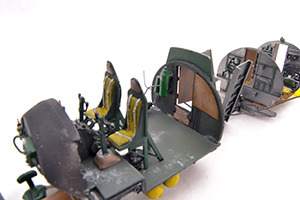
With all aircraft it seems that the build begins with working on the interior, most likely the cockpit. In a bomber, it is generally the navigator/bombardier station. This build is no different. Beginning on the fuselage walls all electrical boxes, radios, and other bits and bobs are fabricated. Very little of the wiring is constructed at this point. The major fabrication is needed to make sure all fits within the fuselage. The wiring and conduits will be one of the last steps as they will be easily knocked off during the construction. The only items that are kit in nature are the floor and the seats for the bombardier and the navigator. Moving into the cockpit the instrument panel (resin), the pilot and co-pilot seats (kit), bulkhead 4 (kit), and the oxygen bottles (resin) are the only items that are not scratch-built. As the parts are fabricated they are white glued into place and a great deal of dry fitting is required. Fabrication is finished with the construction of the items on bulkhead number four. Two tanks, a fire extinguisher, and little odds and ends are fabricated. Once it is confirmed that they all will fit inside the fuselage all the parts are removed and set aside.
Painting begins with working on the distinctive wood details. Beginning with Testors Light Brown, layers are added to the floor. Testors Light Tan is dry-brushed onto the floor, care is not needed. Paint was added until it "looked right". By using a bristle brush the paint is applied in a way that allows for a wood grain texture. Before the paint has a chance to fully dry Oil Paints (Raw Umber and Burnt Umber) are added by dipping a pointed brush into the paint and then dotting the floor section. Using a fan brush the Oils are pulled along the floor which allows them to highlight the wood grain texture.
The smaller details for the Bombardier/Navigator Station are painted at this point. Using Model Master Paints as well as Testor Paints the detail parts are base coated and then highlighted. Once dry these parts are put to the side to avoid breaking them off and losing them.
At this point the direction of the build changed. Instead of taking each section, constructing the parts, painting, and then moving to the next I decided to work on the major construction of parts and pieces and then move into the painting. This would allow the dry fitting that would be needed as well as protecting the construction from accidental destruction during the process.
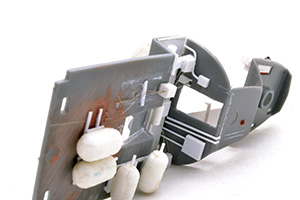
The next section for construction is the bomb bay. This was going to be a major challenge as part of the premise of this build is that I would be showing the interior of the bomb bay. This means fabrication of the components. Major stumbling block of the day, how to construct the walls of the bomb bay as the kit has little and it is wrong. Back to research, it is very important in a build like this to check, recheck, and then check again your references. It is not easy to build something up, paint, and then have to redo it because of a missed item or an error in construction. A lot of time is spent pouring over the pictures I could find online and in the books I have. After determining that the only way to tackle this issue is to start with the basics, construction starts with measuring out the dimensions of the interior of the bomb bay. Once a sheet of styrene is shaped to the proper dimensions strip styrene is glued in a pattern that looks similar to the pictures. A section is cut out to match the section cut out of the fuselage. Once satisfied the cuts match the little detail work begins. Assorted boxes and tubes are fashioned to the bay walls. At this point I can only stress dry fit, dry fit, dry fit. This is the most important technique. It saves so many headaches. Once the construction is completed attention turns to the bulkheads and the bomb racks. As mentioned earlier, the kit parts of the bomb bay appear to be wrong. A new catwalk and the bomb racks are fabricated. While at it, new release mechanisms are added to give just a touch more realism. Two long and two short racks are constructed. Attention returns to the bulkheads at this point. The only real issue is on the front side of bulkhead five, there is a structure that is odd in shape and very prominent. After a bit of trial and error the part is shaped. Again, all parts are white glued and dry fit to make sure all will work. Success, my attention can move on to the Radio Station.
This is one of my favourite sections to work on. There are so many structures and they all are very visible. Radio equipment, electrical, table, and the dynamotors, there are so many things that are fun to play with. Different sizes of rod, tube, and strip styrene are cut and shaped to resemble the many boxes and such in the pictures. The most difficult part of this section is that all parts are wired together. This could pose a problem if holes are not predrilled and the wiring not planned out. Also present is a generator on the floor next to the table. Because of the challenge involved it had to be done. Twenty pieces are involved. In the end, it resembles the real thing close enough. Again, all is white glued in place after the parts are constructed. (Broken record here) Once the fit is confirmed the parts are set aside.
The waist gunners positions lack the most detail as compared to the previous sections. The big construction is the flooring, the attachment points for the portable tanks, and the belly turret framework. Beginning with the aft of bulkhead number six the small bits and pieces are constructed from sheet, rod, and strip styrene. The flooring proves to be difficult in that the shape is so simple it is difficult not to overdo it. Little bits and pieces are added to the fuselage sides for the oxygen stations and such. A word of warning, if building a B-17 be aware that different variants had different arrangements for where the bits and bobs were. It is important when detailing a build to verify what the variant you are building has. Using various sizes of styrene, the turret frame was fashioned.
At this point, two months from starting this project, painting of the interior parts can begin. The interior of the fuselage as well as the bomb bay is Alclad Airframe Aluminium. The highlighting is Vallejo Bronze Green and Model Master British Green. The wood detailing is done using the same method as for the Navigator Station. The catwalk and bomb racks are Alclad Polished Aluminium. Assorted Testors colors are used in highlighting as well.
Up to this point I have been construction minded only. To that end I have done nothing with sections and parts that did not need to be fashioned yet. This included the assorted wiring, tubing, guns, chin turret, and top turret. Assembly means all these will now be needed.
Dry fitting the assemblies had shown me that this phase of the build was going to be interesting. The installation began with making the cockpit, the bomb bay, and the radio station one. The bomb bay proved to be difficult in that the little details broke off almost as soon as I put them on. The rack/walkway assembly goes into position without problem but the hoses and walkway ropes prove to be an issue. This assembly had to be reworked several times before satisfaction. With that in place the details for the bulkheads are attached and then the bulkheads are installed. These details are added going from nose to tail. This allowed for a smoother build up. Once all the interior work is done the last of the detail is added to the fuselage walls and then it is all installed to the port fuselage side.
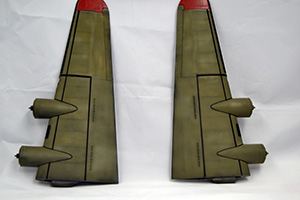
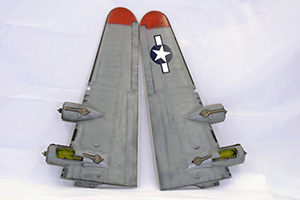
At this point a small issue raised itself. In trying to fit the two sides of the fuselage together a rather significant gap appears. After much sweating, a small locator pin is located on the starboard side. These pins are moulded into the kit to allow the builder ease of installing the cockpit. Once found it was neatly trimmed. Once gone so was the seam. Crisis averted. Minor seams are cleaned up on the upper but a small gap is on the bottom. This gap required an application of my favourite filler, Bondo Glaze and Putty. This automotive filler works very well and dries within minutes. One thing I have gotten used to is to fill, sand, and then spray a light coat of paint to see how well the seam had been cleaned up. After several sessions, it was time to start my preferred method of painting. First is a coat of Rustolium Flat Black to pre-shade as well as make sure the blemishes are cleaned up. At this point I sprayed Alclad Aluminium on several panels to provide a varied look and to give a subtle difference when the base coat is sprayed. Once dry, Model Master Olive Drab is lightly sprayed on the upper services. It is sprayed towards the interior of the panels, being very careful not to overspray the panel lines. The tail and stabilizers are painted Testors Red. The undersides are painted Model Master Neutral Grey. Again, this is done to minimize overspray on the panel lines.
Once this is done a mixture of Olive Drab and Testors White is sprayed in a random pattern on the upper surfaces. This will give a faded, used look but not the patch quilt that I have had in the past.
To this point the wings are not attached. This is to allow better handling of the build. This allows the painting of the red tips on the wings as well as the de-icing boots on the wings, tail, and stabilizers.
A series of light coats of Johnsons Future seals in all the work. Once allowed to dry decal work began. The decals for the most part went on without issue. Some of the larger decals however failed to settle into the raised detail. Air pockets and wrinkles needed to be dealt with prior to moving forward. Several sessions with Micro Sol Decal Solvent persuaded the decals to behave.
Several have questioned why I would paint the aircraft, decal the aircraft, and then attach the wings. For this build it was a technique that worked. It allowed me to work with some of the assemblies without endangering others. It gave me a less awkward piece to handle as well. However, after all this was done it was time to make the aircraft whole. The wings were attached using the "hottest" glue in my tool chest, Tenax 7.
The gaps at the wing root proved to be much easier than I had envisioned. They were not seamless but very little filler or sanding was needed on the upper seam and the lower required a modest amount. Dry fitting is one of the most important techniques you can develop. Touch-up at the wing root on the top and bottom was achieved in one session.
Once the wings are attached it is time to take stock of what needs to happen yet. Construction and painting of the top turret, chin, turret, belly turret, rudder, and landing gear is somewhat quick and almost painless. Painting of the propellers takes little effort. Attachment of these items proves to be no problem. I did however have to rethink my construction of the crew access doors and the bomb bay doors. I had begun with a plan to use thin styrene to fabricate these items but following the attachment of the wings I began to have second thoughts. My standby and most comfortable way to fabricate these doors would be with an aluminium can. This is much thinner than styrene and much more durable. The window in the fuselage door is going to be tricky though.
The B-17 is one of my favourite aircraft and I jump at any chance to build one. The Revell kit is a bit dated but provides the builder with a decent kit, decent details, and the opportunity to add more if desired. Although there are many detail sets on the market for this kit sometimes it is fun just to push the envelope and see what you can do. The secret is to dry fit multiple times to make sure that all will fit without issue.
This is the seventh time I have built this kit. I am finding that the kit builds very nicely provided the right prep work is done. There are some serious issues that can be avoided with the right prep work.
I want to thank two individuals who provided a lot of wonderful information, Karl Hauffe and Mark Harrington. I consider both of these individuals' experts on the B-17 and I am grateful to them for all their help.


