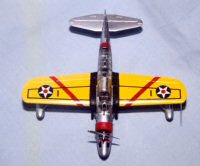
Monogram 1/48 OS2U Kingfisher Kit Build Review
By Michael Taylor
| Date of Review | September 2006 | Manufacturer | Monogram |
|---|---|---|---|
| Subject | OS2U Kingfisher | Scale | 1/48 |
| Kit Number | 5488 | Primary Media | Styrene |
| Skill Level | Intermediate | MSRP (USD) | Out of Production |
Background
[Ed Note: This article has been revised with larger images. Click on a thumbnail image below to see a much larger view.]
Before the introduction of radar the scout/observation plane was the eyes of the fleet. Used to seek out the, rescue downed pilots and spot shots the Kingfisher did this job from 1939 until it was finally phased out of front line service in late 1945.
Monograms Kingfisher has been around almost as long as I have and longer than many of the modelers that will be reading this article!. Overall it’s a typical early Monogram kit with raised details and a sparse cockpit detail. Recently, Cutting Edge Modelworks designed a few resin corrective sets for this decent offering of a historically significant aircraft.
I began by comparing the instructions from the Cutting Edge detail sets to the kit’s instructions. The detail sets used were:
- CEC48300 OS2U Kingfisher Super Detailed Cockpit
- CEC48301 OS2U Corrected Cowl
- CEC48317 OS2U Corrected Floats
- Aeromaster decals sheet # 48-412 Kingfishers Part III
The instruction sheet for the resin cockpit is fairly well done and constantly warns of the delicacy of the resin parts and the need to measure twice and cut once where any cutting of the plastic parts is needed.
And so we begin.............
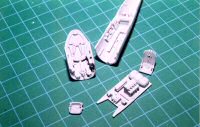
The resin cockpit was sooo impressive I was happy to begin with its assembly. The parts are so well cast a few simple passes with a sharp X-Acto knife was usually enough to release it from its pouring plug. The amount of detail cast into the larger resin cockpit tubs has to be seen in person to be believed. This also allows the designer to use less added parts to get a very busy and realistic look once it’s finished. All interior clutter such as the old cockpits mounting pins are removed and the interior of the fuselage halves are sanded and smoothed in preparation for a coat of aluminum paint and the front of the fuselage is removed along a specified panel line to accommodate a new resin firewall. I chose to leave the smaller resin parts on their pour stubs for painting but did clean up the pilot and gunner tubs, and the front and back pilot bulkheads, seats and upper radio deck. These were then placed on double sided tape and all the resin parts were painted Model Master aluminum. When that was perfectly dry 2 coats of Future were applied about 1/2 hour apart-to seal the enamel and prepare the parts for a wash. The next day a wash of 75% thinner and 25% burnt umber was applied with a pointed brush. Just dip the brush in the wash and let it wick around the raised details and settle into the low spots. If you make to much of a mess you can remove it with a Q-tip dipped in thinner-if you rub too much in one area it will remove the future and finally the underlying paint so take care!
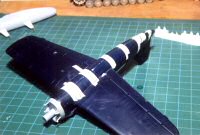
While that was drying I assembled the kits wings and taped the fuselage together. This is necessary because the new cockpit tub doesn’t allow the wing to travel through the fuselage. So you have to insert the assembled wings into the taped together fuselage as if you were really gonna build it the good old Monogram way but then you take your knife tip and scribe the top wing along the inside of the fuselage. Then scribe a line along the bottom wing-you can’t reach the inside so this one will have to be scribed along the outside of the fuselage. Remove the wing from the fuselage and remove the center. Remember to allow a couple of millimeters for the bottom wing because you scribed along the outside of the fuselage, not the inside. Make sure the wings are aligned and centered before you start scribing these lines. Once you cut this if you screw it up you’re gonna have to buy another kit. What you have, when you’re done, is a port and starboard wing that just fits into the fuselage. Cutting Edge supplies 2 wing inserts. One male, one female. I set these in place-generally-with slow setting super glue, then set the wings in place and adjusted them to fit and left it to set for an hour or so. They may then be removed to allow work on the fuselage and cockpits to continue.
The cockpit wash has dried and now painting of interior parts is done. There are radios, instrument panels, a life raft, oxygen cylinders and other such details to be painted. Radios were painted black then given a white drybrush to pick out the dials and meters. Different knobs were painted black or white and some were painted yellow-consult your references. I also like to paint some of the indicator lights on the instrument or side panels yellow or red to add color. The assembly of the cockpit tubs was simple due to the fact that there were really no more parts than you’d find in any of today’s new kit cockpits. Control columns, rudder pedals, throttle and a couple of radio decks. Once done you’re ready to assemble the fuselage.
The resin components were cemented into the port fuselage half with slow setting super glue and the starboard side was taped in place to help alignment.
Once that had set up I took my good old Testors tube glue and joined the fuselage halves. Tape helped the two sides meet in some places and I even played with inserting the wings into position-cool it works! Once that had set up I sanded the front of the fuselage smooth and popped the new resin firewall in place-taking care that it was set in place correctly. The cast on engine mounts would come in handy for a diorama using Engines and Things Wasp Junior, This Kingfisher would have the cowl in place.
Once the fuselage had set I cemented the wings in place and began work on the floats. Here again Cutting Edges casting is excellent. The position of the main float supports is well marked so there was no problem in positioning them. I drilled holes in the end to accept brass rod stock to enable the main float to be secured to the fuselage. Consulting some side views I lined the float up with the fuselage bottom and marked, then drilled, the holes to insert the brass rods from the float. The wing floats are a bit trickier as the location for the supports is not as clear. With a little care though, I had no problem lining the supports up. The secondary supports will be positioned after the wing floats are attached and the insignia decals on the lower wings are in place.
A number of raised panel lines were lost when sanding the lower fuselage. My technique for replacing them is simple. Place 2 lengths of masking tape side by side about 1mm apart where you want to replace a line. Then take some Squadron putty and smear it along the gap and let it set. Once set you can remove the tape and give the putty a quick sanding with 400 grit. You can see the lines a little in the photo but don’t worry-they’re all there.
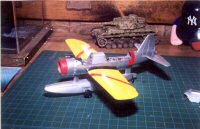
Since I had the Squadron Vacu-formed canopy I used the kits canopy to mask the interior for painting. The first area painted was the upper wings. These are gloss yellow and this wraps around the leading edge to about 8 scale inches. I then masked for the fuselage stripe. This area was first painted white and allowed to dry completely. Then a coat of insignia red was applied over that. Once that was dry the stripe itself was masked in preparation for the aluminum paint. I masked the wing upper surface with masking tape and paper shields and the lower wraparound area was taped off. For some reason I always begin with the lower fuselage? There was no exception here. At this point the floats are not permanently articled and the main float was painted separately. Once one side was dry I turned it over and painted the other ( Wow, what a surprise!) The no skid on the float was supplied as black decal trim film and the prop warning stripe was placed. Now the float was permanently attached to the aircraft. The float beaching gear is from Monograms kit and keeps the painted plane off it’s float. The cowl received the same treatment as the fuselage stripe and was painted aluminum at this time also. Once the aluminum has dried I removed the kit canopy and the masks from the wings and red areas. The entire kit was given a couple of coats of future to seal, gloss and blend everything together. Once the Future has dried for 2 days I began applying Aeromaster’s decals. What can I say? Aeromaster makes some of the best decals available and I had absolutely no problems with them at all.
So now I have this colorful plane with no canopy. Vacu-forned canopy?! AAaahhh. Only one !!?? O.K. don’t screw it up! Get a SHARP X-Acto blade and lightly scribe around the frame of the piece you wish to remove. Continue until at some point you’re through the plastic. Be careful. It’s better to trim it out with extra attached than to trim right through a frame. Time, patience and perhaps a cold beverage or so later and all the canopy parts are removed. I chose to keep the gunners canopy closed-2 reasons. It keeps dust out of that beautiful interior and I really didn’t want to cut the dang thing apart. :D The canopy was cemented into position and allowed to dry. While it was drying I cut some silver decal trim film into 1/16” strips. These then were applied t the canopy. First the crossmembers-allowed to completely dry-then the longitudinal braces. Trim as you go. The same technique was used on the pilot’s canopy. I did choose to open that one as that’s the way the Kingfisher usually looked when on the ground. Besides its white glued and can be slid over the cockpit to protect it from dust if need be.
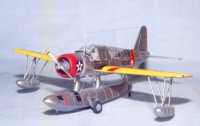
That’s about it. Added the antennae and float bracing wires. Painted the prop and took the finished photos. I’m happy with the way it came out.


