Revell 1/25 '77 Firebird 'Smokey & the Bandit' Kit Build Review
By Michael Benolkin
| Date of Review | May 2005 | Manufacturer | Revell |
|---|---|---|---|
| Subject | '77 Firebird 'Smokey & the Bandit' | Scale | 1/25 |
| Kit Number | 1562 | Primary Media | Styrene/Die Cast Metal |
| Pros | Nice Detail, Beautiful Paint Job! | Cons | |
| Skill Level | Basic | MSRP (USD) | $20.60 |
Background
Way back in 1977, a new comedy was released in theaters that featured Burt Reynolds as Bo Darville (CB Handle 'Bandit) and Jerry Reed as Cledus Snow (CB Handle 'Snowman') as a team that could smuggle beer across the country, but Sheriff Bufort T. Justice (Jackie Gleason) was there to stop them. In this first movie, the lovely Sally Field plays Carrie, a runaway bride that is 'rescued' by the Bandit and is subsequently chased by her would-be husband, Junior (Mike Henry) and his father - Sheriff Bufort T. Justice.
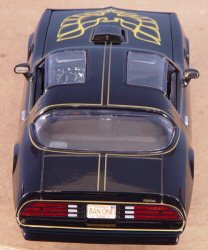
One of the symbols of this move was Pontiac's newest Trans Am Firebird sporting an all-black paint job with stylized Firebird emblems and pin striping in gold. Under the hood was the Pontiac 400, as the 455 previously used would no longer fit in the down-sized body. The car was also equipped with removable T-top window panels and a hood scoop to provide the 400 ample air volume at full power.
This new machine took center stage in the movie and it was an excellent marketing move for Pontiac as everyone in the country wanted one of these cars after seeing the movie! If you'd like to see the kit as it appears straight out of the box, see the in-box review.
The Kit
 |
 |
 |
 |
 |
 |
 |
As I mentioned the in-box review, the kit would look okay built without painting since the car is essentially all black and all of the difficult painting on the body is already finished for you! After looking around the interior, however, I decided to try some different techniques to finish this car.
Construction
While they provide some nice instructions, this is still what you'd classify as a no-brainer kit. This is not a snap-together, cement is required, and a tube of cement is provided with the kit. I used Tamiya liquid cement for the project.
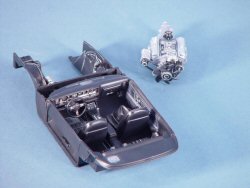
First I assembled all of the silver parts that make up the engine. Since this won't be seen much even with the hood open, the styrene color was sufficient. To remove the styrene shine and pick out the details, I applied a wash of Lamp Black oil paint diluted in Odorless Mineral Spirits. The result was pleasing to the eye, but I still had to paint a few details like an orange oil filter just to get the look right. The black parts were added next, and these were dry-brushed with gray acrylic. The completed engine was set aside.
Save a couple of exceptions, the interior is black. With a black exterior, it would be like looking into a black hole and photography would even be worse. Instead of painting the interior black (again), I applied a wash of Titanium White oil paint. The diluted paint dried in the recesses of the detailing and a good buffing removed any excesses after it had dried. Now I realize that any good upholsterer might take a dim view of replicating white stitching on black seats, but this is the only way to bring out the detailing molded into the interior. You'll want to use less white perhaps in your build, but for purposes of photography, I made my white wash a bit strong.
I did paint some of the typically chrome fittings around the interior with silver acrylic. The kit provides a nice set of instrument faces for the panel to go behind a chrome frame. The stick shift is chrome as well, but the radio, CB, steering wheel, etc., were detailed with the silver acrylic paint.
The final touch was to add Smokey's black cowboy hat to the passenger seat. The interior was complete and set aside.
The engine was installed in the chassis, the interior (that also has the side wells for the engine compartment) and remaining details were added. With everything fitting snugly, the interior and chassis were fitted into the die-cast body and screwed into place with four screws.
The chassis was drybrushed to bring out more detailing before final assembly. The suspension, exhaust system and shocks all went together nicely.
The mag wheels are nicely plated in chrome and gold, this would have been interesting to do yourself (NOT!). The wheels were assembled and installed on the car.
The final step deals with the clear T-top windows. These rest nicely on the body, but left unfinished, they just didn't look right to my eye. Clear parts reflect light at the edges and this reflection needed to be suppressed. The solution was simple, a black non-erasing Magic Marker. I blackened the edges and the frame with several coats and the results were perfect.
Conclusions
This was a fun project. It wasn't a snap together, but it assembles as nice as Revell-Monogram's snap kits. The pre-finished body is the star of the show since it takes countless man-hours of work out of the equation to render the results you see here. Now its time to find a re-run of Smokey & the Bandit!
My sincere thanks to Revell for this review sample.


