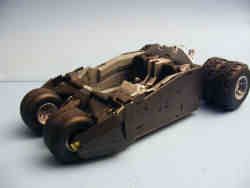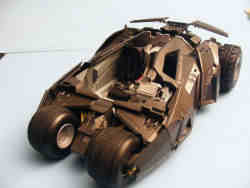
Moebius Models' 1/25 'Dark Knight' Batmobile Build
by Steve Causey
| Date of Review | August 2013 | Manufacturer | Moebius Models |
|---|---|---|---|
| Subject | 'Dark Knight' Batmobile | Scale | 1/35 |
| Kit Number | 943 | Primary Media | 135 parts: 128 styrene, 6 vinyl 1 metal on 19 sprues |
| Pros | Unique subject | Cons | Nothing serious noted |
| Skill Level | Experienced | MSRP (USD) | $39.99 |
Build Review
Batmobile! The word conjures up many visions for many followers of the Dark Knight.
This isn't your father's. Or His father's Bat mobile. It has a vector-controlled jet engine for jumping over obstacles, in addition to a 500 HP Chevy engine. Wrapped in a body that is a cross between a Lamborghini and an F-117 Stealth fighter. Glass cockpit instrumentation and it's heavily armed and armored. When the kit is finished: (I spent about 40 hours) you will have a great replica of the Dark Knight's vehicle. You will need to bring your patience and best skills to the bench.
Due to the very complex nature of the prototype, the kit needs to be complex as well if it is to deliver any scale fidelity. Moebius did a great job! The builder will need to be aware that due to the complex nature of the kit, you will need to test fit, re test, and then test the fit with other assemblies/pieces .
The instructions are well done, but still leave a bit to be desired in the placement, and part # information (several small fiddly parts are reverse numbered).
Assembly begins with the nicely detailed platform-style interior, which is also a structural part of the vehicle. This step will involve careful test fitting and separate paint work to detail it. (It is worth the work it's still visible even after the vehicle is finished)
I primered and painted all the parts. I think this is really the only way to get a quality finish without undue pre-masking and over spray. The instructions are necessary, more so than most kits in the rest of the steps, I used slow setting glue to allow me to adjust how the different parts related to the assembly as well as with the parts in the next step. As I was building the kit, I saw the slight but noticeable mold seams that I missed before I applied paint to the parts. They come off quickly, but every part needs to be cleaned up and then touched up with the appropriate color. The way I installed the tires on the wheels was to paint the wheels with a sturdy silver, let dry. Then dip the vinyl tires in very hot water (holding the tires with tongs) then after a few seconds immersion in the water carefully install the tire on the wheel.
The final steps will require care and patience. Use slow setting glue on parts 8 & 9 to allow them to move a bit as you install the tiny struts that support the many airfoils. The tiny strut parts must be handled with care. They only fit one way and need cleanup before final installation. I noticed instruction callouts on part numbers were reversed on parts 125 & 126, and parts 62 & 63. I cut all the struts out one at a time, cleaned each part up, test fit the part and left it in its location. adding all the other strut parts until they were all placed (without glue) I removed each one at a time, did final clean-up and paint and replaced the part. When they were all painted I used a slow setting glue to allow the adjustments that were needed to add the remaining last four foils.
Sounds like a bit of work, but it will reward you in a fairly simple final assembly.
She looks really great when finished you will be proud to add this one to your collection. The base is an ODG Studios product: "Mean Streets." The batman figure comes from the Moebius Batman Batpod figure kit.
My sincere thanks to Moebius Models for this review sample!


