Moebius Models 1/32 Colonial Viper (Original Battlestar Galactica) Kit Build Review
by Steve Causey
| Date of Review | December 2013 | Manufacturer | Moebius Models |
|---|---|---|---|
| Subject | Colonial Viper (Original Battlestar Galactica) | Scale | 1/32 |
| Kit Number | 940 | Primary Media | Styrene |
| Pros | Well-loved subject; excellent fit | Cons | Nothing noted |
| Skill Level | Basic | MSRP (USD) | $29.95 |
Build Review
I can't remember when I have had more fun building a kit. Combine great memories with state of the art molds and it makes a very nice package. Moebius has re done the original Viper from the TV show and this kit will make fans of the TV show very happy.
The kit comes with 45 parts molded in a soft gray and clear styrene. The moldings are well thought out with ejector pin marks and sprue attachment points in out of the way areas. The fit is so good with this kit, you can pre assemble it without glue; this helps a great deal when adding aftermarket detail sets and lighting. Seams are either hidden or almost invisible in the finished kit (I used no fillers). The decals offer two versions (one for the full size prop and another for the filming miniatures) printed in glossy ink with no registration problems.
Assembly begins with the pilot and cockpit. The cockpit detailing is sparse to say the least. Since I was lighting the kit, I opted to use the Paragraphix Photo Etch detail set PGX175 this gives the builder a very nice set of cockpit overlays and photo film screens that bring even the unlighted kit to life. The photo-etch set also includes engine detail parts and clear diffuser films to help with engine lighting. Some scratch building skills will be needed to install the photo-etch. I drilled and ground out the places that were needed to let light through the photo-etch parts.
The pilot can be left until the end of the build, and he will slide into the finished model with no trouble. The pilot will need some work for the AMS Modeler to be happy with the finished figure. While having almost no mold seams, the detail is somewhat soft and the way the arms attach to the back of the shoulders is visible from above when viewing the finished model.
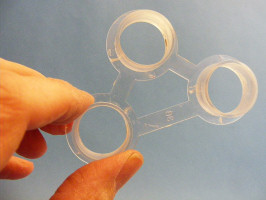
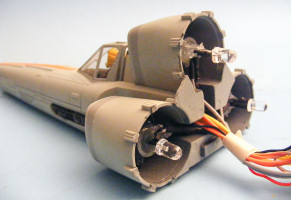
I decided to make my own lighting package, (six LEDs, six resistors, a battery clip, and a switch). The kit is designed to make lighting it easier with clear parts and wiring channels molded into the plastic.
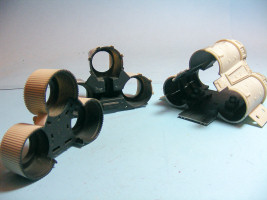
I masked off the mating surfaces and sprayed light blocking paint into the necessary areas. The kit builds into subassemblies that make adding details very easy. I was able to build the forward fuselage, add photo-etch and lighting and stop. Then I started working on the engine area of the kit I added the LEDs for the engines and then was able to build the after engine compartment as I was adding the electronics package. Since I was waiting for a base, I opted to run power out of the kit making initial installation easier, although there is plenty of room inside the kit for a 9 volt battery and the wiring.
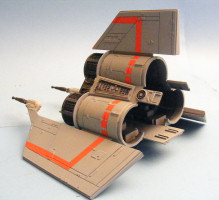
I decaled the assembled and painted subassemblies to simplify the build. The decals didn't respond to Micro Set, but Micro Sol got them to snuggle down into the panel lines quite nicely. Just remember to apply the Micro Sol, then do not touch the decals until they have unwrinkled and snuggled back down into the detail. I over-coated the paint and decals with a semi gloss clear to match up the glossy decals with the flat paint. I used a pin vise to open up the gun bores that really made the weapons look great.
The kit has the typical Moebius clear stand and this time the stand attaches to the finished model without any fuss. The kit also includes landing gear that while being a nice touch, looks like a nightmare to mask and paint. I built up mine since ODG Studios is making a base for the Viper in landed mode. I used pastels to accent the panel lines and then more semi matte clear to affix them.
Another great Moebius kit of a well-loved subject, the beginner could build this one in a few days. I spent 40 hours (with adding the photo-etch details and the lighting).
For a look at this kit straight out of the box, look here.
My sincere thanks to Moebius Models for this review sample!


