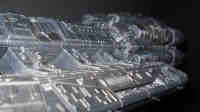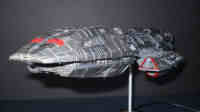
Moebius Models' 1/4105 Battlestar Pegasus (Superdetailed) Build Review
by Stephen Sutton
| Date of Review | August 2013 | Manufacturer | Moebius Models |
|---|---|---|---|
| Subject | Battlestar Pegasus BSG | Scale | 1/4105 |
| Kit Number | 931 | Primary Media | Styrene |
| Pros | New-tool kit | Cons | Nothing noted |
| Skill Level | Basic | MSRP (USD) | $64.95 |
Build Review
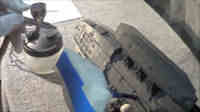
First off I had to order the photo-etch sets for the exterior and landing bays from Paragrafix.com, while I was waiting for these to arrive, I washed all the parts in mild dish soap in my kitchen sink. As I am going to light this kit with LEDs and Fiber Optics, I needed to start light blocking all the upper and lower landing bays and all the upper and lower hull parts.. First I used Flat black Krylon spray paint then I over coated with Walmart brand fast dry gray primer and finally to give more reflectivity I sprayed a final coat of Tamiya Fine Surface white primer. Also the Engine parts where given the same light blocking treatment.
Next I wanted to have Blue firing thrusters for the engines so I removed an LED from an electronic candle, this LED is yellow so I dipped it into Tamiya clear blue, but this was not successful, so I had to order some 5mm Blue Flickering LEDs from the internet.
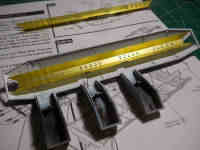
The Paragrafix PE sets arrived real fast so now it was time to modify the landing bays and cut away all bulkheads and locator pins to make room for the photo-etch landing bay inserts to have a complete "through-deck" as in the "real" Battlestar.
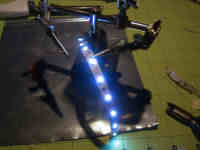
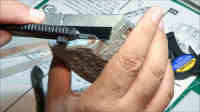
Strip LED lights where soldered and attached inside the landing bays along with fiber optics for the landing lights on the front sides of the landing bays. All the wiring and fiber optics was secured with low temperature hot glue. Paragrafix exterior set provides very nice windows for the upper forward hull trench, so next I proceeded to thin down the trench walls with an electric nail polishers and sanding bit. Having real thin plastic for the trench windows will help to defuse the light from the LED lights.
Pegasus forward hull has numerous separate hull inserts that have some lighting effects so I drilled these inserts first before gluing the inserts in to the main hull, then I light blocked any seams with Black Tulip Slick fabric paint.
The upper landing bays have the Pegasus registry on them and they are lighted, so I inserted Tamiya tape behind the registry so the light blocking will not cover the registry, LED lights from behind will give the Pegasus registry a nice effect.
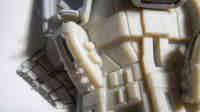
Now the work begins on the Engine nacelles and ducts, the ducts do not fit flush against the engines so I cut the mounting tabs off and the provided a better fit.
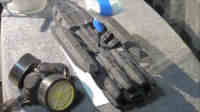
Next I finalized all the blue flickering LEDs for the engines and I secured all the wiring and fiber optics with hot glue and black Tulip paint for light blocking, then the clear engine inserts where glued in place with Glossy Accents clear dimensional embellishment which dries crystal clear, this stuff is awesome for aircraft canopies too. Next I tested all the engine blue LED lights before I closed up the engines for good. The engines halves where glued together but first I cut off the locating tabs then I used clamps to hold the engines together.
After all the engines dried then I did another light test on the engines and they really give a nice blue flickering effect.
Next fiber optics was inserted into the upper and lower forward main hull, I used a lighter to melt the one end of the fiber optic to give a bulb effect which will allow the fiber optic to light up a larger area. The fiber optics I used for this are from very cheap table top party LED and fiber optic strands that I cut to size.
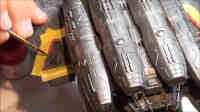
Next I noticed the forward upper hull had some sink marks in it so out came the 3M blue putty and Bondo's red putty to address these. Lots of sanding with finger nail files. Then the panel lines where cleaned up with a Tamiya scribing tool and embossing tape used as a guide.
The Central FTL Drive was assembled and the eight conduits where glued in place and lined up with a large rubber band. The conduits do not fit well so the rubber band was mandatory.
In order for fiber optics to light up correctly, they need the light source to pointed right at the end of the fiber optic, so next I put aluminum tubing and I hot glued 3mm LEDs in the tubing then later I can bundle up all the fiber optics and insert these in the LED aluminum tube. I made 1 red and green tube for the landing bay navigation lights and then I made three more white aluminum tubes for the various window lights. I light block the back side of the LEDs with black Tulip paint.
Next the ParaGrafix photo-etch landing bay walls where painted with Walmart brand gray primer and then the windows in the landing bays where given a layer of Glossy Accents and allowed to dry.
I ordered JT Graphics Landing Bay Decals and while I wait for these I painted the landing floors with the gray primer then I gloss coated these with Testors one coat clear Lacquer.
The landing bay floor decals where applied to the floors, the decals were very thin but laid down very well and were easily maneuverable on the gloss finish for the floors, small bubbles in the decals where treated sparingly with Walthers Solvaset. After these dried I airbrushed a thin coat of Xtraacrylix Flat Varnish with a 90/10 varnish/distilled water mix. This varnish goes on really smooth.
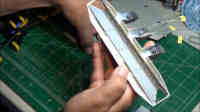
Next all the ParaGrafix photo etch landing bay walls were installed in both the upper and lower landing bays, they fit perfectly in the lower smaller landing bays with the added LED strip lights glued in, however the larger upper Landing bays I had some difficulty fitting the photo etch walls in the bays with the strip lighting, perhaps I should have thinned down the ceilings of these bays to get better clearance. Some sanding of the end caps for the floor was needed to get a better fit, as when I installed one of the floors the front opening to the landing bay cracked from the stress and my drilled hole for the fiber optic navigation lights. I was able to repair the crack after everything dried.
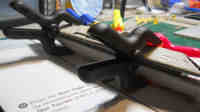
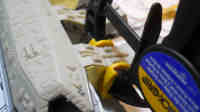
Clamps, clamps and more clamps was in order to seal up the landing bay floors with the photo etch walls into the landing bays, after everything was secured with clamps I then used Gunze Mr Cement liquid glue. I let these dry for 24 hours. Next I tested the landing bay lights, and they look very good.
Now it was time to install the LED strip lighting into the forward upper hull for the trench lighting, two sets of cool white LED strip lights were glued in with my low temp hot glue gun. Then I tested the strip lighting. Next I drilled out windows in the forward hull tween deck and installed the fiber optic lighting. After this I installed the LED tubing for both the upper and lower hull and the tween deck. I then secured the tween deck area to the upper hull to seal everything up.
Now I proceeded to glue the upper landing bays to the lower landing bays, an additional tween deck is sandwiched between the upper and lower landing bays and everything was clamped up and glued with Mr. Cement. These were allowed to dry for 24 hours.
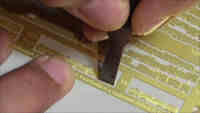
Paragrafix exterior photo-etch needed to be installed for the tween deck details, I should have installed these before I glued the upper and lower landing bays together. Tween deck PE was removed from the trees and carefully cleaned up with a file, then all parts was glued with 5 minute epoxy.
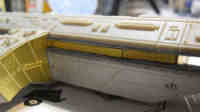
Next the Landing Bay arm sides were sanded flat in preparation for the Paragrafix photo-etch side details, these were clamped and glued with thick super glue. After the PE dried I then applied a layer of Floral Craft Glue to conceal the edge of the PE to the kit part then I applied with a brush a coat of Gunze Mr. Surfacer 500 over the PE edge. This will help to conceal any visible edges on the landing bay arms.
Now it was time to glue the flight bays onto the main hull assembly, I was careful to feed all the fiber optics and LED wiring through the hull openings then I used 5 minute epoxy to secure both flight landing bays to the hull.
Installing the Navigation light tubes was next, I hot glued the red and green LED tubes into the hull, then I bundled all the associated fiber optics and glued these into the LED tubes with 5 minute epoxy. After this dried I performed a light test.
Now it was time to solder up all my wiring, I thought I was careful to cover up all the fiber optics from my soldering work but I wasn't careful enough as a blob of solder fell down into my fiber optics and melted through 4 or so fibers. To fix this I cut the melted fibers carefully and pointed these to a small piece of cool white LED strip, later on I will paint these fibers either clear red or green. Next time I will be more careful when I solder over the model with exposed fiber optics.
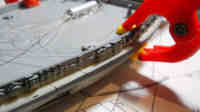
Time to close up and glue together the upper and lower hull halves. First I needed to install the rear bulkhead FTL core, with power applied to all my lights I carefully closed up the hull halves. Clamps, clamps and more clamps were required to clue up everything tightly. Then I glued the hull with Gunze Mr. Cement S.
The kit stand was prepared with a micro switch and 9V power supply opening.
Preparation for paint is next.
Time to test my paints on a donor Nascar kit Pontiac kit. I sprayed Walmart brand flat black, gloss black, and flat grey, then I sprayed Alclad Magnesium paint. I choose to use the flat black primer as my base coat and I thought the magnesium paint looked best over this. Next I tested the Testors one coat wet look clear coat lacquer over the Alclad paint, no problems occurred with is combination.
I masked all the fiber optic windows on the main hull with Parma liquid fast mask. I masked the openings to the engine exhausts and the openings to all the landing bays. I used a combination of Tamiya tape and wet tissue paper for the landing bays. Finally I used Tamiya tape to mask off the main hull trench windows.
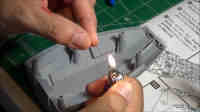
Next I annealed the Trench windows Paragrafix photo etch parts with a BIC Lighter to soften up the metal so it will be easier to bend and conform to the main hull trench areas.
After the Trench windows photo etch had cooled down I then bent the parts with a pair of flat nosed pliers and I dry fitting these parts to the main hull trench areas. Flat black primer coat and Alclad Magnesium was applied to the PE trench windows.
The Rail guns were painted with a flat black primer and a coat of Tamiya gloss black then a final coat of Alclad Airframe Aluminum. The kit base was gloss coated with Tamiya gloss black.
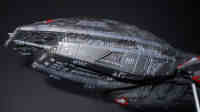
Next I air brushed Pegasus with Alclad Magnesium paint, I painted it panel by panel using the same technique that aircraft model builders would do with pre-shaded panel lines. I ended up using 8/10ths of a bottle of Alclad to finish this project. I hand painted with Tamiya Flat Red the Landing Bay borders and the Main Hull nose identification strip. I allowed everything to dry over night.
Using Tamiya Bronze, I sparingly dry brushed raised areas of Pegasus. Now it was time to remove all the masks for the final paint process of Battlestar Pegasus. When I removed the Tamiya tape I used to mask off the Landing bay floors, this pulled up some of the floor decals, this I did not expect, so to fix this I used portions of the kit decal landing bay floors, I only had to do this for two floors. Lesson learned here. Testors One Coat Lacquer clear coat was sprayed light and heavy over various areas of Pegasus.
The Battlestar Pagasus emblem decal was applied to the top of the mid-section hull and Walthers Solvaset was used to setting down this decal. After this dried, I hand painted Vallejo Satin Varnish to remove some of the gloss off the decal. I also used the Vallejo Satin on all the red borders and hull identification strip.
Now all the Rail Guns were glued in place. Masking was removed from the Main Hull Trench areas and the Paragrafix photo etch windows were glued in place with Glossy Accents Clear and all seams were light blocked with Charcoal Gray 3D Fabric Paint.
I removed the masking on the Landing Bay Pegasus symbols and then I brush on MIG Productions Metallic Gun Metal Pigments, then I clear coated these to lock in the pigments.
All the extra Fiber Optics strands where cut flush to the hull to expose the lights.
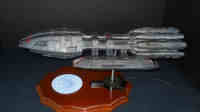
The kit base was dry brushed with Tamiya gold to pick out all the details then the base was added to the wooden base that was purchased from my local hobby store.
Finally the Moebius Models Battlestar Pegasus is complete and fully lighted with a 9 volt 1 amp DC power supply.
My sincere thanks to Moebius Models for this review sample!


