


Moebius Models 1/128 Seaview Build Review
by Michael Benolkin
| Date of Review | May 2012 | Manufacturer | Moebius Models |
|---|---|---|---|
| Subject | Seaview | Scale | 1/128 |
| Kit Number | 708 | Primary Media | Styrene |
| Pros | New-tool kit | Cons | Nothing noted |
| Skill Level | Basic | MSRP (USD) | $119.95 |
The Kit
For a look at this kit as it appears in the box, look here.
The Build
After dry-fitting this kit during the in-box review, I really wanted to see how this kit goes together with cement. I used Tamiya Extra Thin Liquid Cement and a Touch-N-Flow
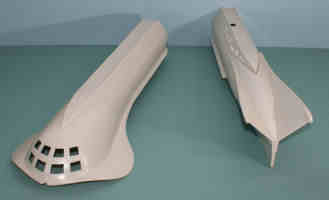
applicator. Once again I dry-fit the forward hull halves and used a file to clean up some left-over flash from ejector pins and my Xuron styrene nippers to remove small remnants of the mold trees that were cut away at the factory. Running a bead of liquid cement along the seams and putting a clamp in the front windows and one at the rear of the hull was all it took to hold the model together whilst the glue dried.
There were more ejector pin marks to clear up on the rear hull halves and these two parts also had a slight deformity that was easily corrected with the application of liquid cement along the seams and a few more clamps.
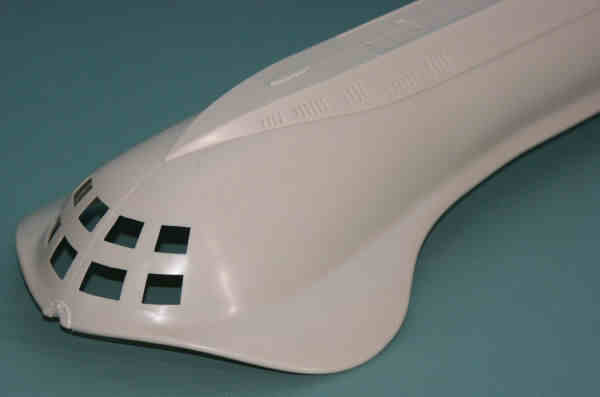
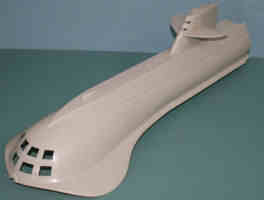
The V-tailed stern fairing was next and that went together smoothly. Here it is dry-fitted onto the rear hull half.
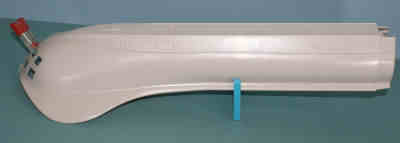
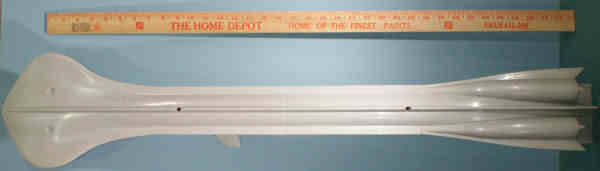
The front and rear hull halves dry-fit nicely and that visible seam will be much smaller after cementing. You can see from the yard stick that the completed model will be over three feet (just under one meter) long.

Aside from the twin propulsion fairings, the sail, and the missile launch tubes, there isn't much to building this kit on the outside. In fact, the interior section will take a little more time because of the variety of colors used, but it mounts to a bottom section that inserts under the bow. I'm interested in the cable runs molded into the V-tail for the aft running lights as Moebius Models has made it easier for the modeler to add their own lighting and special effects.
Here is the Seaview with the sail and the forward deck plate installed. There were no issues here.
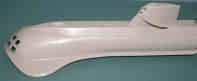
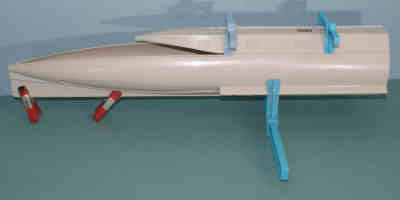
Here's another look at the forward hull with the sail and forward deck plate installed. The aft hull now has the propulsion fairings installed but the twin screws and rudders are still off the model until after painting. Note how the tip of the rear fairing from the aft deck to the main hull appears to be sticking up slightly? That's because it is, but all it needed when the cement was dry from this last phase of assembly was to be clamped down and cemented into place.

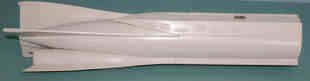
Here's the model almost completed on the exterior. Only the ventral bow plate is dry-fitted into place. This is where the flying sub bay would be on the Season 2/3 television version of this kit and the interior observation lounge is mounted to the inside of this bow plate.

Here's another look at the bow and if you look carefully at the forward spotlight, the ventral bow plate is not quite seated. I had intended to build up the interior of this model but after looking this over, I decided to make this build a simple display model. In order to do the interior justice, I'd need some interior lighting to view the nice interior details provided in the kit and I'm not wiring this beast up. I'll save that project for the television version instead.
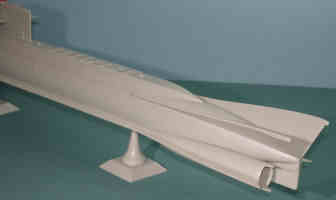
Here's a closer look at the stern and you can see the aft deck plate with the missile launch tube doors molded in place. One is left off so you can have the option of posing this model with a Polaris missile leaving the tube. Those display stands plug right into the two holes on the underside of the model. They are molded hollow so you can run your wiring out of the hull and into a display stand that would house your battery (or batteries) and power switches.
When next you see this model, the windows will be painted dark from the inside, the visible seamlines will be filled, the hull will be block sanded, and the model will be painted and finished. The completed model is going to look too cool sitting on a shelf in my office!
My sincere thanks to Moebius Models for this review sample!