Minicraft 1/144 KC-135E Stratotanker Build Review
By Fotios Rouch
| Date of Review | March 2014 | Manufacturer | Minicraft |
|---|---|---|---|
| Subject | KC-135E Stratotanker | Scale | 1/144 |
| Kit Number | 14627 | Primary Media | Styrene |
| Pros | First decent KC-135 kit in this scale | Cons | See text |
| Skill Level | Experienced | MSRP (USD) | $45.00 |
The Build
The KC-135 Stratotanker is the USAF's first all jet powered refueling air tanker. It significantly increased the range of bombers and fighters alike and has seen extensive use since it entered service in 1957. Prior to the Stratotanker the Air Force had to make do with the prop driven KC-97 which was too slow for the jets. The C-135 with all its variants represents one of the most successful designs that has been around for 57 years and counting! Its replacement will be the KC-46 but it is certain that the KC-135 will still be around for years to come.
Modelers have been waiting for Minicraft to produce the 135 family for years now and the wait is finally over. Was the wait worth it?
Just like with the C-130, the KC-135 project started with higher ambitions for more detail such as a cockpit and an interior. As with the C-130, the KC-135 has no interior and more importantly just a hole for a cockpit. I know it is a small scale kit and the problem was much worst with the big C-130 cockpit but was it going to be so much more expensive to include at least the bulkhead and a floor?
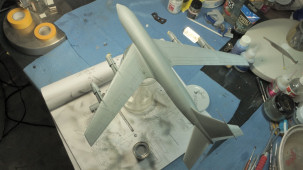
The build started by trying to scratch the bulkhead and the cockpit floor. I traced the inner fuselage diameter and cut it out of styrene stock. I also cut styrene to recreate the instrument panel coaming that will show through the front cockpit windows. Prior to joining the fuselage I used a lot of lead weight just to be safe. I hope the landing gear will take it. The fuselage snapped together well but I had a hard time aligning all the reinforcing rear fuselage strips. If it was me then all would be off by the same amount. In my example some aligned and some did not. Not a big deal since I was planning to sand them down a bit as they are too prominent.
Building the wings and the engines was fast. The TF-33s are OK but they could have been much better. The front cowlings are not as nice as they could have been and the intake fans are oval. Maybe someone can make an aftermarket resin set for that.
The wing to fuselage joint leaves a gap. I tried a new solution I have been reading about which is using Perfect Plastic Putty and a syringe to precisely apply it to the seam. It looked good as I was doing it but my results were not that great and I had to use 3M putty as I usually do. Maybe I need more practice.
One area worth paying attention to is the joint between the clear cockpit part and the fuselage. It is not smooth and it needs putty and then rescribing of the panel line that will inevitably be lost. The last area that needs attention is the joint between the engine pylons and the top of the wing. There will be a step there that will need putty and sanding.
The model is almost ready now for the paint booth!
Unfortunately my Xtracolor AMC gray had gone bad and separated and I could not mix it enough to achieve pigment uniformity. Second choice was Humbrol 156. It has a satin finish which wet sands and polishes well once dry.
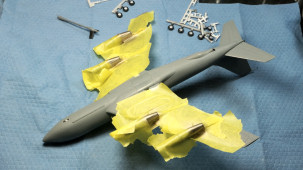
The wheel wells were painted white once the surrounding plastic was masked.
The engines were a bit more complicated to mask before spraying the Alclad II shades.
I masked and sprayed the anti-glare black. This is the standard Modelmaster flat black. I then mixed a little gloss black to it for the nose cone.
The Cartograf decals went down very well on the Future prepared surfaces. Maybe they were a bit thicker than I expected but they conformed well and sunk into the panel lines. I did use Microset and Microsol just in case. The model was finished with airbrushing satin finish varnish. Weathering was kept to bare minimum.
If you want to know, yes, the tail antenna did brake at the very end! I was careful throughout the project but this is the nature of the beast. One complaint is that the landing gear is not easy at all to finesse and it was impossible to get all ten wheels to touch the ground at the same time. I had to sand down a few of them to get them to make simultaneous contact.
My overall impression is this is an OK kit. I would really like someone to make aftermarket TF-33 engines. The intakes need work both in shape but also on the fans. The clear canopy part seriously needs attention. I do not expect anyone to come with a clear resin replacement. The main windows are OK but the eyebrow windows are way off in shape and location. I would be OK in this scale with decal eyebrow windows actually. I will certainly wait for aftermarket parts before I build my second kit in the stash maybe as an NMF C-135B! Also, this is such a popular subject, we have got to see decal sets with interesting schemes plus some nice nose art!


