Mac Distribution 1/72 Flak 38 Build Review
By Dale Owens
| Date of Review | March 2005 | Manufacturer | Mac Distribution |
|---|---|---|---|
| Subject | Flak 38 | Scale | 1/72 |
| Kit Number | 72063 | Primary Media | Styrene & Photo-etch |
| Pros | Nicely Detailed Kit | Cons | |
| Skill Level | Intermediate | MSRP (USD) | $17.98 |
Background
The 20mm FlaK 38 ant-aircraft cannon, designed by Rheinmetall, was based on the earlier FlaK 30 gun. Production of the FlaK 30 began in 1937 and continued until the faster-firing FlaK 38 replaced its presence on the assembly line in 1940. Lightweight, inexpensive, reliable and quickly readied for firing, the FlaK 38 was used by the Wehrmacht on all fronts. Towed in a small trailer by medium-sized transport vehicles such as the Sd.Kfz11 and the Horch (a kit also offered by this manufacturer), the gun could be dropped from the trailer, loaded, and ready to fire in a matter of seconds, though it could also be fired right from the trailer. This weapon enjoyed a long and effective career, many serving right up to the end of the war, and were found to be very effective against medium tanks as well as devastating to aircraft flying under 3500 feet.
The Kit
I’m not going to bore you on the specifics of the packaging, so suffice to say that the box is a rather flimsy top-and-bottom sort, and the instructions are a rather nice bi-fold type covering history (English being a second language on this one) and fairly clear drawings. It wasn’t until I was almost finished with this kit when I read the notice near the top of the front page: Short run—Recommended for advanced modelers.
The kit consists of one surprisingly small sprue of cream-colored plastic and a single fret of etched brass. The plastic parts are molded in a rather soft and easy to cut plastic, so be careful with the sandpaper on this one. Spend plenty of time studying the box art and the excellent three-view drawings of both the trailer and the gun, as none of the parts have obvious mounting points. The brass fret consists of ten nicely etched parts, providing handles for the trailer and gun platform, the center portion of the gun shield, and what seems to be a foot pedal of some sort.
There are no markings included with this kit, and I can’t fathom as to why it would need it anyway. Painting references for three guns are included; the first being an early war example in gray, the second being a DAK example in desert yellow, and the final being an SS PzAbt. in dark yellow and green.
Construction
Before I begin on a brief description of the assembly process, I should mention that this kit will require some special attention to cleanup, as it is a short-run kit. However, be prepared for a surprisingly easy task, as those who have experience with short-run kits will chuckle to themselves merrily when their eyes fall upon this beauty of a kit, with it’s crisp molding, surprising lack of flash and strong detail.
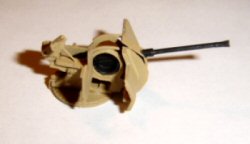
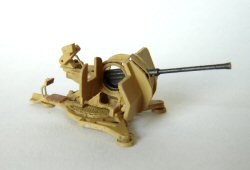
According to the instructions, construction begins with mounting the gun between the two halves of the gun cradle, and the cradle to its base. After a brief moment of thought, I realized how much easier it would be to build the cradle separate from the base and paint the subassemblies before installing the gun. I went as far as to assemble most of the gun sight mounting plate and the rearward sighting shield before painting the gun and the cradle assembly. This made it rather easy to simply spread the cradle, slide in the gun, and then mount the whole thing to the base. Think through and study the drawings before installing the sight arm, and you may be rewarded with a couple of easy scratch-built detail ideas. Don’t forget the lower shield brace and foot pedal, like I did; it kind of sneaks up on you if you build out of sequence. I also installed the pile of PE handles on the gun platform early, so I could paint the platform, cradle, and gun base at the same time.
Attach the PE center shield portion before attaching the side shields, as it helps align them. While the glue dries for this part, try skipping ahead to the trailer assembly, as it is a completely separate structure. It’s at this point I lost the seat back, so I scratch built a new one out of styrene and scrap wire. I think it looks a tiny bit nicer. Be sure and drill out the barrel, if you can stomach the challenge.
Drop the gun onto the platform, paint the tires and install them, and you’re practically finished. Yes, it was that painless.
Conclusions
This is a beautiful little kit that finishes into a beautiful little model in a short time; I finished this kit in a power-building session that lasted less than four hours. As for the claim on “advanced modelers,” don’t let it scare you, this one is a great model for those who have a couple of kits under their belt and want to embark on their first short-run kit. Despite the rather paltry retail of $18, I wholeheartedly recommend this kit to all those squinting 1/72ers like myself who want to really astound their peers. Fully assembled, it almost fits on a quarter, and it’s a really great addition to a diorama as well.
My sincere thanks to Squadron Mail Order for this review sample!


