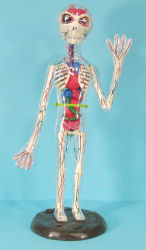
Lindberg Transparent Roswell Alien Build Review
By Michael Benolkin
| Date of Review | June 2008 | Manufacturer | Lindberg |
|---|---|---|---|
| Subject | Transparent Roswell Alien | Scale | - |
| Kit Number | 76014 | Primary Media | Styrene |
| Pros | You just have to get one of these! | Cons | |
| Skill Level | Basic | MSRP (USD) | Out of Production |
Introduction
There I was, minding my own business and working on a project on my bench, when my wife comes into the workshop to ask a question and instead spots Lindberg's Transparent Alien kit. After the in-box review of the kit (look here), I had set it aside for a quick-build and quickly forgot about it, until that moment...
After getting my current project to a point where it needed to dry anyway, I pulled out the transparent alien kit for another look. Just like in the review session, the kit appeared to be a quick build, so once again I spilled its guts on the bench and started in.
The kit is really comprised of three logical assembly phases. The first phase deals with the skeleton, which is clearly inaccurate if you've seen the latest Indiana Jones movie - those bones should be clear. On the other hand, if this is an Asgard, these bones are probably close enough for government work. If you're wanting the Roswell gray, well you'll have to really get into some government work to get to those details.
Most of the bones are molded in halves, and I used Tamiya Extra Thin Cement to assembly each of the bones. After cleaning up the seams with a fine file, I installed the vinyl hinges that serve as joints to assemble the skeleton. The skull (or whatever that is) also comes in halves and encapsulates the brain (or whatever that is). The brain, as well as the organs, are all pre-colored vinyl parts, which leads us into the second phase.
In this phase, the skeleton parts are styrene and are assembled with liquid cement. In this phase, we're assembling the vinyl organs, and here we use cyano and some 'Zip Kicker' accelerant. First, the eyes are inserted into the corresponding holes on the front of the brain (or...never mind). Next the brain halves are assembled and Zip Kicker finishes that job. The skull halves encapsulate the assembled brain and are cemented together.
Note: Like most of the 'Visible' kits in this series, the models are usually not glued together so you can take the body apart and reassemble it again. I really don't have any desire to 'play' with this figure - it will be a novelty on the shelf, so I am glueing everything into place.
The internal organs theoretically will press-fit together and then stay inside the clear body shell. I tried that once and gravity had other ideas. That's when I decided to glue these organs together and onto the mounting stubs on the spine. The instructions are a little vague on which organ goes where, but a little fiddling around soon reveals the solution to this puzzle and I cyano the applicable join points together. These subassemblies are then cyanoed onto their spine mounting tabs.
The base of the skull has an interlocking tab to mount onto the spinal column and while I was tempted to glue this into place, the weight of the assembled skull is too heavy for that joint to handle glued together. So now we try another dry fit of the skeleton into the clear body shell.
The skull is trapped snugly in the clear head, so there isn't a problem with the spinal connection. I laid the rear of the clear body out, installed the skull, then carefully laid out the skeleton. The vinyl joints allow free movement of the arms and legs, so you'll have to carefully align everything to get the body shell to close properly. With a little fiddling, the body halves do go together snugly, and inserting the tabs at the bottom of the feet onto the stand, the visible alien stood erect for about 17 seconds - then gravity took over - again.
I glued the tabs at the bottom of the feet onto the base. Now we have a firm foundation. Next, I reloaded the skeleton into the rear of the clear body shell and got a good fit with the front half of the clear body shell. This time, I have my little friend a belt made of two cable ties to hold the shell together. Now the little alien can be handled without another 'gravity' event.
Conclusion
This was just a few hour project that was fun and required absolutely no painting. All of those colored organs are as they come out of the box. Ditto on the pre-painted circulatory system on the clear outer shell.
If you're looking for something different (and this definitely qualifies!), grab yourself an alien. My little ET was presented to my wife since she liked the kit so much.


