Lindberg 1/1 Transparent Bullfrog Kit Build Review
By Steve Causey
| Date of Review | January 2014 | Manufacturer | Lindberg |
|---|---|---|---|
| Subject | Transparent Bullfrog | Scale | 1/1 |
| Kit Number | 0301 | Primary Media | Styrene |
| Pros | Easy build | Cons | Some part locations confusing |
| Skill Level | Experienced | MSRP (USD) | $37.49 |
Build Review
Believe it or not, even though I grew up in the '60s I have never built a visible kit before.
This release of the Lindburg transparent Bullfrog was an interesting build. The kit comes in transparent green, beige and ivory styrene. It includes a complete skeleton, the visible bullfrog, and a juvenile bullfrog as well as a frog Life Cycle Display.
I approached this build not from a modeler's viewpoint but from a teacher's - meaning not having fancy paints or glues, just typical household hobby supplies. I used Krylon spray paints and white glue only and I followed the color callouts in the instructions. The instructions have 17 steps, some easier to understand than others.
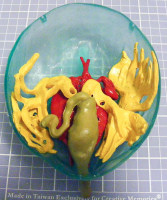
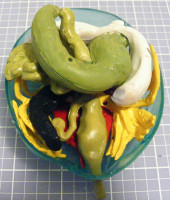
Assembly begins with the internal organs, most parts fit together well, the only trouble I had was when sub assemblies came together: some of these connections were a bit vague. Using slow setting glue helped here, as I was able to discover the way the parts fit together the best. I assembled all the organs, and then painted them. When dry I started to put them into the interior of the frog. Most parts have positive locators; with the parts that didn't fit well, I used the parts that did lock into place as guides. It was fun watching all the organs as they wound around each other and snuggled into place.
Once they all were assembled together, I test fitted the belly hatch and it all fit! The hatch closed down with no interference. All that remained was to add the hands and feet (flippers?). I had to get creative as the glue was slow setting and I needed a place to let the flippers dry. Guess what's for dinner honey? Then I assembled the separate skeleton. The skeleton is a stand-alone piece and does not fit into the body. I used paint pens to detail the life cycle display.
This kit builds into a very nice display you could mount it on a wall or place in on a table. I enjoyed this build and I recommend it for supervised child modelers or experienced builders.
My sincere thanks to Round2 Models for this review sample


