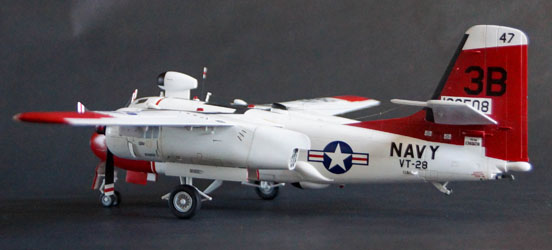
Kinetic 1/48 TS-2A Tracker Build Review
by Fotios Rouch
| Date of Review | March 2020 | Manufacturer | Kinetic |
|---|---|---|---|
| Subject | TS-2A Tracker | Scale | 1/48 |
| Kit Number | 48040 | Primary Media | Styrene, Photo-Etch |
| Pros | See text | Cons | See text |
| Skill Level | Experienced | MSRP (USD) | $39.99 |
Build Review
Taking a break from Vietnam subjects and I decided that it was time to build an early model Tracker. The Corona virus has us all cooped up (and for a good reason) but gives as time to be with loved ones and spend more time together but also lets us do more modeling! I remember what I built at every crisis of national or personal life. This will be the Corona Tracker. I had the Kinetic kit and every Tracker related accessory I could think of. The Kinetic kit has a lot of parts to do different early Tracker variants but no decals or instructions for an A-model variant for example. I really wanted to do a Tracker with the parrot beak engine nacelles and I wanted a white/red scheme. The TS-2A had the scheme I was looking for but I would have to make my own decals. Easy, since it would be just the black serials and letters.
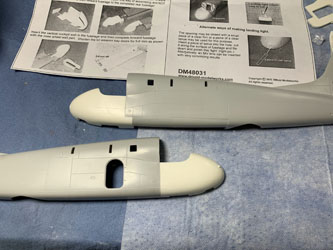
I started by reading up the Tommy Thomason Tracker Part One book and the Squadron book that had a picture of a TS-2A in the scheme I was looking for. Reading the Thomason book showed me all the mistakes of the Kinetic kit plus a few that were not mentioned in it. I had a lot of accessories to use and decided to use many but not all. The DMold forward fuselage was a must for fixing the shape of the Kinetic kit. The DMold engine nacelles are great but they are for the E variant not applicable here.
The build started by cutting of the plastic and adapting the DMold resin forward fuselage. Do follow the instruction and adapt the resin to each side and do not build the forward fuselage as an assembly and try to plug it to the plastic later. The resin is flexible and will help you when closing the left and right sides to line things up properly. Still, lots of testing and dry fitting will be required before committing plastic and resin to glue!
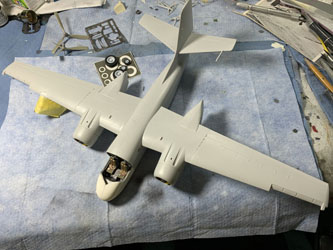
I used the Eduard photoetch parts that look great but do not match the TS-2A configuration that had no gear for the ASW role. Little will show after all is together and canopy is on so I took some artistic license here.
I used the Quickboost propellers that look so much nicer. I used the Quickboost wheels that are pretty but of the same too large diameter as the kit ones. I used the Quickboost Cyclone engines that look more detailed but need valve rocker rods to be added. I needed thinner styrene rod but I was out and the hobby shop was closed due to the virus and I ended up using a slightly different diameter that is too thick. I might use it as an excuse one day if anybody notices!
The search light dome comes empty which mind boggling as it looks ridiculous and they should have done something about it. Sadly, nobody makes a clear resin or vac dome cover and kit one is too short.
The engine nacelles are handed, repeating the same mistake as the E Kinetic had. I engraved mine to make the left and right nacelle look the same.
The kit wings are really made to be folded and need work if you want to pose them extended. The wings fit very well to the fuselage leaving no gaps.
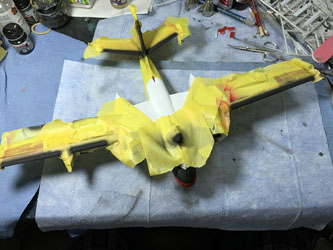
Work on the Tracker continued with laying down the white gloss paint and insignia red.
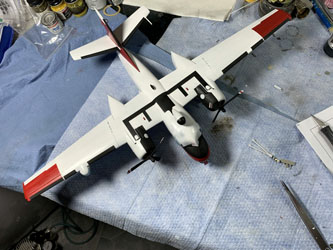
Next, more masking went on and the black anti-icing boots were painted as well as the black walkways which were thinner and not gray for this scheme as the kit decals.
While the paint was setting, I started work on the decals. I chose to do the scheme and marking as on page 17 in the In Action book. The decals were done on my inkjet printer.
The Tracker received its finishing touches to include a semigloss coat and some light weathering. Got the rigging done with wife's hair, a very complex affair. Not removing her hair but figuring out where all the aerial attachments went! Last, I unmasked the clear surfaces and scratchbuilt the windshield wipers. Things I could have done differently.
The TS-2A was a twin engined trainer for the Navy and as such it was gutted from all mission electronics. Most did not have the searchlight pod at all. Some had it but it was hollow. Mine has the search light and I am pretending that it was right before it was removed. Also, the pylons were not necessary but in some TS-2A pictures you can see them. I liked the Eduard prepainted photoetch and used it but it is not quite right for a TS-2A. Most TS-2As did not have the overhead radome but this one did in the picture. Maybe it was removed later.
All in all, this was not a very easy build with some fit issues and many inaccuracies. No excuse today with all the on-line references and myriad of pictures. I am happy with my trainer Tracker and one day I would like to build an early sea-blue Tracker as well.


