Kinetic 1/48 EA-6B Prowler Build Review
by Fotios Rouch
| Date of Review | February 2023 | Manufacturer | Kinetic |
|---|---|---|---|
| Subject | EA-6B Prowler | Scale | 1/48 |
| Kit Number | 48022 | Primary Media | Styrene |
| Pros | See text | Cons | See text |
| Skill Level | Experienced | MSRP (USD) | $39.99 |
Introduction
For aircraft history and an in-box review, look here.
I bought this kit as soon as it was available in the US since this is an important subject for my US Navy model collection. I have the Monogram Prowler as well, but this new kit took precedence. This is an early effort by Kinetic with thick sprue gates, so-so plastic, variable depth and width panel lines and soft details. They have come a long way since.
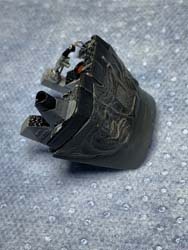
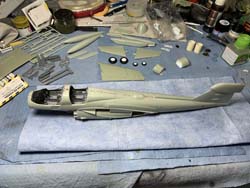
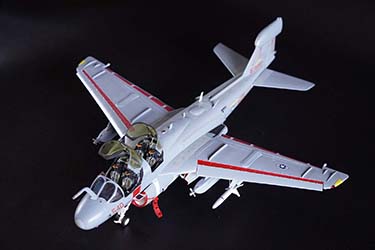
Since this model has been out for a long time now, a lot of aftermarket stuff is available for it. I started work with the AIRES resin cockpit and the necessary surgery to get it to fit inside the plastic fuselage. Work is required here but not as much as with some other similar projects. I added plastic support around the cockpit so when everything was buttoned up it would stay secured in place. I also extended a bit the front portion of the coaming so it would tuck under the front of the fuselage just in case there would be a visible gap after the windscreen would be in place. I also installed the resin front wheel well by Wolfpack which is done in four main pieces and is easy to paint prior to assembly.
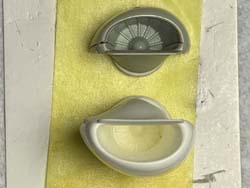
The kit intakes leave gaps, are shallow and are missing the intake lip panel line. The DMold intakes are great with no seams and nice depth. Unfortunately I did not plan well and with all that other resin inside it looked like there would be interference so I chose to save them for my next Prowler and tried to make my own poor approximations.
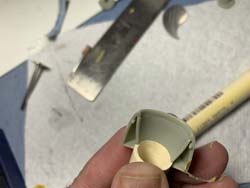
While all that was going on, I was also experimenting with tinting the canopies. I made several attempts with Tamiya clear tinting colors and with food coloring mixed with Future. The good thing is that ammonia removes Future and another experiment can be executed. I think I have settled with Future, yellow food color and a final spray with Gunze clear gold (GX111). I’ll let it sit for a while and if I don’t like it in a few days, I will try again.
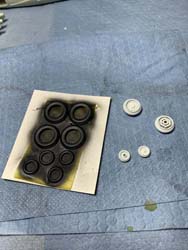
The wheels are easy to paint in stages. I painted the halves first and after assembly and light sanding of the seam, I sprayed them one more time with tire black mix.
The fuselage halves and all the innards went together well with little putty applied here and there.
Work continued on the Prowler with the wings coming up next. I was a bit disappointed with the fit and after some advice I went ahead and got a recent release of the Kinetic Prowler to see if anything had improved. Sure enough, there are new sprues for the wings, and it makes a big difference. I saved my old wing parts as I will do a Prowler with folded wings as well.
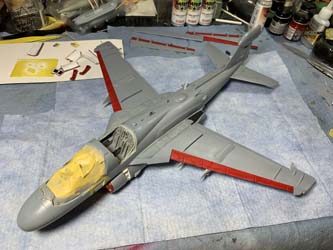
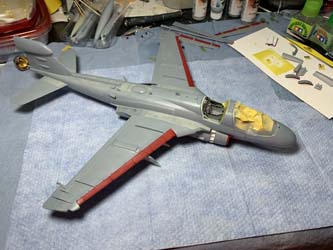
Flying leathernecks makes resin replacements for the top wingfold covers and it makes life easier as the ones in the kit are not good at all. The Quickboost resin aux intakes are a nice to have addition as well since they are much cleaner than the plastic ones. I still spent some time to join the wings to the fuselage and avoid ugly seams. I also worked on the antennas under the forward fuselage based on pictures of the era I am modeling. The wing tanks need work too. The tool could not perform well at the tank joints and the detail is soft and incomplete. I scribed the detail and although it is not perfect, at least it is there.
The Mr Paint colors look really nice and spray great. The camouflage pattern on all Prowlers differs a lot in the details from date to date and squadron to squadron. I chose a specific example from the PrintScale decals set and chose the relevant photos (circa 2008) from the web. This is a pretty clean plane and a well maintained Garudas example.
To do the wing walkways I first sprayed very lightly thinned mat black Testors paint at high pressure, so it created a rough surface as it halfway dried before hitting the plastic. I then sprayed the gull gray paint over it so it too looks rough.
The walkways were completed with a coat of FS 36081 and a coat FS 36440 in various opacities that went over the rough black paint underneath. I might touch them up more at the end with pastels.
The nose tip differs a lot in painting from airframe to airframe and from different times and depot phases. The one I chose to do had a glossier small round tip and the only way to do that is to mask with a soft round mask. As I was scrounging around, I remembered the old Black Magic vinyl masks from Meteor. They are still in great shape, and I carefully used a wheel paint mask to do the job. After the spraying was done I carefully put the mask back in its set and put the masks away.
Next the landing gear went on with some minor hydraulic line detail added.
I used the Montex masks for the clear parts which went on nicely on the inside and the outside of the canopies. Remember that Montex does not offer the little triangular mask that is at the top portion of the windscreen and between the two front clear panels.
Lastly the stores went on their pylons and now it is time for a clear coat of Future and then the decals.
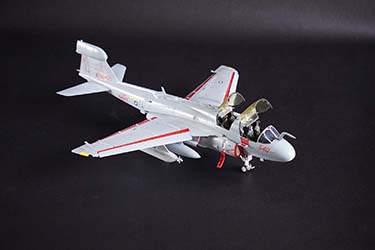
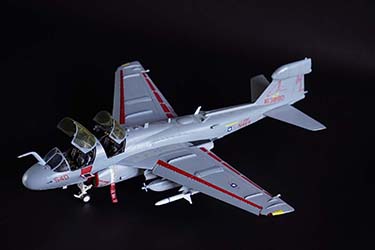
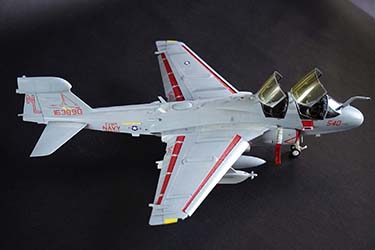
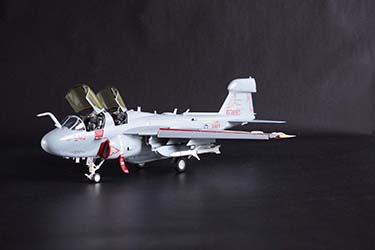
After detail work was completed, the model was sprayed with Future and decal work started. To do the 163890 VAQ-134 Garudas EA-6B I used the PrintScale decals and photos from herehttps://www.airfighters.com/photosearch.php?reg=163890. This airframe has received numerous camo updates in its life. In general, this Prowler was stateside and was not abused in respect to camo ware and tear. The PrintScale decals were okay quality wise but maybe a bit too matt. Research wise I have some questions but there is nothing else out there. Final semi-gloss coat went on and lastly the ejection seats went in and the canopies went on.
This model is tedious and takes time to complete and it definitely better than the Monogram kit but not as good as the later Kinetic releases. Experience is required.


