Italeri 1/48 Wessex HU.5 Kit Build Review
by Michael Benolkin
| Date of Review | September 2012 | Manufacturer | Italeri |
|---|---|---|---|
| Subject | Wessex HU.5 | Scale | 1/48 |
| Kit Number | 2720 | Primary Media | Styrene, Photo-Etch |
| Pros | Nice new-tooled kit of the H-34 series | Cons | See text |
| Skill Level | Experienced | MSRP (USD) | $41.95 |
Background
For some background of this subject and a look at this kit out of the box, look here.
The Kit
I've been looking forward to the new kits coming of the UH-34 and Wessex, so when we looked at this kit earlier in the week, I was interested. Once I finished the Trumpeter 1/48 MiG-23M quick build, I was wondering which project would be next and there was the Wessex. As I looked over the kit and instructions, I found myself starting the pre-painting process and before I knew it, the project was underway.
The Build
As with any good aircraft project, construction starts in the cockpit, or in this case the flight deck. With all of the parts pre-painted, it was simply a matter of painting a few details and gluing it together.
Next comes the main cabin and since I was doing the Falkands War aircraft, clearly web seating would be needed to shuttle troops between the ships and shore.
Atop the main cabin is the transmission system which translates engine torque into rotor RPM. Since I didn't know at the time how much would be visible after assembly (not much as it turns out), I took a little time in here.
The instructions were a little vague on how to mount the main cabin ceiling to the rear of the flight deck bulkhead and in hindsight, the flight deck buikhead needs to angle rearward more. It took a little trial and error to get this all to come together.
The interior subassembly fit perfectly inside the fuselage halves and the tail rotor shaft was added per the instructions. The main cabin windows were installed and the indicated holes that are flashed over on the fuselage halves were opened per the instructions. The fuselage halves were glued together and the separately molded fuselage bottom was installed.
Next is the nose section and this is where Italeri could have done a better job. The drooped snout of the turbine enclosure was made from four main parts and I think this would have been far easier had these been done as two halves instead. The two nose halves plus the chin and the intake subassembly (which is another four parts) all come together and really don't fit together very well. I cemented the parts together, clamped them into shape, the used Mr.Surfacer 500 to fill in the gaps. When the filler had dried, the nose was treated to some wet-sanding and another treatment of Mr.Surfacer 500.
The instrument panel is next and this is a blank part that you can simply apply one of two styles of decal instrument panel and then optionally overlay a photo-etched instrument panel. I didn't pre-paint the blank panel, so I applied a quick coat of Testors Gloss Clear Lacquer and when dry, applied the black background instrument panel decal. The photo-etched front was painted and overlaid onto the decal. The photo-etched panel was simply glued into place by applying Future Floor Wax through each of the instrument faces.
The completed panel and glare shield were installed into the nose section per the instructions. The nose was installed on the fuselage and not it is starting to look like a Wessex.
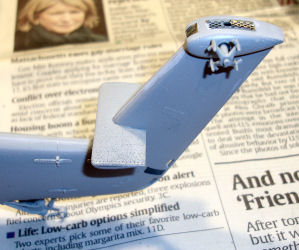
The kit provides a number of photo-etched screens to replicate the details of the full-scale subject and most go into place without any problems. A few up the the tail went into openings that weren't really squared but I glued them into place and filled any gaps with Mr.Surfacer 500 and sanded the area flush.
Painting and Finishing
It was time to close up the airframe, mask the windows and paint the base color, which in this case was Dark Green. Since there aren't any window masks available for this kit yet, I decided to try a new technique. I usually cover the windows with Scotch Magic Tape and trim the frames with a sharp X-Acto knife. This time I pulled out some Mr.Finery Slit Masking Sheets from Mr.Hobby and create my own window masks. If you've used Eduard window masks, you know that on larger windows these masks only provide the window outline and you have to fill in the middle with a liquid window mask. These Mr.Finery strips are yellow tape and I simply framed in each window and trimmed them to fit. When the windows were all framed, I filled in the centers with liquid window mask and we were off to the paint booth. You can see here the airframe with the base coat.
Here'e the airframe after a coat of Testors Clear Gloss Lacquer.
The decals were added next as the warning surround for the exhaust ducts would be a challenge to apply after the ducts are added. The Falklands aircraft had a simple set of markings but was still an eye-catching scheme. When the decals were dry, they were sealed under another coat of Testors Clear Gloss Lacquer.
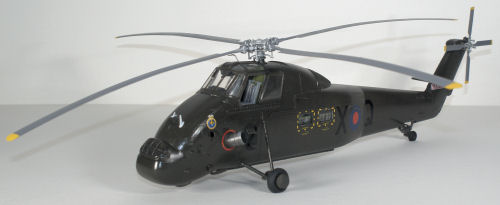
The exhaust ducts were cleaned up and painted with Alclad Steel with an overspray of Jet Exhaust. The main and tail rotors were assembled and painted and by that time, the airframe was dry and ready for the final steps. First, the window masks were carefully removed from the windows and this new approach (for me) worked better than I had hoped. The rest of the small details were added and the project is completed!
Conclusion
From start to finish this project took less than two days. It was intended to be a relaxing build and this was indeed a very relaxing project. There were a few challenges but what fun is a project if you can't apply some of your hard-earned skills or try out some new ones? There were certainly no show stoppers in the project and if I had taken longer on the build, I'm sure I could have created a contest contender with the nice kit. Bring on the UH-34!
My sincere thanks to MRC for this review sample!


