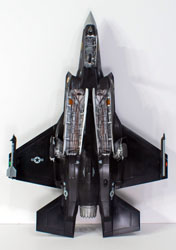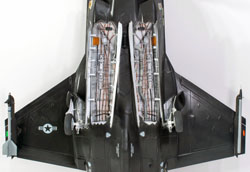
Italeri 1/32 F-35A Lightning II Kit Build Review
By Michael Benolkin
| Date of Review | March 2018 | Manufacturer | Italeri |
|---|---|---|---|
| Subject | F-35A Lightning II | Scale | 1/32 |
| Kit Number | 2506 | Primary Media | Styrene, Photo-Etch |
| Pros | Nicest F-35 kit in any scale to date | Cons | See text |
| Skill Level | Experienced | MSRP (USD) | $119.00 |
Build Review
For a brief history of this subject and a look at this kit out of the box, look here.
As with previous Italeri large-scale projects, the best place to start is the instruction book. This instruction book is laid out in Italeri's easy-to-follow style and it will give you a sense of the progression and what to expect. You won't find any surprises or challenges (so far) but it is clear from my examination that there is a lot of preparation work to do, so let's get started.
While my spousal unit was elsewhere, I washed the sprues with Dawn dish soap to remove any mold release agent and let the sprues air dry. Since I wanted to do some dry-fitting of the major assemblies, I started with the upper and lower fuselage halves. I removed the sprue tree inside the air refueling receiver opening on the upper half and the larger sprue structure in the weapons bay opening of the lower half. I used a file to remove any sprue tree remnants and flash before dry-fitting the fuselage together. The fit is excellent.
Aside from the cockpit, the model is painted in essentially two colors - outside is gray, inside is white. I used Tamiya Gloss White to paint all of the various interior parts, intake trunks, weapons and wheel well bays, landing gear, door interiors, hinges, etc. Once the white had dried, I assembled the intake trunks as it consists of four parts and would be a potential fit problem but alas, it assembled with no problems.
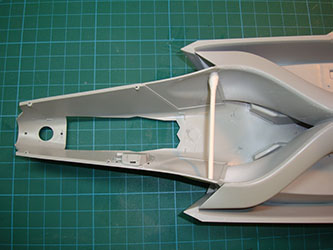
As I mentioned in my first-look at this kit, there is an access panel that goes between the weapons bays. Since I'm not going to do much with the engine, I glued that panel into place to add more rigidity to the lower fuselage half. I also glued the forward fuselage panels that have the distinctive intake bulge into place. Next, I dry-assembled the engine and it is held together by the fuselage cross-member. I placed the unassembled weapons bay shells into the lower fuselage half along with the intake assembly and the dry-fit engine assembly. No fit issues here.
With the upper fuselage half snapped into place (dry-fit), there are no fit issues and you can see only the rear-most section of the engine from here and that will be covered soon enough. This confirms in my mind that there is zero need to paint the engine because the neither the engine shell nor the compressor face will be visible once the fuselage is assembled. Only the afterburner chamber and nozzle will be exposed. The interior of the nozzle and afterburner chamber are pre-painted white and will be slightly weathered soon to represent the ceramic coating of the afterburner interior.
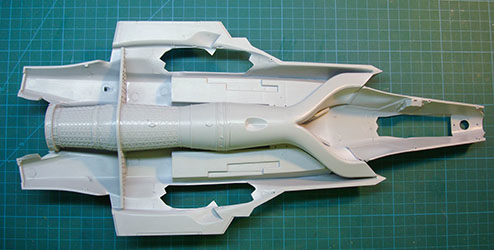
Here's the dry-fit fuselage assembly from underneath and the afterburner nozzle is fitted as well. Those huge weapons bays are white per the instructions, but they can't be that plain in appearance.
With the dry-fitting completed, here is the lower fuselage with the fuselage/intake inserts and the ventral access panel glued into place.
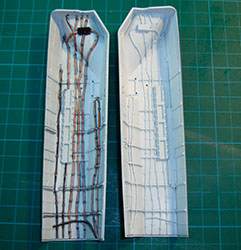
So here are the weapons bay shells pre-painted white per the instructions but without the rear bulkheads and other parts installed. Italeri did a great job with the interior details, but all-white?
After scavenging through the internet for weapons bay photos, I was taken by the copper-colored cable runs and black plumbing in those bays. While the examples I was seeing may have been flight test aircraft, I'm building an AFOTEC bird so I should be good-to-go. You can see what a difference a little detail painting makes inside those bays. I hand-painted the details with Tamiya and Gunze gloss acrylics before washing the key details with AK Interactive Gray Panel Line Wash.
Note: You do not want to use washes on flat paint as the wash will flow into the flat paint's textured surface. If you do paint with flats, use a coat of clear gloss or Future to smooth/protect the paint, and the gray wash will perform as advertised.
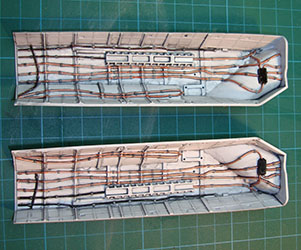
While in the image above, one of the bays was still all-white, here I've applied the same Tamiya and Gunze colors to the details. You can see in contrast to the bay on the top, there is no real depth to the newly painted bay below it.
Here I've applied gray panel line wash to the newly painted bay and added wash to the frames of the other bay. The beauty of these washes is that they cover many minor errors in your hand-painting and they do not require any precision in application (clearly from my work). As long as you've applied the wash to either a gloss finish or a gloss-covered flat finish, you can literally rub the excess away. Any stubborn spots are resolved with a Q-Tip dabbed in mineral spirits and resume wiping with a clean paper towel. These bays are now ready for the rest of the parts so we can move on.
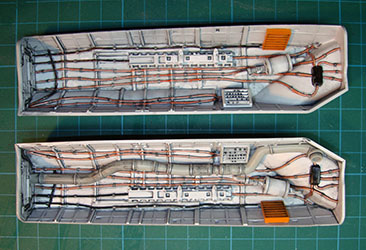
Here are the completed weapons bays. I jumped ahead to add the suspension system for the JDAMs included in the kit. This turned out to be a good thing as it took some experimentation to see where on the beam the units should go and allow for tail clearance on the bombs. I wouldn't want to do this when the bays are installed and the doors are all in the way.
The upper and lower fuselage halves have holes that require drilling which I opened up and cleaned up before mounting the weapons bays. The bays are mounted in the fuselage and we can finally move on to other tasks!
While I was dry-fitting the intakes, I noticed a mold glitch just outside each intake - a recess into the styrene surface that will need to be filled. I've already applied Mr. Surfacer 500 to the seams of the fuselage/intake inserts.
Here's another look at that mold recess that will need a bit of putty. No serious problem, just a little bodywork.
With the weapons bays installed, I finished up the engine and with the previously assembled and painted intakes, mounted them into the lower fuselage. The intakes required some additional fitting to get as close to a snug fit to the intake edges on the lower fuselage. I glued the lower and outboard surfaces in place and set the assembly aside to dry.
I used a Q-Tip trimmed to fit as a wedge to press the fuselage inserts out to meet the inboard edges of the intakes. Once the glue had cured, we're ready to move on.
Once again, I have the fuselage halves dry-fitted just to ensure that nothing is obstructing that fit. You see the various inserts in the upper fuselage are installed and the afterburner nozzle is also dry-fitted in place. It is nearing time to go back and finish up the cockpit.
Insert a several-month time gap here. Yes, the project was set aside because I was waiting to see what aftermarket solutions would be coming for a few key hurdles.
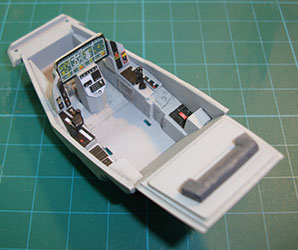
Back into the cockpit. Eduard released two color-printed photo-etched detail sets, one for the cockpit, the other for the pilot restraints on the ejection seat. As usual, the photo-etched parts for the cockpit are a bit over-engineered, but using selected parts rendered the look I was seeking. In addition to the over-engineering, Eduard sometimes uses odd colors in their color-printing process. Such was the case with the cockpit gray which has a tinge too much purple in the mix. They also opted to present the monitor displaying a notional status screen which means the aircraft (model) is powered-up. Since I'm posing the canopy open anyway, I opted to leave the display as-is, but it would be just as easy to spray dark green/gray over the screen and power it down again.
The first step is to remove the molded-on details on the panels before adding the photo-etched parts. The final result looks nice.
The pilot restraints are now using the ultra-thin steel process which makes these easy to pose and place on the seat.
The cockpit is completed and here's what it looks like dry-fitted to the upper fuselage half. There's still more painting and details to be done on and around the canopy sill, but that is coming up soon.
The wheel wells are painted and a gray wash applied to bring out the details. The landing gear struts receive the same treatment before the three wells are assembled.
The wheel wells are installed in the lower fuselage and set aside to dry. Given the mass of the model, I don't want a gear strut or well to pop loose after the fuselage is closed up.
While the wheel wells dry in the fuselage, it is time to assemble the wings and tail feathers. While the fit of the model is very good, Italeri did leave some gaps in some of the wing halves out under the wingtips and the inboard vertical stabilizer surfaces. They tried to make them blend into the surrounding scribed panels, but the gaps are wider than the scribed panel lines and there are no such gaps/panel lines on the full-sized aircraft. The solution is simple with a couple of applications of Mr.Surfacer 500 and some wet-sanding. These photos show the Mr.Surfacer applied and drying.
Here's that magic moment in any aircraft build when the model is standing on its landing gear. I've been wondering how the weight and balance would be on the model since no ballast is called out in the instructions. While I'll leave the radome off as long as possible, so far the model doesn't appear to have a tail-sitting tendency. I've painting the instrument panel coming and need to paint the rear deck behind the cockpit before gluing the upper fuselage half into place.
With the fuselage halves glued together, the wings glued into place and the design of the wing/fuselage joint sets the wing angle very nicely. Nevertheless, there is still some play in the joint and with the wing glued, you must keep pressure on the joint to minimize the gaps. No matter what you do, there will be gaps here, but with a little effort and the new Tamiya quick-setting liquid cement, the gaps were minimized. Here I have the F-35 in the HobbyZone USA PS01 aircraft jig to keep the loads off the landing gear while I work on those wing/fuselage gaps.
Here is a look at the upper surface of the model with a combination of thin strip styrene and Mr. Surfacer 500 applied to the seams. It took three applications to get the seams removed.
The upper surface of the model after the excess filler is removed and the surface is buffed smooth, ready for a base coat.
And the lower wing/fuselage joint received the same treatment.
I started to fit the weapons bay doors which will be glued closed with white glue to serve as a mask for painting. While glue is easy to clean up and doesn't harm the paint. I also added the horizontal stabilators and realized that the leading and trailing edge flaps have the same underside seam as the stabs which needed filling. Now that they're cleaned up, the flight control surfaces are in place and I'll get the rest of the doors glued closed, canopy glued closed, and the struts/exposed wells masked off so I can apply the base coat.
Insert a significant time gap here. I don't recall why I set aside the F-35 at this stage, but it didn't have anything to do with the model itself. The F-35 sat in a box next to the bench for more than a year. Due to circumstances beyond my control, even I was off the bench for a number of months as well, but in that time a number of new kits had been released and the F-35 was still there collecting dust. Then I saw a photograph.
It seems that the first batches of F-35s are not combat ready as they don't have the hardware needed to support the enhanced software systems. At the time of my initial building of this model, none of the F-35s had seen any action, and the early block jets were to be relegated to the training squadrons. Then someone had a good idea - use some of these 'surplus' F-35s as aggressors. Until a few years ago, the Fighter Weapons School at Nellis AFB had two aggressors squadrons - the 64th AGRS and the 65th AGRS. Back in the 1970s-1980s, both squadrons flew the F-5E Tiger II, then they gradually transitioned to the F-16C before the 65th AGRS shifted to the F-15C as their aggressor platform. in 2014, the 65th was deactivated and their Eagles dispersed to other squadrons to offset a shortage of mission-ready aircraft. Plans are now underway to reactivate the 65th using the early-block F-35s to simulate Generation Five fighters like the J-20.
When I previously working on this build, I had acquired the different grays for the aircraft including the non-metallic gray of the RAM areas and the lighter gray of the dilectric areas. Then I heard from a friend working the program that Lockheed-Martin had started painting all of the aircraft surfaces with the metallic (looking) gray, and older aircraft were going to be repainted as well to simplify aircraft maintenance. In short order, examples of the newer scheme appeared with all three services, but even so, all of the F-35s in all three services and in international air arms are all the same boring metallic (looking) gray. It is deja vu all over again as this is the same thing that happened in the early days of the F-16 before the Belgians began painting special schemes on their aircraft. Remember the Diana schemes? So, the idea of an aggressor F-35A is a nice break from the norm...
I gave the model a thorough wash to get all of the dust off, then added the vertical stabilizers and removed the landing gear struts and the doors that I had previously installed. With the masking complete, it was time for some primer.
Here's the first coat of primer on the model. I've used a variety of primers over the years and since I primarily shoot acrylics these days, I am less than impressed with the available products out there. The Vallejo primers worked somewhat well, though they don't adhere to photo-etch and it left a somewhat grainy surface just like ModelMaster enamels. Last year, I tried a primer from Ammo by Mig that applies nicely to the surface, self-levels so even touch-ups are undetectable, and it works with photo-etch. Much to my surprise, the Mig primer isn't made by Mig, it is rebottled Badger Stynylrez primer and it is available for less with the Stynylrez label. I love the black and gray primers, but the white is a bit temperamental, but still better than the competition.
After the primer had dried, I found a few places where there was still a hint of a seam at the wing/fuselage joint as well as a few scars here and there. A simple bead of cyano and some wet sanding took care of the problem and the black primer was reapplied followed by a charcoal black basecoat.
Since I thought I was done shooting black, I reinstalled the landing gear. Once again the F-35 is standing on its own.
You learn something new every day... As you know, a good glossy black finish is almost as difficult as bare metal. While the final appearance won't be glossy, I need a good surface to apply the subject decals as well as all of the stencils. I applied a coat of Future, but it seemed a little odd that some parts of the model came out flat while others were glossy. When the Future had dried, I decided on a second (wet) coat to allow the Future to level on the surfaces. That didn't work, the result was orange peel. A little time was spent wet-sanding with 1200 and 2400 grit helped, but when I touched up the black and reapplied the Future, I was back to orange peel.
I never thought it was possible, but my bottle of Future had gone bad. Granted that I bought that bottle almost 20 years ago, but I have bottles of Tamiya and the original Alclad that are much older and still in good condition. Fortunately, I have the current Future equivalent and it does go on smoothly and levels. Even so, it was back to the sink for another wet-sanding session to remove any remaining old Future/orange peel and start anew.
The moral of this story is one of caution - if you use Future that is older than your underwear, you might also consider replacing it before you find yourself in a similar situation...
Since the primer was still in (relatively) good shape, I reapplied the base coat, and then went 'old school' on the model. I had a rattle can of Testors Clear Gloss lacquer and applied two coats. Mission accomplished!
Since I've managed to destroy many decals in past projects because I'd grab the model to reposition it for the next decal, I mounted the F-35 back into the jig. Now I can move the jig around as needed to apply decals. I'm using the Furball Aero-Design's F-35A sheet for most of the markings, though they didn't provide the air refueling stencil, so that came from the kit's sheet. I applied the Italeri air refueling guide stencil and was disappointed that the decal was brittle. The Furball decals go into place with no problems and don't even require any sort of setting solution.
With the upper stencils in place, it is time to work on the port side of the aircraft. I am a bit amazed at the contrast of these decals against the black surface. These decals would be dark against the stealthy gray used by the regular F-35 fleet.
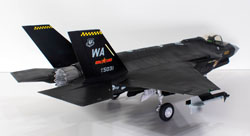
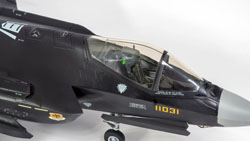
Once again, the majority of these decals are from Furball Aero-Design's F-35A sheet though I used the spare numbers to render 11-5031. The aggressors use the last two digits of their tail number for their 'bort' number, but since I haven't seen what they would do for a PLAAF/PLANAF bort number, I turned 11-5031 into 11031 on the nose. The tail codes also come from the Furball sheet and the bort numbers and Chinese markings on the tail come from Kitty Hawk's 1/48 Su-35 kit. To complete the look, I used Speed Hunter Graphics' 1/32 F-15 sheet to get the 65th Aggressor, 57th Wing, and the yellow checker bands.
This decal session ended up taking several weeks as I had almost finished the port side of the aircraft before it was time to pack and travel to the IPMS National Convention in Chattanooga. That was a fun trip! Once we got back, it took a little time to get back into the project again. With a little work, the remaining markings and stencils were applied to the airframe. Once any water marks or other remnants were cleaned off the surface, I applied another wet coat of Testors Clear Gloss Lacquer to seal the markings in place.
Here is where my skill level recommendation went from basic to experienced. If I hadn't spent so much time painting the details inside of the weapons bays, here is where I'd follow steps 18-19 to pose the weapons bay doors closed. Instead, steps 20-25 painfully try to illustrate how to install these doors with the numerous hinges and sub-doors. While the full-scale aircraft is even more complex, the maintainers have better illustrations plus training to handle this complexity - the average modeler isn't going to find this process to be enjoyable. Even with careful assembly, there isn't a good way to visually align the hinge mounts where they attach to the weapons bay walls and in fact, I had to slightly bend a few doors to even get them to align. In the end, no amount of liquid cement was going to work and I switched over to cyano. Problem solved. The part that took the most time was mounting the hinges and sub-doors on the inboard sides of each weapons bay. While this appeared simple, there is an error in the instructions that show the sub-doors mounting to the upper attachment points of each hinge rather than the lower points. The main (large) doors attach to the upper points, and it took some time and fiddling to figure out what was supposed to go where. The photo below shows the inboard weapons bay doors and nose gear doors installed with the remaining doors waiting their turn.
While the kit's wheels are okay, I opted to try the ResKit 1/32 F-35A wheels which have their hubs cast separately from the tires. I shot the hubs with gloss white and the tires with Rubber Black.
Here's a look at the underside of the model with all of the doors installed as well as the resin wheels. After all of the fun with those doors, a part of me wants to tell you "don't try this at home!" After taking this photo, I started looking at reference photos for the remaining details in this build and that's when I saw another error in Italeri's instructions. The kit has you install the forward main wheel well doors open and when the F-35 is simply parked, those doors are closed. I removed those doors and reinstalled them closed. I also learned of a design bug in the kit - the axle shafts on the landing gear struts are far too narrow in diameter for a model of this kit's weight. Adding resin wheels only complicated things and sure enough, one axle broke. I simply drilled the shaft out of the resin wheel and drilled a corresponding hole where the shaft is mounted to the strut. I cut down a steel pin from a supply of simple clothes pins to length and with a drop of cyano, I had a steel axle in place of the thin plastic one.
The radome and afterburner nozzle and associated parts are now permanently installed and, in the photo below, I'm test-fitting the canopy before working on building up all of the details that go inside. You'll also note that the aircraft now has its matte finish - I used Gunze Aqueous Clear Flat. One really nice thing about using Testors Gloss Clear Lacquer over the decals, I can simply use Windex or similar medium to wipe off the model's surfaces before the matte coat, and if that coat had gone bad, wipe that off as well and try again.
You'll note the outboard pylons/missile rails in the photo above. While I don't know how the 65th Aggressors will configure their F-35s, I'm going to put an ACMI/TACTS pod on one rail and an AIM-9M on the other. While the AIM-9X has been operational for a number of years now, I have yet to see one used with the ACMI system at Red Flag. Ever since the mid-1970s with the introduction of the AIM-9L, the ACMI system has been programmed and fine-tuned over the years to simulate 'FOX-2' using the Lima/Mike and perhaps we'll see them add the X-Ray to that mix, but for now on this model, I'll hang an inert Mike on this aircraft.
I grabbed two AIM-9Ms out of my Kitty Hawk 1/32 RF-5E kit, built one as an inert AIM-9M while the other was modified into a TACTS pod. The ACMI/TACTS pods are AIM-9 airframes that connect to the host aircraft like an AIM-9, but instead of a seeker, warhead, and rocket motor, it has a small computer and transmitter that forwards data off the aircraft bus to ground stations around the range complex using a special data link. There are several different configurations of antennas on the nose of the pod, I simulated the simple antenna array using fiber optics that were inserted into pre-drilled holes and cyanoed into place. The AIM-9M and TACTS pod were mounted to the outboard pylons which were, in turn, mounted to the wings.
I masked the canopy and sensor pod that mounts under the nose and painted them to match the aircraft's scheme. The pod was glued into place and my full attention was turned to that canopy. The canopy bow consists of an arch of plastic that has a photo-etched frame laminated to it that adds structural detail and hand holds. This slips nicely inside the pre-molded slot inside the canopy and is glued into place. In the instructions, this is part of Step 41. In this same step, there is a rear canopy frame, a forward canopy defroster manifold, and a pair of defroster ducts that run inside either side of the canopy. According to the instructions, the defroster ducts go 'somewhere inside' the canopy but they do not elaborate. After some test-fitting, these ducts mount one end to the manifold and the other end to the rear frame. The ends of the ducts are not properly shaped and will require lots of test fitting and trimming to get them right. The sides of the tubes have hefty mold lines what will also require clean-up. After glueing in the manifold and rear bulkhead into the canopy, I added the defroster ducts but they still didn't mount correctly. When I test fit the canopy assembly to the cockpit, it no longer fits. I removed the ducts, found the canopy sort of fits, and proceeded to glue it into place using tape to help the canopy 'fit'.
This kit has some incredible detail molded in all of the right places. The vast majority of the parts and subassemblies go together without much effort. But as I detailed above, there are a few areas of caution to include the complexity of the weapons bay doors and the sketchy instructions in these areas, the canopy subassembly that has the defroster ducts go 'somewhere in there', and so on. Despite these little challenges, this was a fun build. While I did set the model aside for a variety of reasons half-way through the process, the appearance of the F-35 aggressor scheme concept for the J-31 got my attention and brought this project to the finish line. I did find the kits decals to be brittle and otherwise unresponsive which is a shame given that Cartograf is located in Italy (along with Italeri), but that's okay because using the Furball Aero-Design 1/32 F-35A decal set along with the Speed Hunter Graphics 1/32 F-15 sheet for the 65th Aggressor markings and this project is looking great!
My sincere thanks to Italeri SPA for this review sample!


