ICM 1/48 C-45J Expeditor Build Review
By Fotios Rouch
| Date of Review | December 2017 | Manufacturer | ICM |
|---|---|---|---|
| Subject | C-45J Expeditor | Scale | 1/48 |
| Kit Number | 48181 | Primary Media | Styrene |
| Pros | Best kit of the short-nacelled Beech | Cons | See text |
| Skill Level | Basic | MSRP (USD) | $49.99 |
Build Review
The ICM Expeditor is a nice little kit with good detail and light years ahead from the Battle Axe rendition. I do not care much about the short nacelle B version in the kit and after some interesting aftermarket parts came out I purchased the kit and all available accessories. The kit was started but was left in the stash together with all the included "investments". So as I was talking with Mike some time ago about starting and abandoning projects, I decided on a Mid-Year resolution! Let's finish all of the half builds lingering in various stages of completion! So here comes number one.
Important accessories for a later-version Expeditor are the Caracal decals sets (not sure what is still available), the Belcher Bits or Lone Star resin conversion and maybe all the Eduard and Quickboost accessories if you like. I went with Belcher Bits conversion, saving the Mike West parts for my next Navy Expeditor out of the Caracal set.
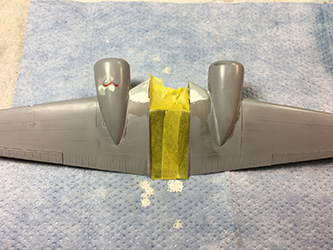
There is some of measuring, taping and cutting involved to get the old nacelles removed and the new ones on as well as the extended inboard leading edges. The fit of the resin parts is very good. I used a bit of automotive putty and Mr. Surfacer to get everything nicely blended. I polished the finished work and then enhanced and added more panel lines based on my Pima Air Space walk around.
The interior is spruced up by Eduard's self-adhesive set. I am not sure why there were no more seat belts included for all the seats. Also only one set of rudder pedals was provided. I like the dual instrument panel.
The interior was painted Interior Green but I am not sure if my Air Force model had that kind of interior and not blue instead.
The plastic came together well for the tail wings and rudders. No locating pins anywhere on this kit so care is required to align all parts, especially the fuselage halves that appear to be a bit warped in my example.
The C-45 landing gear system together with the engine support structure represent a complex assembly that needs careful and patient alignment. I also noted that in my example I had to trim the landing gear strut so it would fit as per the included image. Once all is in place it looks sturdy and will support the model nicely.
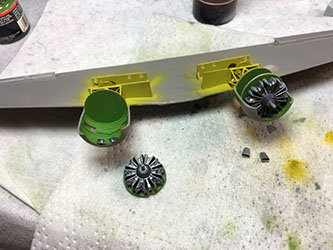
The engines did not seem to fit in the new half plastic and half resin nacelles. Not a big surprise as there was interference from the thick resin and the layers of cyano glue on the inner surfaces. The Dremel tool cleaned all that up but I also found out that the Aires aux air scoops on the inside of the nacelles popped out as I was finagling the overall system. Not a big problem they can be added again much later.
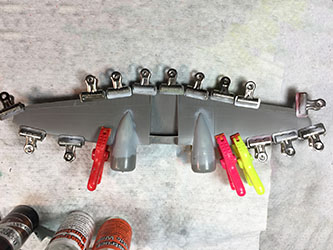
The wings went together with the help of lots of help and they came together pretty good once the glue set overnight. I did have a little problem with the fit of the upper and lower nacelles that could be solved only with cyano glue and accelerator.
The resin props look nice and go together well but the spinner cone does not fit well without trimming or filling.
The later models of the C-45 had wing root insert extensions and extended nacelles as we know. Unfortunately, I could not fit the resin leading edge inserts in a satisfying way. I had problems with the thickness of the resin and where I cut the wings. Maybe I cut the wings too deep, although I followed the panel lines. Another problem was that the lower resin fuselage extension did not match the plastic fuselage contours. Not sure where I went wrong. Just the same, I cut the resin with a razor saw in four pieces and managed an OK fit.
I still used putty and also rescribed lost panel lines. I added a few access panels on the lower resin side as the appear in the decal instructions, but I am not totally sure if they are actually totally factual. Lastly, before adding the interior seats, I test fitted the fuselage and the wings and it looks like I am mostly OK there.
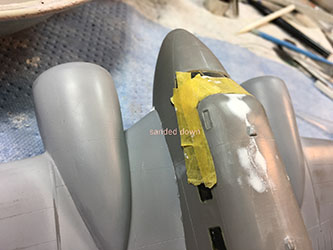
I did not like how much the top left cockpit window was sticking out of the fuselage. I decided to sand it down and have it flush to the fuselage surface. I used various sanding sticks and polishing cloths until it looked just right.
I masked all the clear parts and sprayed Mr Primer 500, polished it down and continued the process finishing with Mr Primer 1200. After I washed the model I used a clear base coat to prep the model for its first metal coat.
The metal coat was polished as well with 8000 and 12000 grit polishing cloths.
The last coat of Aluminum went down and now the model will be masked for the white fuselage top and a dull aluminum for the control surfaces.
The C-45G is finally completed. I used the Caracal decal set and the decals went down with no issues. The next C-45 will be done with the Mike West's resin conversion.
I took one photo of the ICM model next to the Battle Axe model that I built many moons ago.


