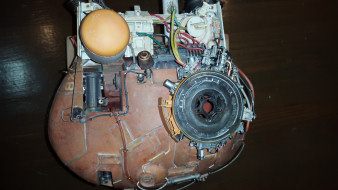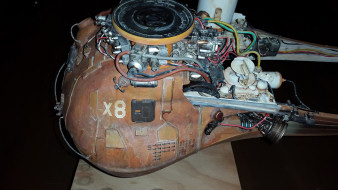
Hexamodel 1/20 Kelberos Ma.K. Kit Build Review
By Eli Raphael
| Date of Feature | August 2014 | Manufacturer | Hexamodel |
|---|---|---|---|
| Subject | Kelberos Ma.K. | Scale | 1/20 |
| Kit Number | - | Primary Media | Resin |
| Pros | Nice casting, unique subject | Cons | Nothing noted |
| Skill Level | Experienced | MSRP (USD) | $750.00 |
Build Review
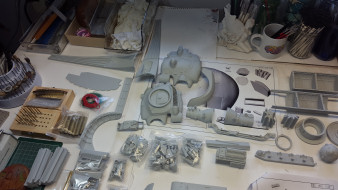
Hexamodel is located in Seul, Korea. After waiting more than a month for my kit to arrive (they cast them when the order is placed), it finally arrived. I was blown away with the box contents as you can see in these photos:
I started removing the extra resin found over the hatches in the hull.
To my surprise a lot of air bubbles were found that needed filling up.
After many hours dedicated on only this hatch I managed to fill the large holes with Red Bondo.
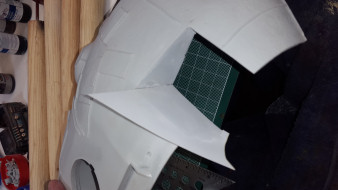
On the other one, the bubbles were so many and micro sized that I opted instead in covering the whole wall with polystyrene plastic sheet.
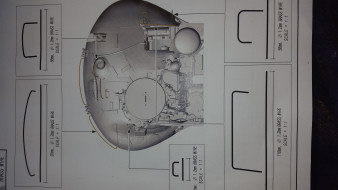
Beware of the 1/1 scale measurements that the plans have you cut the mesh provided! I cut the one that comes in the kit and to my surprise it is both short in height as in width. Also the mesh is a little thick and open spaced. I used a finer mesh instead as used by the florists to make arrangements.
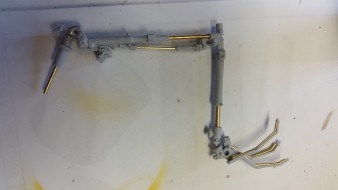
I decided to tackle the rocket launchers. Hexamodel provides the brass tubes already cut to size. I decided to give them a dark patina with "Blacken it".
Be careful on where you place the supporting rings, they have to fit in the provided notches of the mounting pylons! Sand and prime the end caps. Here is a photo of the finished rocket launchers.
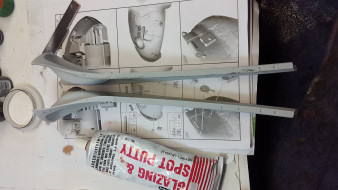
The main hull parts are glued and filled. Thinned the red Bondo with lacquer thinner to make it smoother and when almost dry applied a hand brush to its surface to create a light rough surface. I decided to tackle the two main spars too, together with the upper turret.
Before cementing the horizontal spars I decided to finish the interior nozzles and paint the spars' interior white. Some oil and fuel stains were randomly applied,
When paint was dry, they were glued in place. The joint had a lot to be desired so out came the lead wires to simulate weld joints.
Whole ship was primed with Gunze's Red Oxide surfacer.
After much deliberation I chose a Napolitano Yellow as her base color. A mix of Tamiya red, yellow and red brown was performed to achieve just the right shade. After dry, more yellow was added to the main mix to highlight raised areas and white also to the base color to achieve degraded paint.
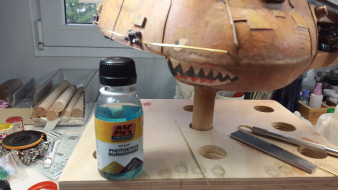
Oxidation was performed using Rustall. Being sure to thoroughly mix the bottle to get maximum effect. Let it dry and seal again with a dull coat.
Wanted to do something different with her look. Out came my Zotz decals choosing a shark mouth, letters, numbers and some mission markings.
After dry, a mix of acrylic sand color was prepared, diluted with a tiny bit of dishwater soap added to the paint. All recessed surfaces are given this fluid to achieve a dusty look. Sealed everything with Testors Dull Coat when dry.
Added another acrylic mix called "fuel stain" mas applied and went all over her. Sealed again. After one week of applying washes, this is how it turned out.
After removing blemishes and covering air bubbles, Parts were either primed with Gunze's Red Oxide or Black surfacer spray. Gilders Paste and Alclads were used to paint and finish them. I didn't seal afterwards as the metal would lose its finish.
I also decided to finish the turret's base.
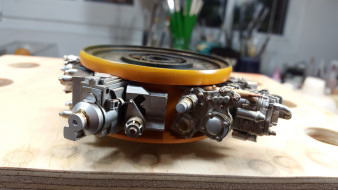
This image shows part of the finished small pieces together with the combustion tanks.
The horizontal tank finished having used some a/c data!
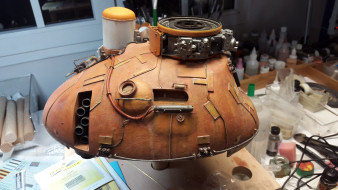
Fun starts when I start installing all the painted small parts on the hull. When set, I go over dirtying things a little. First the main equipment spar is fitted where the main tanks go. It is important to place the engine parts first!
The horizontal tank is secured with a pin. Don't want to be ejected while handling this beastie.
Oh my! Here's where the fun ended. They are deformed! If I only just use glue to the horizontal "stabilator" to fix it in place it wouldn't take the amount of pressure the main spars will place on this small piece.
Luckily I had some 1mm micro bolts, washers and nuts from in stock. Decided that with three sets on ea. side would suffice. There was no more room to place a fourth.
Here we have the horizontal stab in place. If I had to build this spaceship again I would glue this stab first to the spars and then join them to the main hull. Stab painted and with its accessories in place.
The photo below shows the diagram for cutting and bending the brass wire for grab irons. Using my hand piece I start drilling holes.
Using my orthodontic pliers I make the first bends. But wait! I remembered that the instruction diagrams were shorter than what in reality was needed. Using my compass to measure actual size I finish the second bend. Sure enough my bends are longer!
After bending and fitting them in place, a previous sanding was given so that the Blacken it liquid can be more effective.
Also here, cutting and bending was needed to fix the resin parts correctly to the wire squeletons.
Tubing and wiring comes next. After looking for what was available in my wire stash, several materials were used to achieve what I wanted.
The wire provided by the mfc. came short in sizes, textures and colors. There are several wire diagrams included in the instructions, but after a while I started wiring where I saw fit.
Finished hull:
Now comes the upper turret...
Instructions call out for the insertion of a thin wire wound around the supplied pins. Didn't like the one supplied so out came my orthodontic ligature wire. (65)
After priming in red oxide, it was given a first coat of Tamiya flat red. Red brown was used on the recesses and panel lines. Neapolitan yellow was then applied. Raised surfaces where highlighted with straight flat yellow. (66-68)
Wanted to try a new wash called Flory Models. I chose the rust shade applying it all over and letting it dry for a whole day (69). Later a humid cloth was used to wipe out the excess. Flat finish was used to seal everything afterwards. Again, flat yellow was sprayed to highlight the raised surfaces of the hull. (70) Sealed again with a flat coat.
Decided to apply a dust wash (71) but I over did it! I will take care of that later. The smoke grenade launchers were now finished (72) and cemented to the turret together with the radar antenna. (73-74)
The robotic arm received its hydraulic tubes attached with Artistic black wire. (75-76)
Time has come to mount the upper turret into the main hull. Also the TOW launch tubes are in place. I gave the turret a final shadow and highlight makeover before sealing everything with a flat finish.(77-80)


