HobbyBoss 1/35 M1070 Gun Truck Progressive Build Review
By Michael Benolkin
| Date of Review | September 2022 | Manufacturer | HobbyBoss |
|---|---|---|---|
| Subject | M1070 Gun Truck | Scale | 1/35 |
| Kit Number | 85525 | Primary Media | Styrene |
| Pros | Unique subject | Cons | See text |
| Skill Level | Experienced | MSRP (USD) | $144.99 |
Build Review
For a brief description of the M1070 Gun Truck or a look at this kit out of the box, click here.
It has been a long time since I've build a HobbyBoss kit, and I believe the last ones were quick-build (snap) kits. Since HobbyBoss is one of the brands that come out of a conglomorate in China that also includes Trumpeter and EasyModel, I figured I knew what was coming in this kit. Let's just say they are big fans of really tiny parts.
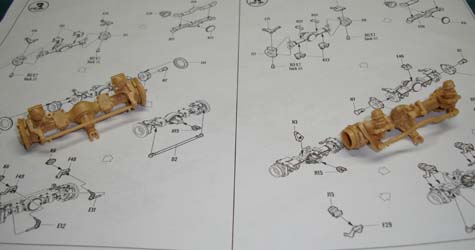
Construction begins in Step 1 with the basic chassis and despite the relative simplicity of the assembled frame in the photo below, that assembly consists of over 60 parts! Nevertheless, HobbyBoss has taken steps to ensure that the assembled frame will be square and parallel after assembly. Given the number of parts trees that contribute parts to this assembly, the kit designers want to ensure that you have a good system in place to locate needed parts quickly and it didn't take long for me to get that system together.
Step 2 continues on with another 20+ parts which brings the chassis up to readiness for the differentials coming in the next several steps.
Step 3 builds up the front axle which is detailed to be steerable but not quite enough to keep it from shedding parts. Note that the universal joint that comes out of the transaxle should not be glued until the very end of all axle installations as you'll have challenges getting them to line up otherwise.
Step 4 builds up the fourth (rear) axle, which is also (theoretically) steerable, but it isn't.
Step 5 builds up the trailing link arms for the rear axle and mount the assembly to the chassis along with the leaf spring suspension and the front axle.
Step 6 continues with the third axle and its trailing link arms.
Step 7 concludes this interesting array with the second axle and its traling link arms. Note that all of the drive shafts are also installed and with the various universal joints free, they can be pressed into place and rotated as needed. I applied liquid cement when all were in place. Each transaxle and its suspension took a little over an hour to assemble and install onto the chassis. The first one took a blit longer as it took time to figure out what the designer was thinking when trying to match up parts and put them together.
My sincere thanks to MRC for this review sample!


