Hawk 1/48 Westland Lysander Mk.II Kit Build Review
By Michael Benolkin
| Date of Review | March 2014 | Manufacturer | Hawk |
|---|---|---|---|
| Subject | Westland Lysander Mk.II | Scale | 1/48 |
| Kit Number | 0410 | Primary Media | Styrene |
| Pros | Simple construction | Cons | None noted |
| Skill Level | Beginner | MSRP (USD) | $17.49 |
Build Review
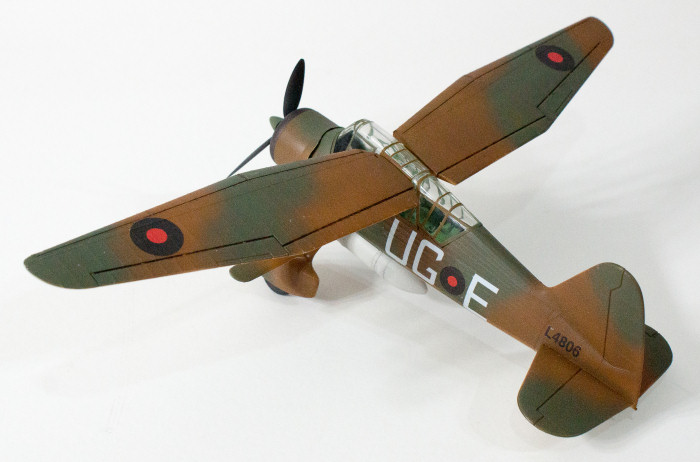
As I mentioned in my first-look at this kit, I remember building this kit many, many years ago. Since I had several tests I wanted to accomplish, I decided to build this kit and use it for some of these tests. I didn't take any in-progress shots of this build since there isn't much to the kit. The interior is basic, but I assembled it according to instructions and painted it with Italeri Interior Green. The fuselage halves came together and the cockpit transparencies were installed. There is a clear cap that is used to attach the two wings and this was kept separate until the end.
Much of the time spent on this project was simply masking all of the windows. I used Tamiya yellow masking tape and carefully cut the frames from the mask using a new X-Acto knife blade. Once the masks were in place, I sprayed the frames with the Italeri Interior Green as well.
The wing halves are assembled around that clear center section, these were clamped and set aside to dry. Again I masked the windows, removed the frames from the mask, and painted the frames with Italeri Interior Green.
I assembled the wheel spats and then took a Dremel and removed the area on the front of each spat where the landing lights would be located. These remained open until the final steps.
The rest of the aircraft was assembled according to instructions, though the wing subassembly and the engine/cowling were not glued into place until the end. The underside of the aircraft was painted with Testors Model Master Sky (Light) Gray followed by Italeri Dark Earth and Dark Green on the upper surfaces. The exhaust collector ring on the front of the cowl and the exhaust stack were painted Tamiya Bronze.
When everything was dry, the model was given a gloss coat of Future. The kit decals were applied and though they didn't include the requisite fin flash, I decided to keep this build straight out of the box. When the decals had set up, I gave the model a coat of Gunze Sango Aqueous Clear Flat.
I used thick cyano to close off the openings on the front of each wheel spat that I'd opened earlier. I built up layers of cyano and created lenses that conformed to the shape of the spats without sanding or shaping.
The final subassemblies were glued together and this simple kit turned out to be a fun project. What is nice about a project like this is that you can put aside most temptations to do corrections or super-detailing since you can start with the Gavia/Eduard Lysander for a project like that. This was an opportunity to evaluate a new homemade acrylic thinner, re-evaluate Italeri acrylic paints, and look at some of the adhesion problems that several of us have noted recently using acrylic paints.
If you're looking for a starter kit for your kids or something fun for yourself, you can't beat the price and as you can see, with some basic skills the model turns out very nice!
My sincere thanks to Round 2 Models for this review sample!


