Hasegawa 1/48 E8N1 Type 95 (Dave) Reconnaissance Seaplane Build Review
By Larry Horyna
| Date of Review | March 2016 | Manufacturer | Hasegawa |
|---|---|---|---|
| Subject | E8N1 Type 95 (Dave) Reconnaissance Seaplane | Scale | 1/48 |
| Kit Number | 19197 | Primary Media | Styrene |
| Pros | First kit of this subject in 1/48 | Cons | See text |
| Skill Level | Experienced | MSRP (USD) | $59.99 |
Build Review
Produced between 1935 and 1940, the Nakajima E8N1 was a mainstay reconnaissance ship launched seaplane for the Imperial Japanese Navy during the second Sino-Japanese war. With a total production of 755 aircraft, what became known as the "Dave" to the allies in World War II was also used extensively for dive bombing and artillery spotting before the outbreak of the Second World War. The aircraft saw limited service at the beginning of the Pacific War but was phased out of frontline service in 1942.
Hasegawa's new 1/48 'Dave' represents the E8N1 variant, although the only distinction between the E8N1 and 2 were the engines and no visible external characteristics were visible. So the kit can be built to represent a later 2 model with the appropriate markings. (For a look at this kit out of the box, look here). I opted to build mine with Hasegawa's aftermarket photo-etched set that includes the rigging and some nice extra detail options. This was my first attempt at using PE rigging so I was a bit apprehensive. Most kits I have seen with PE rigging did not look that good to me. But since the E8N had heavy flat wire rigging it seemed appropriate.
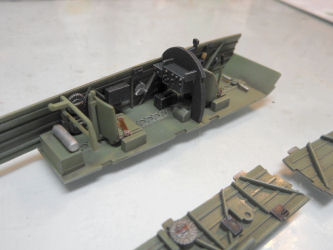
Overall construction is straight forward and posed no problems at all. The lower wing is very cleverly engineered with separate pieces for the curved wing root. The interior is fairly simple yet well detailed. Hasegawa's PE sheet came with seat belts but I found them very difficult to work with as the sheet is not brass but something much more stout (no doubt to keep the long sections of rigging straight). It does not anneal to make it more pliable so I used a set of Eduard color etched IJN belts.
The kit engine is very nicely molded and the PE provides a wiring harness. Again, this was a little difficult to use as it was not very pliable but because the wires were so thin it was easier to bend than the seat belts. Because the cowling is open in the back, I could not figure out a way to mask things off after it was all assembled. I painted after assembly. In fact, this was one of the challenges of the kit, most of the model was painted before major components were assembled. I'm not a big fan of doing for fear of mucking up the paint job that but the fit on this kit was superb so it actually worked out well.
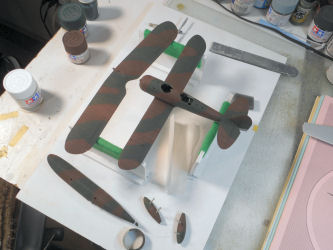
For painting, I used some of my own references to make Tamiya equivalents for the colors. The bottom was XF-76 IJN grey-green slightly lightened with XF-2 flat white. The top colors were pretty much out of the bottle XF-11 IJN green and XF-9 hull red. Since I knew I would probably need to do little touch-ups after assembly I figured it would be easiest to use stock colors out of the bottle.
The model was painted in the typical style I have come to like, pre-shading with XF-1 flat black followed by based colors and lighted base colors for highlights. I kept this model fairly clean. I may go back and do a little additional weathering later. The top colors were masked with poster putty secured with little strips of Tamiya tape. I find this method very precise (although a little time consuming) and very rarely do I need to touch anything up after removing the mask.
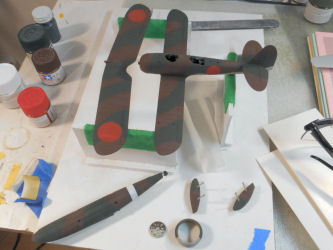
The lower wing Hinomaru overlaps a very pronounced aileron hinge bump that I did not want to deal with. I decided to mask and paint all of the Hinomaru. I actually had some pre-cut Eduard Hinomaru masks that were the right size for the upper wing. The fuselage and lower wing Hinomaru were done with Tamiya tape and a compass cutter. The only decals on the model are the tail numbers, data plate and rear gun deflection lines. I was pretty nervous about the lines on the horizontal stabilizer because there were one piece and that's just asking for a silvering nightmare. To my delight, the decals went on great. I'm sure it helped that I made sure to lay down a few extra coats of Future as well.
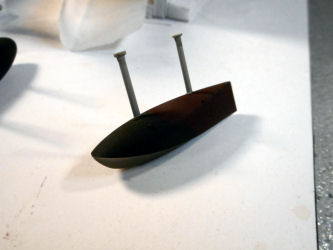
I followed the decals with an oil wash. I decided to wait to flat coat until I had the floats, cowling and upper wing attached as well as the PE rigging. I thought it would look about right to not paint the rigging and simply flat coat over it since it was steel. The outrigger floats and main float went on without a hitch. The upper wing was also a great fit. I used my biplane jig just to make things a little easier but to be honest, it's not necessary. Everything locked into place with no fidgeting. An interesting feature about the E8N is that many, if not most, did not have a rudder on the main float. The PE had a rudder so I used it. At first I was a little miffed that one would have to buy the PE set to have the rudder. I thought it was a standard item. However, I actually had a bit of a hard time finding photos of E8Ns with the rudder!
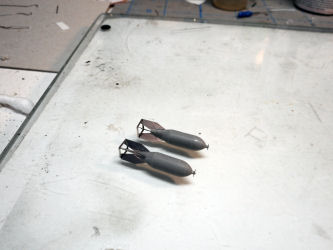
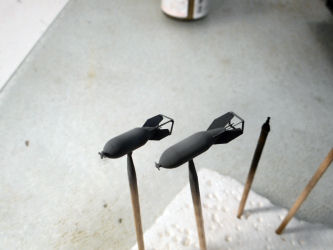
Also included in Hasegawa's PE are details for the kit's bombs. I will say, these made the bombs look much better but they are bit of work! I painted the bombs neutral grey with green tips and fin supports and a blue band just behind the mounting lug. This was standard during the Pacific War so that may not be correct for earlier but I thing single colored ordinance is boring looking!
Now to the PE rigging. I was most definitely skeptical about using PE for rigging. Would it sag? Would it look over scale? More importantly, if I bend it, can I get it straight again? The first two questions are answered with an emphatic yes! The third, well, I did manage to get a slight bend in one wire and I could not get it back to perfect, but it is hardly noticeable. In the end, I am happy with how this looks. But I don't think I'll use it again as I am sure that I have a few more grey hairs after doing this! Basically, I found three main difficulties working with the PE rigging.
Firstly, the cross lines on the outrigger floats and each side of the main float supports were designed as single assemblies which were attached in the center and you bent them into an "X". It's hard enough attaching one piece with two attachment points, but four was quite nerve wracking. It took me over 30 minutes to attach the two outrigger lines. The main float was even more dicey. The angle at which the rear section lines sit were pretty much impossible for me to work the "X" into. I ended up separating them and attaching each line one at a time. This was much easier. The tail rigging posed no problems and fit great.
The second problem I ran into was with the cross lines at the front of the main float. There is a small bump molded into the center of the lines to represent a reinforced balance for the lines. But when I bent the pieces to form the "X", the bumps did not line up in the center as they should have. I ended up separating these lines as well and grinding the bumps off (I use a hardened rubber wheel in my motor tool, which is a dental technician's hand piece, to clean up PE parts). I made the reinforced balance out of a drop of Testors clear parts cement and painted it black. The main float side rigging should also have these little bumps but they did not so I made them from glue as well. I think it would have been better for Hasegawa to simply leave them off altogether as you have to put a drop of something there anyway to fill them in.
The third little problem was mounting the main flying wires. There are no locating holes in the kit for rigging. The attachment points are a little weird. On the real aircraft, the rigging lines go into the wings through fairings. To represent these fairings, Hasegawa used the "sandwich" method to make the ends thicker than the lines. The problem is, these ends just sit on the wing and they really should not. Without any type of attachment point, I had to sit there and look at the whole business for a bit to try and figure out how to attach the lines without making a mess. The answer that worked out great was to use a tiny ball of dental sticky wax on the single point end of the line. That held the lines in place so I could adjust and secure the separate ends. Then I just carefully removed the was with a toothpick and secured the single end.
As an ex-dental technician, let me share this tip with you. You can buy dental sticky on eBay. A lifetime supply is about ten bucks (seriously, I have given a ton of it away at my local club meetings and I still have more than I can ever use!). You can put it on the end of toothpicks and you have your own little custom Grabstix (you know, those neat little things you can buy that cost fifteen bucks for five of them!).
The more difficult part of the main wires was fairing the attachment points into the wings. Again, I employed a little Testors clear parts cement and painted it the color of the wing where the fairing went into the wing. The end effect is not bad. I think it would have been much better had Hasegawa made the fairings out of injection molded plastic that you could attach to the wing and then use whatever rigging you want, whether it be their PE or some other material.
The last little hurtle were the two bracing rods that go in the center of the wing rigging. Unfortunately, the lines did not cross perfectly so that the rods would lay perpendicular to the lines. They were also very difficult to position as there was nothing to hold them. I used a little drop of future to get the area tacky enough to hold them so I could position them as best I could. I decided to go with straight (perpendicular to the main lines) even though they don't touch the lines exactly as they should. If I had them touching the lines they way they should, they would look very catawampus.
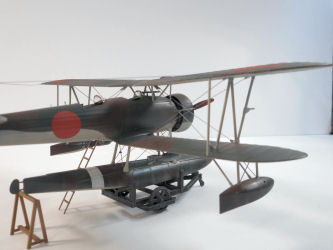
Once all rigging was on I flat coated the entire model with a mixture of Tamiya flat base thinned with 91% isopropyl and mixed roughly 50/50 with Future. I then added some of the last little PE details and glued the model to the dolly. I was also a bit disappointed that Hasegawa did not mention the you could/should add some weight inside the main float so the model would sit in the dolly. Instead, Hasegawa supplies a neat little sawhorse to hold the tail up. That's fine, but I think I would have preferred to add some weight. I didn't think about it before I glued the main float together and there is no "reminder" in the instructions.
One of the last details and probably the one I was the most skeptical about was the long single piece "Y" shaped antenna line. It actually works! I colored it with a magic marker but didn't really like the way it looked so I ended up painting it black. But it's actually straight and looks pretty good. Who knew?!
All in all, this is a great little kit. The PE rigging will test your patience a little, but I think it's actually worth it. All Hasegawa needs to do now is the venerable Aichi E13A "Jake" to replace the old toyish one from Nichimo and we would have the three major ship launched reconnaissance aircraft of the IJN in WWII! I'm probably asking too much, but man, it would also be great if they would scale up their 1/72 catapults to go with these!
My sincere thanks to Hasegawa USAfor this review sample!


