Hasegawa 1/32 Fw 190D-9 Dora Build Review
By Michael Benolkin
| Date of Review | April 2018 | Manufacturer | Hasegawa |
|---|---|---|---|
| Subject | Fw 190D-9 Dora | Scale | 1/32 |
| Kit Number | 08251 | Primary Media | Styrene |
| Pros | Easy build, nice details | Cons | See text |
| Skill Level | Basic | MSRP (USD) | $74.99 |
Build Review
For a brief description of this famous Focke Wulf and a look at this kit out of the box, look here.
While I made a New Year's resolution to tackle the various projects around here that are in varying degrees of completion, I find myself drawn to a number of projects instead that are on my 'bucket list'. One of those projects is the recently released Hasegawa 1/32 Fw 190D-9 kit in Gerhard Barkhorn's markings during his brief command of JG 6. You may recall the classic Hasegawa 1/32 Fw 190D-9 'Hi-Grade' kit from years ago, I built that model and thoroughly enjoyed the project, though some of my IPMS colleagues were quick to share all of the inaccuracies of my build. Being relatively fresh out of the Air Force, the Fw 190D was one of my first builds in years, and I still enjoyed the model enough to proudly display it on my shelf. When I eventually moved to fly-over country, the Dora didn't survive the trip, so it became one of the leading projects on my 'bucket list'.
This reissue from Hasegawa came just at the right time to jump on my bench. While this kit is a reissue, it isn't the same kit that I built more than 20 years ago. Hasegawa had retooled the kit to correct some of the inaccuracies, and from what I could gather online, the model is a relatively easy build. My original intent was to build this kit straight out of the box, but you know how it goes, I wanted to try a few things too. While the kit has a nicely detailed instrument panel, I was impressed by the Yahu Dora panel and wanted to use that in this build.
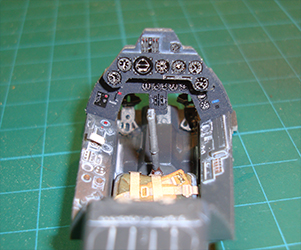
The Yahu panel comes pre-finished and only needs removal from its photo-etched carrier. The downside to the panel is that it doesn't work on its own - there is no support for the upper panel. The solution was to modify the kit panel by first removing all of the molded-on detail. Given the heavy relief of those details, I grabbed my Sujiborido Coarse File and with several swipes, I had the details on each level smoothed down to the surface of each panel level. The bottom of the kit panel had corresponding drops on either side of the upper layer, just like the Yahu panel on the left. I used a razor saw to remove those drops so the lower panel will slide into proper position on the Hasegawa part. You can see the resulting modifications to the Hasegawa part on the right. I used cyano to mount the upper and lower panels to the kit panel and set it aside.
The kit cockpit goes together easily, though I replaced the plastic rudder pedals with aftermarket pedals and added pilot restraints to the seat. In the images above, the Yahu-enhanced panel is in place after the cockpit is painted, weathered, and photo-etched parts applied. The rest of the model will be built straight out of the box.
One of the 'bugs' of the original Hasegawa Dora kit was in the wheel wells - the kit had completely enclosed wheel wells. The Dora had the forward portion of the inboard wells open into the engine bay to allow airflow out past the extended landing gear for supplemental cooling at low speed. You can see the rear of the engine from underneath and Hasegawa replicated that bay.
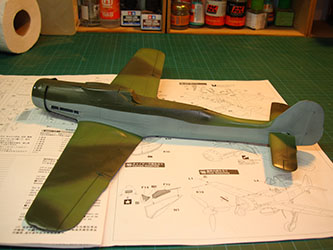
The cockpit was installed along with the engine bay insert into the fuselage halves and these were glued together. The tail section was also assembled and added to the fuselage. Since I had pre-painted many of the kit parts during the early stages of the build, I was able to get the wheel wells into the lower wing half, add the panel inserts for the mid-wing sections, and the upper halves of the wing. All of this went together smoothly, though a wee bit of Mr.Surfacer 500 will be required in various areas before primer.
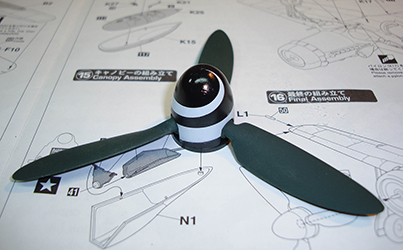
Since the propeller assembly was pre-painted earlier, I added the spiral decal from the kit's decal sheet to the spinner and assembled the propeller.
The cockpit was installed along with the engine bay insert into the fuselage halves and these were glued together. The tail section was also assembled and added to the fuselage. Since I had pre-painted many of the kit parts during the early stages of the build, I was able to get the wheel wells into the lower wing half, add the panel inserts for the mid-wing sections, and the upper halves of the wing. All of this went together smoothly, though a wee bit of Mr.Surfacer 500 will be required in various areas before primer.
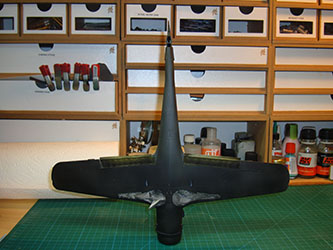
After masking off the cockpit and main wheel wells, I applied Ammo by Mig Jimenez Black One Shot Primer. This stuff is now my favorite primer as it goes into the airbrush straight out of the bottle, goes down smooth, self-levels, and dries almost semi-gloss. I've been using Vallejo's primer until recently, but it is higher viscosity, so if you want to apply it straight out of the bottle, you need more air pressure, and even so, it dries with a textured flat finish. After several other projects using this One Shot Primer series, I've never had any problem with masking tape pull-up. In a few areas that needed fixing after priming, I was able to reapply the One Shot primer and you can't tell where the repainted areas are located visually or by touch.
I read an article where the modeler was using a concept called "inverse pre-shading" where you start with black and apply the grays over the top. Mig had created a concept called "black and white" where you pre-shade all of the upper surfaces white, side surfaces gray, and undersurfaces black, to replicate the effects of sunlight. I decided to combine these two concepts and here you see that I've applied One Shot Grey to the panel areas of the model, but on the upper surfaces only, I've added a layer of One Shot White inside the gray. When you inspect the surfaces, you don't see the layering of the paint as with other products. One Shot Primer is good stuff.
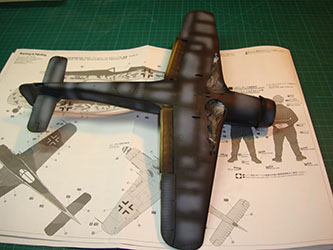
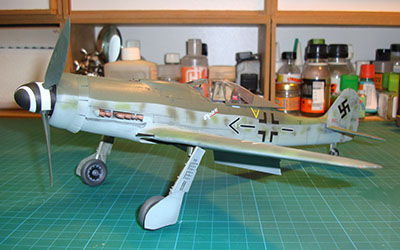
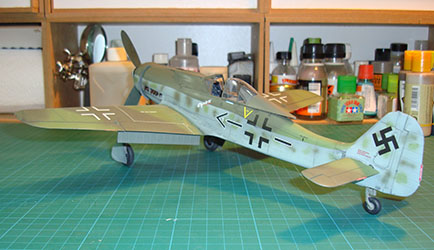
Here is Dora on her landing gear and the mottled camouflage is applied to the sides of the fuselage. With a good coat of Future on the airframe, it is time for decals.
After painting was finished and the decal process started, that's when I ran into problems - the constant maneuvering of the model to apply decals was going to damage the landing gear. The solution? Remove one arm of the PS01, create a tape sling around the horizontal stab clamp, and use it to cradle the model while I rotate it around to apply decals! No landing gear were harmed in the application of these decals.
Speaking of decals, I used a simple technique that I had used years ago. Instead of room temperature water to soak the decals, I use hot water. With room temperature water, it takes a while for the decals to soak off their backing paper, but with hot water, it is almost instantaneous. What's more, the decals seem more pliable and I laid them into place. The adhesive on the Hasegawa decals is quite effective and you need to get them as close to final position before letting go of them. I used a Q-Tip to work out any bubbles in each decal, then applied a light layer of Tamiya decal solution. The Tamiya decal solution does react to Future and you might panic when you see deformities in toe surface finish, but don't touch anything! Let it dry. In most cases, if you don't apply too much setting solution, the surface seems to heal and no sign of any problems remain. If you touch it during the reaction to the setting solution, you'll be doing some touch-ups.
With the decals applied, I gave the model one final coat of Future and after that dried, I applied neutral gray panel line wash to the model. Over the clear coat, you don't have to be precise with the panel line wash, and when the application is finished and dried, simply rub down the model to remove any excess wash. What is left is subtle but visible up close. If you want greater visibility from further away, use black panel line wash instead.
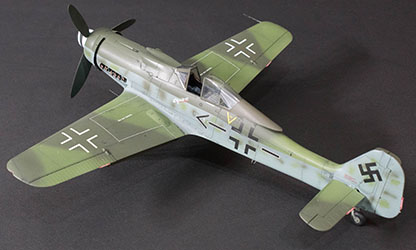
Since this was a cleaned-up aircraft to serve as a backdrop for Gerhard Barkhorn's photo shoot, I didn't bother with exhaust or gun smoke stains. Instead, I finished this up with an application of Gunze Aqueous Clear Flat overall. Finally, the masks were removed from the cockpit and canopy, the windscreen glued into place with white glue, and the remaining small details installed.
This was a fun build and one I can check off my bucket list. I suspect I'll do another at some point. As you can see, Hasegawa did a great job engineering this kit, right down to the fool-proof locators for the landing gear struts to replicate that unique stance.
Up-close, you can see the gray panel line wash on the airframe as well as the light gray panel line wash that was applied over the black and RLM 66 surfaces in the cockpit.
This kit was built with a bare minimum of aftermarket items: Yahu instrument panel, Eduard rudder pedals and pilot restraints. The rest of the model, including the decals, were all out of the box. Now that I know where a few of the minor glitches are in this build, I will tackle the next Dora with the assurance that there are no hidden 'gotchas' to ruin the project.
My sincere thanks to Hasegawa USAfor this review sample!


