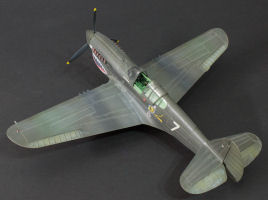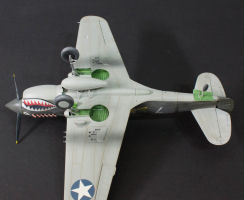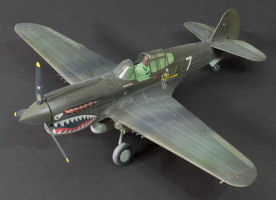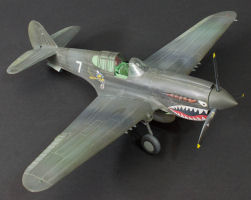
Hasegawa 1/32 P-40E Warhawk Back to the Bench
By Michael Benolkin
| Date of Review | November 2015 | Manufacturer | Hasegawa |
|---|---|---|---|
| Subject | P-40E Warhawk | Scale | 1/32 |
| Kit Number | 08226 | Primary Media | Styrene |
| Pros | Easy build, nice details | Cons | Nothing noted |
| Skill Level | Basic | MSRP (USD) | $79.95 |
Background
For a look at this kit out of the box and a brief description of the subject, look here.
The Build
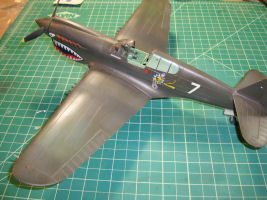
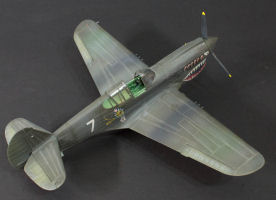
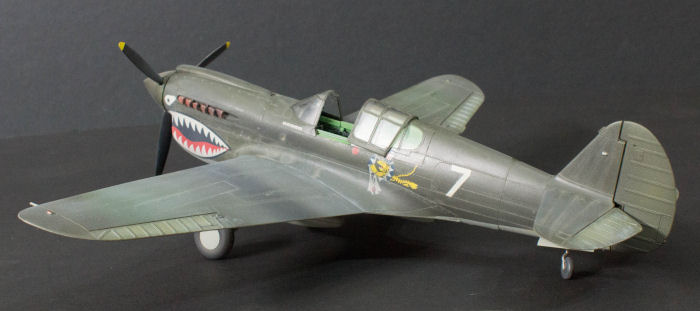
Three years ago, I wanted to see how well this kit went together and I was not disappointed. I built the model straight out of the box including kit decals and had no problems. You can see the finished result here. I had applied a minimum of weathering which amounted to exhaust stains from the engine stacks and gun stains. When I looked at the model again recently, I noticed that I hadn't even applied a dull coat to the model, so it was back to the bench.
Back to the Bench
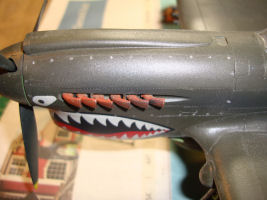
You know your weathering techniques need work when the model looks better with a few years of dust on the surfaces. I cleaned off the model and thought I'd try some basic weathering. First I grabbed a silver pencil and highlighted the Dzus fasteners around the cowling panels and the cockpit sills. I rubbed the pencil marks with my finger which removed the excess and left the silver lead in the recessed Dzus fastener surface details.
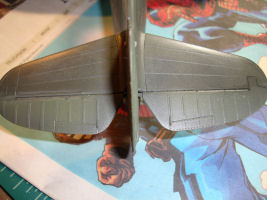
I applied a mist of Medium Green over the upper flight control surfaces to show the beginning of sun fade on the olive drab paint. I also dry-brushed Ghost Gray onto the raised ribs in the ailerons, elevators and rudder. The last step was to apply a wash of lamp black oil paint into the flight control hinges to add some dimension to the deep recesses molded into those areas.
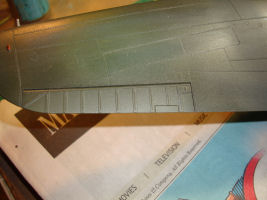
Next comes the panel line wash. I applied Mig Ochre panel line wash to the upper and lower surfaces, running the solution across all of the rivet and panel line details. When you're applying the wash, it doesn't appear to be very stark in contrast, but you can see in the image below that while individual rivets and panel line segments may not be very visible, the wash is quite effective overall. Per the instructions, I let the wash dry and then used a clean paper towel moistened with thinner to remove the excess wash. The cockpit and wheel wells look too clean now, but that would be another step in the weathering process.
The final step was to apply a dull coat finish to the model to give the paint a more aged appearance. For this step, I used my favorite solution - GSI (Gunze) acrylic Flat Clear which sealed the previous weathering steps as well as dulled down the decals and camouflage colors.
Conclusion
You can add further weathering to the model including fuel runs from the filler cap, oil and coolant leaks along the underside of the fuselage, dirt and grime from operating off of dirt airstrips, and more. The object of this exercise was really to try out the Mig panel line washes and I'm impressed. I've been using home-made washes made with artist oils and odorless mineral spirits which I will continue to do, but the performace of these Mig washes was very good and I'll be using more of these in future builds. I also want to build this Hasegawa 1/32 P-40E again, this time with aftermarket details and more attention to the final result rather than testing the build for a review.
My sincere thanks to Ammo by Mig Jimenez
and Hasegawa USAfor the review samples!


