Hasegawa 1/48 F-104C Starfighter Build Review
By Fotios Rouch
| Date of Review | October 2019 | Manufacturer | Hasegawa |
|---|---|---|---|
| Subject | F-104C Starfighter | Scale | 1/48 |
| Kit Number | 07219 | Primary Media | Styrene |
| Pros | Beautiful detail | Cons | See text |
| Skill Level | Basic | MSRP (USD) | $29.95 |
Build Review
After a laborious built of a beast of a plane I decided it was time to do something slick and sexy. Nothing is sexier than a Starfighter! A model that is long and narrow and a whole bunch can be built and take very little space in a display case!
So I took out my Hasegawa F-104C and compared it to the new Kinetic F-104G. The Hasegawa kit still looks amazing. It does have the weird shortcoming of the pronounced rivets on the wings that are still there on the real plane but are flush and barely noticeable. The amazing DACO kit solves that and adds tons of more detail. I also took out my Eduard photoetch and my Cutting Edge detail sets. It practically killed me taking the Meteor Prod sets out. I savored them and never thought I was going to use them but what is the point of holding on to resin forever.
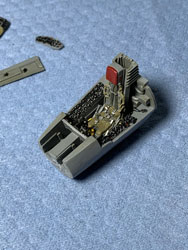
Test fitting the resin reminded me of the old ‘ScottyB’ magic. Why in the world Aires and the other Czechs don't test fit their sets and make the user having to destroy their kits to make the resin fit? The cockpit set is amazing with lots of detail and a sliding C2 ejection seat.
I augmented the exhaust with Eduard photoetch actuators.
I also added the Meteor resin NACA intake duct avionics panel.
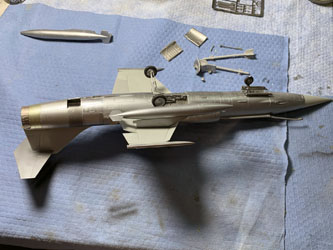
I used the DACO plastic for the wings and elevators and aligned everything with the DACO template. I dropped the leading and trailing edge flaps for the visual appeal.
Work on the Starfighter continued with applying first the gloss white on the wing tops and the aircraft gray on the tail and wing bottoms.
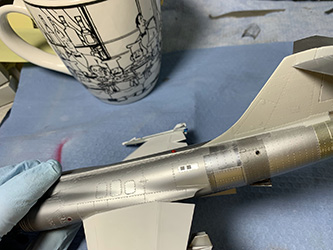
After the gloss paint was completely dry, I masked it off and applied the first coat of semi-gloss aluminum. That was followed with masking and different metallic shades.
The most interesting area on the F-104 is the exhaust area with all of its different shades. I mashed and applied the different shades which were very distinct. I then blended them in using metal powder by SNJ. It toned down the differences and looked more realistic. I then used a pointy make-up Q-tip and polished off some stripes for better effect.
The refueling probe was done with a multi-hue tip.
The landing gear went on next.
The F-104 is coming together well with no surprises.
The AIM-9Bs came from the DACO set. They look nice and add a lot to the look of the plane.
The DACO set also includes colored clear parts for the position lights. Future makes them stand out well.
The pitot tube will go on last as I have a bad habit of breaking them off while handling the model.
The next big step is the decals. I ordered the Caracal F-104C set from Kitlinx because I cannot bring my self to cut up the beautiful Victory set.
The model was getting close to completion and then I received a nice and informative email from one of the Starfighter experts (Norm Filer) with some good advice on things to fix. Most notable items were to change the color of the wingtip missile rails from NMF to gray. Also, Norm does not think that my under-wing tank and wingtip missile configuration was common or used at all, but I like the visual so I am keeping it! While I was addressing the repaint, I thought that it would be me more visually appealing to drill out the position lights (yellow/ orange) in the rear fuselage and insert clear sprue instead. I used manually a set of drill bits until I got the diameter just right. I then secured clear sprue in place and painted it with Tamiya clear orange on the top and clear yellow on the bottom position lights.
Sadly, the F-104C Caracal decal set I ordered from Kitlinx on Oct 10 is still not here, a month later. I should have ordered it straight from Cursad (Caracal). Sad as it was, I opened and used the Victory set. 15 years later the decals behaved very well.
The model is basically done and the only thing remaining is the very subtle acrylic based black wash from Vallejo to pop out the panel lines and rivets.
I have been very happy with this kit. Hasegawa is still delicate in execution with great shape accuracy. Do not throw away your old Hasegawa Starfighter kits. They are still great.


