Hasegawa 1/72 SOC-3 Seagull Kit Build Review
By Richard 'RJ' Tucker
| Date of Review | February 2019 | Manufacturer | Hasegawa |
|---|---|---|---|
| Subject | SOC-3 Seagull | Scale | 1/72 |
| Kit Number | 02232 | Primary Media | Styrene |
| Pros | Accurate shape; only 1/72nd scale kit of this aircraft | Cons | See text |
| Skill Level | Experienced | MSRP (USD) | OOP |
Build Review
The Curtiss SOC Seagull was an American single-engine scout observation aircraft, designed by Alexander Solla of the Curtiss-Wright Corporation for the United States Navy. The aircraft served on battleships and cruisers in a seaplane configuration, being launched by catapult and recovered from a sea landing. The wings folded back against the fuselage for storage aboard ship. When based ashore or on carriers the single float was replaced by fixed wheeled landing gear.
Curtiss delivered 258 SOC aircraft, in versions SOC-1 through SOC-4, beginning in 1935. The SOC-3 design was the basis of the Naval Aircraft Factory SON-1 variant, of which the NAF delivered 64 aircraft from 1940.
When the SOC was replaced by the OS2U Kingfisher, most remaining airframes were converted into trainers; they remained in use until 1945. With the failure of the Curtiss SO3C Seamew, many SOCs in second line service were returned to frontline units starting in late 1943. They saw service aboard warships in the combat zone for the rest of World War II. This is one of the few instances in aviation history in which an older aircraft type, that was retired or sent to second line service, replaced the new aircraft type that was intended to replace it. (1)
Typical of kits from the '60s and early 70s, the details are lacking, and what's there isn't very accurate especially the cockpit. I started with the resin cockpit. The instructions are very clear; you have to carefully remove a lot of plastic to install it. Here's the cockpit side-walls installed after grinding out the molded instrument face and thinning the fuselage walls for the pilot's console.
The Starfighter cockpit set came with a photo-etched fret from Tom's Works # 72-306. I used the seatbelt buckles with painted Tamiya masking tape for the seatbelts and mounted a 30 cal gun, scrounged from the spares box, on a straight pin then glued it to the rear deck behind the resin ammo box. When I assembled the photo-etched gun-ring, I butted the ring right-up against the pin. Looking from the top, it appears the gun-ring is supporting the gun.
The kit engine is the other instance of soft and unrealistic details. I painted the Radial Wheels & Engines resin engine medium gray then applied Alclad aluminum to the piston houses with a fine brush. The Alclad behaved as a wash and filled in and highlighted the detail. Wrapping silver floral wire around a plastic tube the same diameter as the crankcase to replicate the ignition harness ring, it was glued it place with a drop of super-glue. The sparkplug wires are fine gage copper wire. The sparkplug wire should be black, but I left then unpainted for a little contrast to draw the eye to the details. (Artistic license!)
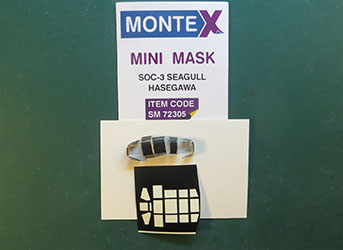
The next departure from the kit parts in the windscreen and canopy. The kit canopy is way too thick to fit over the replacement pilot console, so I used a Falcon vac replacement. I tried to mask the canopy pieces with drafting tape, but I just could get a straight cut. I was short a hand. So, I bought the MONTEX mask set; it made the job much easier.
As I looked at the wings, I was concerned that the strut parts would cause a gap in the wing that would be nigh-on impossible to fill ad sand. So, I removed the top and bottom of each strut piece and glue them in the wing slots leaving holes to attach the struts to the wing.
Here's the top wing. The slots are filled and sanded smooth. When I test fit the fuselage struts (center slots), the fit was so tight and flush that I didn't bother cut them out; there wasn't any gaps.
The Star-Fighter photo-etch set has replacement hinges for the elevators. For small parts, I back the fret with tape. Then I cut out the parts. Since they're stuck to the tape, there is little (never say no) chance of launching the minuscule part into low-earth orbit and re-entry into the carpet never to be seen again.
All this took a while and brought me close to eye-strain, but the results were worth the time.
Assembly was straight forward from here. Alclad Aluminum (ALC-101) simulated the bare-metal portions on the fuselage and Tamyia Flat Aluminum (XF-16) simulated the doped fabric.
The wing floats had a grab handle on their face. The handles were fashioned from floral wire and glued into holes drilled on the front.
The blue, white and yellow colors are Testors Model Master enamel paints. After applying the decals, the photo-etch rigging was installed during final assembly. The instructions with photo-etch are clear and straight forward.
The simple wood base and kit supplied placard was painted in Navy colors and the miniature gold wings set the "Fly NAVY!" by "the-seat-of-your-pants" spirit to model display. The figure is from the CMK US Navy Pilots WW2 pilot set -72115. Our intrepid hero* adds the scale reference.
This kit is an accurate representation of the real thing. It requires a little filler around the wing-fuselage joints, but, overall, goes together quite well. The resin cockpit and engine address the two short comings of this kit. I can't say enough about the Starfighter and Radial Wheels & Engines resin sets; they're superb kits in and of themselves.
* "You came in that thing?! You're braver than I thought!" Princess Leia


