Hasegawa 1/72 CV-22B Osprey 'U.S. Air Force' Kit Build Review
By Chuck Holte
| Date of Review | September 2014 | Manufacturer | Hasegawa |
|---|---|---|---|
| Subject | CV-22B Osprey 'U.S. Air Force' | Scale | 1/72 |
| Kit Number | 02074 | Primary Media | Styrene |
| Pros | Well engineered, accurate | Cons | None noted |
| Skill Level | Experienced | MSRP (USD) | $49.99 |
Build Review
For the Editor's First Look review of this kit, look here. The CV-22B Osprey in my review is assigned to the 58th Operations Group, Kirtland AFB (Albuquerque), New Mexico. For the US Air Force CV-22B Fact Sheet, look here.
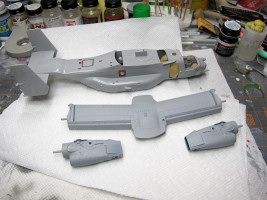
The recently released Hasegawa CV-22B Osprey is actually the second 1/72 kit of the multi-role vertical take-off and landing aircraft, the first being Testors/Italeri in the late '90s. While the early kit was certainly buildable and looked like the V-22, it was created when the actual Osprey was still in development stage. The new Hasegawa release captures the Osprey in its operational configuration and updates kit with state of the art molding and the latest details in sensors and antennas and markings. The kit provides the option to drop the main wing flaps (I did), repositionable engines and rotor blades to show vertical and horizontal flight capabilities, and finally the option to display the model in-flight on a robust clear plastic stand (I didn't).
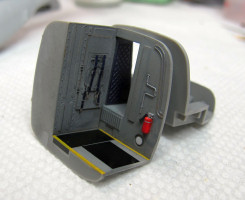
Hasegawa provides all the basics for a nice closed fuselage model but teases with possible future options to show off the now empty aft cabin with an open ramp and to possibly fold the rotors and stow the wing above the fuselage, as on the actual aircraft. Oddly, the crew entry door is molded closed, however the area just inside the door is detailed with the flight engineer's seat, passageway to the forward cockpit, a light and fire extinguisher. I chose to open the crew entry door and add a few extra details, such as the entry steps, cockpit displays and seat belts, with the Eduard PE set 73482.
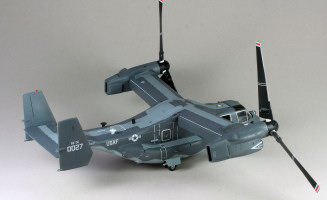
I also added some of the exterior fuselage detail from the Eduard set and primed with Tamiya Fine Surface Primer. I airbrushed Model Master Light Ghost Gray on the bottom of the fuselage and wings and MM Gunship Gray on the top side, per the kit painting instructions. I brush painted two coats of Future Floor Polish to give a smooth gloss finish for the decals. Kit decals are well printed and in register, but I found they had a tendency to silver when using the usual Micro Sol setting agent. Stronger Solvaset solution was applied and the silvering problems magically went away and the decals settled down for the duration. Airbrushed Floquil Flat was used to seal the decals and provide an overall flat finish to the model.
Overall, this was another enjoyable modeling project resulting in a nice model of a current aircraft. The kit is engineered to fit well and didn't require any heroics in the construction stages. As mentioned earlier, it appears that Hasegawa may have had more plans for this kit, at least at one time, with the interior and the wing fold, but time will tell if there's a more complex kit in the future. As it is now, there's an opportunity for an aftermarket manufacturer to step in and add another dimension to an already pleasing kit.
My sincere thanks to Hasegawa USAfor this review sample!


