Great Wall Hobbies 1/48 T-33A Shooting Star Kit Build Review
By Fotios Rouch
| Date of Review | June 2016 | Manufacturer | Great Wall Hobby |
|---|---|---|---|
| Subject | T-33A Shooting Star | Scale | 1/48 |
| Kit Number | 4819 | Primary Media | Styrene/Photo-Etch |
| Pros | Beautifully done model of this distinctive aircraft | Cons | See text |
| Skill Level | Experienced | MSRP (USD) | $53.95 |
Build Review
For some background of this subject and a look at this kit out of the box, look here.
After finishing a tough resin kit it always nice to do something that goes together well to cleanse the palette so to speak!
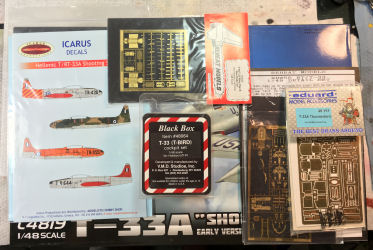
The GWH T-33 looks great in the box but let's see how it goes together. I wanted to do some extra things to it mostly out of curiosity and because I never leave things well enough alone. Through the years I accumulated lots of accessories for the old Academy kit and I wanted to see if any of the accessories would fit the new kit.
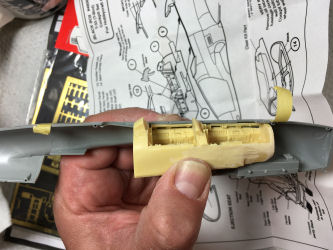
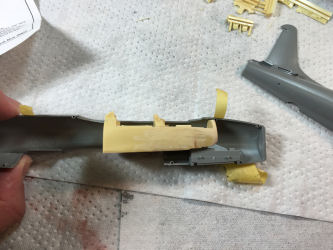
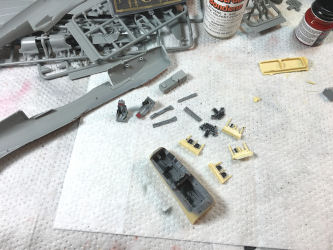
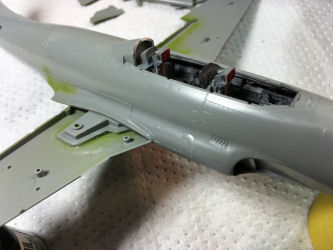
After some test fitting and sanding, the Black Box cockpit fits rather nicely. I did sand the front wheel well step that defines the relationship between the plastic cockpit and the wheel well. I also made two small cuts to the fuselage sides to accommodate for the front instrument panel.
I know I will have to sand down the bottom of the resin cockpit tub to accommodate the main landing gear well. I do not recommend using the Black Box resin cockpit unless you are a risk taker and have done this type of thing before. I was worried that I might have ruined a good kit as all the sanding in the world would still not clear all the parts. I had to shave the resin bottom of the cockpit paper thin, had to shave the top of the wheel well and sides of the intake trunks. This was a close call but it all worked.
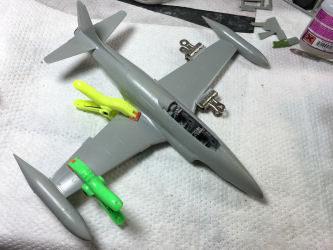
I am pleased with how well the intakes fit although the bottom of the intakes needed a little adjusting to allow for the fit of the bottom wing. I am not saying there is a problem with the kit design because I messed with the internals of the kit rather heavily. The nose piece little polishing because the mold left a small ridge-line behind. The fit of the nose piece to the main fuselage gave me a little headache and required sanding and polishing as if the nose is slightly wider than the fuselage front.
Once The bottom of the wing was secure the rest of the build was a breeze. If I had left the kit parts alone this model would be done by now!
I will use the True Details wheels once I verify the correct version of the front wheel for the Hellenic T-33 from the 50's.
I cleaned the plastic parts with alcohol and sprayed a coat of Mr Surfacer 1200. Next job will be to polish the primer prior to laying the first coat of Alclad.
After the primer was polished, I started the Alclad shades. I used Aluminum, Dark Aluminum, Polished Aluminum, and other various mixes that I keep for NMF aircraft.
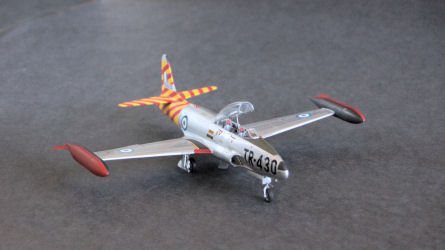
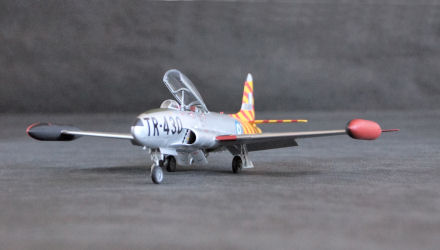
The tail is supposed to be yellow with red stripes. The tanks are black and red. So I masked and applied all the colors.
The last step was to paint the clear parts. The model is now ready for decals.
The T-33 was finally completed with the help of DACO's strongest decal solution. The kit is very nice overall with some minor issues that are mostly correctable by the modeler. The price is considered high by some modelers but this the new reality of our hobby. I will certainly be buying one more down the road for a US Navy trainer version.
My sincere thanks to Great Wall Hobbies for this review sample!


