Great Wall Hobbies 1/144 Victor B.2 Kit Build Review
By Larry Hornya
| Date of Review | February 2015 | Manufacturer | Great Wall Hobby |
|---|---|---|---|
| Subject | Victor B.2 | Scale | 1/144 |
| Kit Number | 1004 | Primary Media | Styrene |
| Pros | Beautifully done model of this distinctive aircraft | Cons | Nothing noted |
| Skill Level | Basic | MSRP (USD) | $49.95 |
Build Review
For some background of this subject and a look at this kit out of the box, look here.
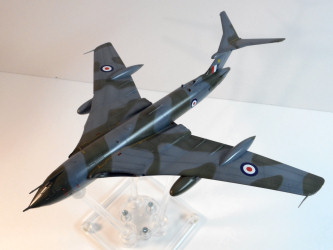
Retired from active service in 1993, the Handley Page Victor was the last the British "V" bombers (the Vulcan and Valiant being the first two). Removed from the strategic nuclear bombing mission in 1968 due to the discovery of fatigue cracks, many Victors were modified to fly strategic reconnaissance missions. After the nuclear deterrent role was handed over to Polaris missile carrying submarines of the Royal Navy, the Victor found new life as an aerial refueling tanker. In this capacity, the Victor saw service during the Falklands War refueling Vulcan bombers on the long range "Black Buck" missions. The 1991 Gulf War saw the Victor in its last use in wartime before being retired.
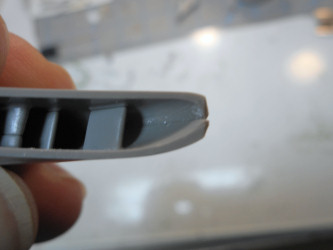
Great Wall Hobby has recently released a 1/144 scale kit of the this historically important Cold War British aircraft. Given the scale, the kit is very well detailed. The casting is clean and crisp with very little fit issues. There were a few ejector pin marks in places that were a bit of a hassle to remove, most noticeably on the tiny fuselage intake doors near the tail. Nose weight is required to get the model to sit on the gear (very little though, 3 grams as I recall). The large wing leading edge intakes pose a bit of challenge as there is a seam running right through the middle of it (but hey, isn't that just a fact of life for "jet guys"!). Careful filling and sanding will get rid of what was the only seam issue on the kit.
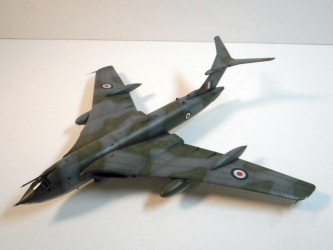
One other very small gripe. There are several antennas on the fuselage. Three are very small blade antennas. Two have to be glued on but for some reason, one is molded on the fuselage top center, making it a certain victim of covering the fuselage seam. After accidentally sanding it off I made a simple replacement from plastic card. I just thought it was strange that Great Wall elected to mold that antenna on the fuselage when the other two would not have been in the way. That's about it for assembly! Everything else was a breeze as far as fit. The real challenge was the paint scheme. The leading edges of the wings and tail had a slight wrap around which required a lot of masking. In fact, I would say that I spent half the time on this model masking! The result was well worth it though.
Paints were Tamiya acrylics following the same techniques I use for larger scale models. I start with a black pre-shade, followed by base colors and then a highlight using the base color with a little white mixed in. This is the third model I have used post shading on and I like the technique very much. I keep a bottle of a particular mix for this. It is made up of Tamiya black and red brown thinned about 75% with Tamiya thinner. I spray this in shadowed areas as well as on the demarcation lines between the camo colors.
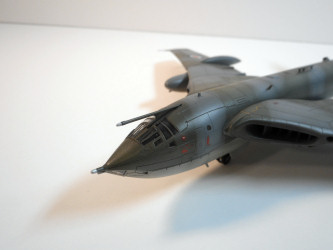
I used Future for the clear coat followed by the decals. The kit decals went down without a problem and reacted well with only a few coats of Micro-Sol. Next came a panel wash using MIG dark brown followed by Testors clear flat mixed with just a little semi-gloss. I wanted a tiny bit of sheen but not much because of the scale. Lastly, the landing gear were added. Here there is one little glitch in the instructions. The instructions have you add the gear doors before the gear struts. This is a little unusual but it works fine for the main gear. If you follow the instructions for the nose gear you will have a problem. The doors will interfere with the strut going into the bay. You will want to attach the gear and then the doors. Otherwise, this was a very nice little kit and a very enjoyable build.
Highly Recommended.
My sincere thanks to Great Wall Hobbies and DML for this review sample!


