Collect Aire 1/48 AT-9 Jeep Kit Build Review
By Fotios Rouch
| Date of Review | September 2020 | Manufacturer | Collect Aire |
|---|---|---|---|
| Subject | Curtiss AT-9 Jeep | Scale | 1/48 |
| Kit Number | 4871 | Primary Media | Resin, White Metal, Vacuform |
| Pros | Nicest AT-9 in 1/48 scale (only AT-9 in 1/48 scale) | Cons | Bubbles in resin parts |
| Skill Level | Expert | MSRP (USD) | Out of Production |
Build Review
Look here for an in-box review.
For photos of the AT-9, look here. I also used as a reference the very good walkaround from the WPAFB Museum.
The build of this kit started with the very standard procedure of washing and de-greasing the resin parts.
Most resin kits require patience and lots of planning, test fitting and small corrections. Some need more work than others. I thought that such a small kit would need less hard work. I was wrong.
Let’s start with the cockpit. It is fairly simple but looks complete and with some careful painting it looks pretty good. The canopy glazing is fairly expansive and lots of detail will be seen through it.
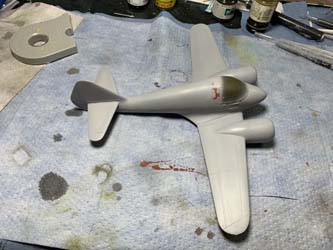
The fuselage halves went together okay for the most part but there were gaps on the seams on the top and bottom of the fuselage. These were eliminated with successive applications of fillers and primers. The panel lines were restored easily with Dymo tape and a scriber.
The tail wings and tail joint were not thought out well by the maker. A big gap is left behind after the tail wings are on the fuselage and the tail does not fair in well with the fuselage or the tail wings. I had to use lots of filler and had to recreate the reinforcement strips on the tail/wing joint based on the museum photos.
The main wings went on okay for the most part but there were many pinholes that had to be dealt with. The resin casting from this maker became semi-decent and somewhat close to the industry standards only at the very end of his career with Collect-Aire.
I spruced up the metal engines with styrene rod for the push rods and then I realized that whatever engines were copied for this job were a bit too large in diameter to fit inside the cowlings. Some surgery was required for the cowling parts to close up.
I did not like the resin propeller blades so used the hub from the kit and the blades from the Beech 18.
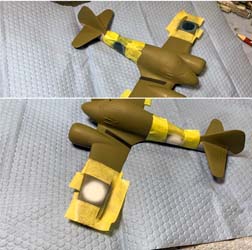
The most difficult part with this kit is by far the vac canopy. This is a most important part to this kit as it attracts all the attention. Sadly, the maker did not design this kit with the modeler in mind. The front of the canopy has no framing where it touches the fuselage so the modeler cannot apply glue there as it will show. The best path I could think of was to super carefully trim it and test fit the heck out of it so it just drops in place. Trimming the vacuform part took me a few days worth of trials. My end goal will be to secure it in the back and sides and have it touch the forward fuselage with maybe a drop of future at the contact point. Masking the soft vac part will be another nightmare. Once I was satisfied with the vac canopy fit, I needed to make sure that it would be a secure fit to the fuselage. For that I created little styrene sprue steps that would help keep it in place. I used the extra vac canopy to cut out masking shapes and affix them to the final canopy. I prepainted the vac canopy with interior green first and then with olive drab. After I secured it in place with CA glue I checked for errors and areas of imperfections. Mr Surfacer 500 and 3M Acryl Red took care of the little issues. Once things looked good, I used Mr Surfacer 1000 and then rescribed all the panel lines around the canopy.
I used Floquil Neutral Gray first for the under surfaces. Then I used BluTack for camouflage masking and Floquil Olive Drab for the top camouflage. Next, I will work on camo fixes if any and all the small detail parts. I will attempt to airbrush the national insignia. This will be a new thing to me.
Painting the decals (National Insignia) was not an easy task and I will stick with good quality decals next time, thank you very much! The kit decals were old and needed a little help but were serviceable nevertheless. The rest of the tasks consisted of adding the little details, unmasking the clear parts and adding a little weathering.
This AT-9 is meant to represent one of the few that were assigned to tactical units for P-38 pilot training. I'd like to think that this is how it looked when it served at Luke Field in Arizona. This build has been plenty of work considering how small it is. For almost 20 years since this kit came out there has not been another 1/48th scale Jeep. Now that I did all this work, I am sure one will be coming out soon in injected plastic!
I am pleased with the results and here are the lessons learned. Use of high-quality decals is better and easier than painting your own. Using human hair for antennas poses risks. Humidity affects the tension. I plan to redo the antenna aerial. Last and most important corollary! The moment you build an obscure limited run kit, it guarantees that a plastic injected kit will appear! Apparently, Dora Wings gas an AT-9 coming out. It is alright as it would be nice to do an NMF colorful cowling version trainer as well.


