Classic Airframes 1/48 Sea Hawk Build Review
By Michael Benolkin
| Date of Review | August 2004 | Manufacturer | Classic Airframes |
|---|---|---|---|
| Subject | Hawker Sea Hawk | Scale | 1/48 |
| Kit Number | 0465 | Primary Media | Resin/PE |
| Pros | Detailed resin cockpit, intakes, wheel wells | Cons | One-piece canopy |
| Skill Level | Intermediate | MSRP (USD) | Out of Production |
Background
For a look at the history of the Hawker Sea Hawk and the kit straight out of the box, check out the review
published earlier on Cybermodeler.
The Kit
As with any limited run kit, the first thing to do is to dry-fit everything. Getting to know your model now will save you frustrations later. A number of ejector pin stubs will require removal in various parts of the kit to ensurse a good fit. Dry-fitting the top and bottom forward fuselage halves revealed that the stubs in the wing roots would be classified as problematic, so away they went.
Assembly
The resin parts need to be removed from their casting blocks and cleaned up as well. I had a brief fantasy that the main wheel well resin part would not have to be touched as the part drops beautifully into the lower fuselage, but alas, the casting block - small as it was - interfered with the upper fuselage half. Time to grind everything away.
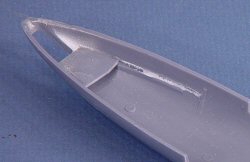
In addition to the casting block, the edges of the cockpit tub need to be shaped to achieve a nice fit that won't interfere with the lower fuselage half. I installed the styrene nosewheel well into the forward section of the lower fuselage half. I dry-fit the cockpit tub into the upper fuselage half and located where the fit problems were. I ground quite a bit of the underside of the tub, but as I realized how thin that floor section was, it was time to look for alternatives, as the fit was not quite right yet. After fiddling with the nose for a bit, I realized that the styrene part that serves as the noseweel well 'top' was trying to double as a base for the cockpit tub, but it was more of the cause of the poor fit. I removed the styrene part from the lower fuselage, shortened it considerably, and reinstalled the nosewheel well. The shortened part does not interfere with the cockpit tub nor does the change affect the nosewheel well.
The instructions call for the wheel wells to be either the lower fuselage color or dull aluminium. As I don't have any photo references to work from, I opted to paint the wheel wells Tamiya Flat Aluminum. Once this was dry, I applied a wash of diluted black oil paint to the details inside the main wheel well. The photo shows the nice results. I installed the resin main wheel well into the lower fuselage and the fit was nice!
I painted the cockpit tub Tamiya Dark Grey. I know that 1950s era aircraft tended to have black cockpit tubs, I used a variety or Tamiya Dark Grey, NATO Black, Flat Black, and diluted black oils to retain some contrast while keeping the 'dark' cockpit. The kit comes with a nice photo-ected instrument panel that is backed with an acetate part on which the instrument faces are clearly printed. Photo-etched seatbelts and ejection seat details are also provided in the kit. Nicely done!
The completed cockpit was installed in the upper fuselage half. One last dry-fit of the upper and lower fuselage halves show a nice fit when it comes time to make the join permanent.
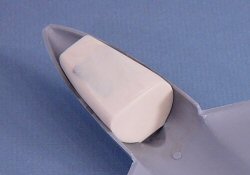
he lower fuselage is completed with the installation of the resin intake inserts (which are made to install easily and perfectly - nice one Classic Airframes!), and 10 grams of ballast. I use standard lead ballast that has two-sided foam tape used by the model railroad hobbiests and make great aircraft weights as well. In this case, however, the foam tape gets in the way of the cockpit tub, so this was removed after the photo was taken. For this installation, I applied cyno to affix the lead directly to the lower fuselage.
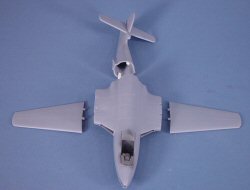
While the lead was drying in the lower fuselage bay, I jumped ahead and assembled the tail section. Do lots of dry-fitting here to get the horizontal stab to fit firmly in the vertical stab without twisting to the left or right. Mine went together with minimum adjustment.
I assembled the wing halves next, but before gluing, I drilled out the holes for the wing pylons on the underside of the wings. The instructions clearly show how far in from the inboard ends of the wing to drill (14mm) and how far apart to drill the holes (8mm), but it doesn't show how far aft of the leading edge of the wing the pylon should attach.
Fortunately, there are a pair of holes for the inboard pylons, these are found on the underside of the wing that is part of the lower fuselage. I drew a line that extended fron that pylon attachment point out onto the outer wing panel to get the point of distance from the leading edge of the wing to the pylon, assuming that the inboard and outboard pylons align with one another. I drilled out the holes accordingly, then cemented the wing halves together.
Probably the most challenging part of the model are the photo-etched flow directors in the mouth of the engine intakes. These three PE fins are glued to a photo-etched guide that needs to be installed in the upper half of the intake mouth first. With the guide installed, I applied a small bead of thin cyano to the appropriate spot of the guide and then put the appropriate fin into place with tweasers. The thin cyno grabs almost instantly, the keyword is almost. If you move the part before the cyano grabs, it won't take. It took me a few tries to get the technique and it worked flawlessly for the remaining five fins. With the forward fuselage halves together, you'll need to add a small bead of thin cyano to where the fins meet the bottom half of the intakes.
Painting and Markings
With the major components completed, it was time to apply the first coat of paint. I had originally chosen the color scheme depicted on the box art, but since I've seen many other Sea Hawks completed this way, I opted for the Extra Dark Sea Gray over White scheme that is also provided in the kit decals. I used a spraycan of Tamiya White lacquer for the base coat, building up the finish with a thin layer of paint at a time. When I had a small build-up of paint on the trailing edge of one of the wings, it was a simple matter of sanding off the excess, buffing out the surface, and touching up.
You can see in this shot that the white goes on well and does not clog up the details. The other nice thing about white, like Alclad, it will show you where any surface flaws lurk. Once this coat has thoroughly dried, it will be time to mask and apply the Extra Dark Sea Gray.
One note of caution - the color profiles in the instructions have one confusing contradiction. They show that all of the paint schemes use Extra Dark Sea Gray. Check your references! The first sign of trouble for me was the equation of Extra Dark Sea Gray (BS 640) to FS36118, which is Gunship Gray. FS36118 is actually a rough color equivalent to Dark Sea Gray (BS 638), a shade several tones lighter than Extra Dark Sea Gray. While I've found one reference that equates BS 640 to FS36118, the majotiry seem to agree that BS 640 is equivalent to FS36099.
To make matters more confusing, It appears to my eye that the paint schemes of Sea Gray over Sky use BS 638 Dark Sea Gray whilst the Sea Gray over White uses BS 640 Extra Dark Sea Gray. I'd welcome some educated corrections here if I'm mistaken!
I used Tamiya XF-24 Dark Gray for the upper color as it is a very close match to BS 640, especially after a few coats of dilluted Future to gloss up the finish. The rest of the details were finished in their appropriate colors and it is finally time to decal the aircraft.
I chose the markings for Sea Hawk FGA.6 of 806 Sqn, with the Ace of Diamonds placed just ahead of the intakes. The decals are Microscale, though the roundels were done in the two-part style that some manufacturers are favoring. Most of the decals went on fine without setting solution, though a touch of Micro-Sol was required for the Ace of Diamonds markings.
Final Assembly
With the markings in place, all that remained was to install the landing gear and the folded wings. I used thin cyano to hold the wings in place, though these wingfolds will be a bit delicate.
Conclusions
This was a straightforward build, though it did take a little time to complete since it was left on the bench while my wife went to hospital for a while. It's nice to get this model finished and on the shelf! You'll like this kit, while it is a multi-media kit (styrene, resin and photo-etch), none of the parts are complex and this would make a great starter kit for those builders ready to take on their first or second multi-media project.
My sincere thanks to Classic Airframes for this review sample!


