Classic Airframes 1/48 de Havilland Sea Hornet NF.21 Build Review
By Larry Horyna
| Date of Review | March 2015 | Manufacturer | Classic Airframes |
|---|---|---|---|
| Subject | Hawker de Havilland Sea Hornet NF.21 | Scale | 1/48 |
| Kit Number | 0459 | Primary Media | Styrene/Resin |
| Pros | Unique subject | Cons | Nothing serious noted |
| Skill Level | Intermediate | MSRP (USD) | Out of Production |
Build Review
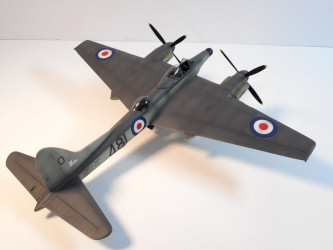
Pushing the limits of wooden combat aircraft design based on the success of their earlier Mosquito, de Havilland aircraft company introduced the Hornet toward the end of the Second World War. Initially designated the DH.103 Hornet, the aircraft would equip postwar RAF Fighter Command day fighter units. With its excellent low speed characteristics and pilot visibility is was a natural choice for the Fleet Air Arm in developing a carrier based fighter. The NF.21 Sea Hornet was the night fighter variant of the Sea Hornet. Adding a seat just aft of the wing trailing edges for the radar operator/navigator and elongating the nose to accommodate an ASH rotating dish in a "thimble" radome, the Sea Hornet certainly attained the look of sleek design modified to look a bit ungainly! The design was very successful, however odd looking and remained in FAA service until 1954.
Classic Airframes kit of this unusual aircraft is a welcome addition to any FAA collection. The kit is molded in gray plastic and comes with resin cockpit details, exhausts and wheels. The moldings are very clean. As is typical with many short run kits, there are no alignment pins. The kit also includes two clear vacuform canopies and windows for the radar operator/navigator's hatch.
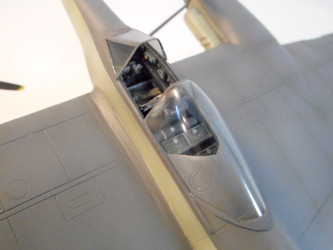
Assembly is fairly straight forward. The kit is tooled to make a standard Hornet and the resin F.21 nose requires some cutting to graft onto the forward fuselage. Fit was pretty good with only a little filler required. My only disappointment with the interior was a lack of seat belts. Usually resin seats have molded on belt but for some reason CA did not do that nor did they supply any photo-etched ones. I elected to use an Ultracast Tempest seat that had molded on seat belts since I had a couple lying around.
The resin cockpit fit great! I was actually a bit surprised as just how nicely this kit went together. I would say this was the best fitting CA kit I have built next to their Model 239 Buffalo. One structural weakness was the wings and tail surfaces. As I mentioned, there are no alignment pins and nothing to support the wings which are essentially shoulder mounted. I made brass wire spars which worked great. I also made brass wire alignment rods for the tail surfaces. The resultant model is quite robust. The wing root joint required a little adjustment/filling to get everything nice and even but again, this was minimal.
The model was pre-shaded and painted using Tamiya acrylics mixed to match the specific colors. The model was then clear coated with Future Floor polish and decaled. The kit decals worked quite well with just a little Micro Sol. An enamel wash was applied followed by a very subtle post shade using a mix of Tamiya flat black and red brown thinned about 80%.
The vacuform canopies fit great. The landing gear fit without any problems as well. The propellers on the Hornet series were "handed", meaning they rotated in opposite directions to offset torque. This requires making sure you use the correct propeller blades for port and starboard engines. For a limited run kit, this was actually a pleasure to build. I will be doing the standard F.3 Hornet in the near future and am now looking more forward to it!


