Armortek 1/6 Tiger I
By Michael Taylor
| Date of Review | September 2006 | Manufacturer | Armortek |
|---|---|---|---|
| Subject | Tiger I | Scale | 1/6 |
| Primary Media | Aluminum | Detail Media | Machined metal parts |
| Skill Level | Advanced | MSRP (USD) | Out of production |
The Project
It was 2 years ago when I began getting shipments from England containing parts for a 1/6 Tiger1 for a regular customer in N.C. My first thought was damn this thing’s going to be heavy!
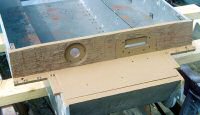
The first shipment contained the cast aluminum hull and turret pieces as well as the steel upper deck, turret top and hull bottom and the machined aluminum barrel/blast suppressor.
Every other month or so I’d receive another shipment of parts. The only problem was they were in no particular order-wheels may be shipped with turret parts. Anyway I had the basic parts to begin assembly of the hull and turret so I started (it was August 2004 I believe) because I wanted to get a look at the size of this thing.
Assembly is straight forward basically using the screws and nuts provided and screwing the parts together. Fit is generally good and there was little cleaning up to do.
Some of the cast aluminum parts had flash that needed to be ground and there is a fillet that goes across the front of the turret that didn’t fit flush with the turret sides and needed to be ground down to conform to the turrets contours.
There were 2 lower fillets provided as well and their fit was well proud of the turret as well. As I could see no purpose for these fillets I decided they were not structurally needed and instead of fitting them then grinding them down I simply filled their space with Milliput.
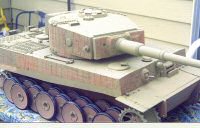
This thing is big-2 feet wide by 4 feet long so when I wasn’t working on it, it filled the bottom of my closet. I tested out red Bondo for the zimmeritt and found it worked well. I used 3 tubes to do the entire tank but before I got too far along the weather turned and that was it for work in the winter of 2004/5. I could only work on it outside due to its size and lack of space in my normal work room.
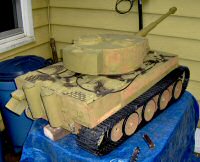
I continued getting parts shipments during the cold months and stockpiled the boxes in my bedroom (much to the dismay of Mrs. Taylor) until the weather warmed. In the late spring of 2005 I began work in earnest. There was no rush on this project so I worked at a leisurely pace. The suspension is a torsion bar affair that works fairly well when the kit is motorized I hear. In some of the photos you can see I have the suspension set too high and later adjusted it to sit better.
The wheels are cast aluminum with rubber “tires” and have bearings in them and spin quite well.
I continued through the fall of 2005. As the build progressed I pointed out things to its future owner like the nuts on the turret box and the lack of hinge pins.
Now this thing is getting heavier and heavier as more parts are added. You can see in some of the photos that I had a clothesline rope tied to the back tow mounts. This is how I moved the thing around. When I did want to work on it I had to wait until I had some help to lift it onto the table. Over the winter of 2005 I worked on the assembling the tracks.
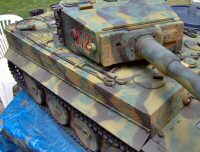
Spring of 2006 found me on the homestretch. I took 8 bottles of Model Master Dunkelgelb for the basecoat. For the camo I used burn umber and panzer olivgrun. The tow cables, tracks and tool heads were painted with Metaliser Exhaust. The crosses are from a 1/48 German bomber decal sheet but the numbers are painted on using masks.
Even though this thing’s 1/6th scale I did do some light weathering. Using shades of light tan for dust and some pastels for stains I think it added a lot to the finished tank. I rented a pickup truck from Enterprise for the weekend and drove the tank to N.C. where its new owner was very happy to finally see it.
Armortek’s Tiger page: http://www.armortek.co.uk/tigerbuild.html
 |
 |
 |
 |
 |
 |
 |
 |
 |
 |
 |
 |
 |
 |
 |
 |
 |
 |
 |
 |
 |
 |
 |
 |
 |
 |
 |
 |
 |
 |
 |
 |
 |


