AMtech 1/72 EC-135N ARIA Build Review
By Fotios Rouch
| Date of Review | November 2016 (updated Dec 2019) | Manufacturer | AMtech |
|---|---|---|---|
| Subject | EC-135N ARIA | Scale | 1/72 |
| Kit Number | 729202 | Primary Media | Styrene, resin |
| Pros | Unique subject and history | Cons | See text |
| Skill Level | Intermediate | MSRP (USD) | Out of Production |
Build Review
The Advanced Range Instrumentation Aircraft (ARIA) program history goes back to the mid-60s and ends around 1991. Our subject will be an ARIA that supported the 1971 Apollo 14 mission. A little background is necessary. If you are a model builder you come across interesting stories and requests. As luck might have it one of my coworker's father was a member of the ARIA program during the Apollo days. As his dad was turning 80 he approached me about maybe building an ARIA as a birthday present for his dad. What a great idea!
Here is usually where the good part starts. Do we have any era pictures I asked? Of course, there were! Don, my coworker and his father Hubert were kind enough to let me share them in this article. They were taken at Patrick AFB. The group shot was taken the night they landed with the moon rock samples. My coworker's dad is Hubert Redmon and he is on the far left of the picture. Interesting that back then it was no big deal to have the family come to the base for a group shot. Try and do that now! Also note that the 61-0326 tail number plane looks like it was configured to also carry the ALOTS pod.
As we all know there is only one model of the ARIA in any scale, the AMtech EC-135N/E. And before that the DB Productions resin conversion, long obsolete now.
The kit is of course based on the venerable AMT ERTL design with the well-known super soft plastic, variable production issues, warped long parts, etc. I built many of them in the early 90s but back then I cared a little less about the quality of the kit and was happy to have an injected 135.
I was not going to super-detail the interior as almost nothing can be seen through the cockpit windows.
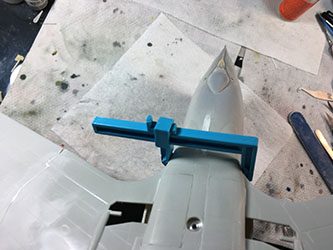
The fuselage took days to close. I started from the middle and tried to get it together by gluing it small sections at a time. The tail was all over the place. The wings were hopelessly warped and the left wing went to point up while the right wing wanted to point down. I tried two different ideas in reinforcing and straightening the wings. Both were different takes to the included instructions provided as an aid in the AMTech kit. Neither turned out perfect by the way but the wings are much better now.
I wanted this to be a model that would be on a display stand. I wanted a metal base for this and found an 1:24 scale Dauntless base that looked like it would do the trick. Don helped me with machining the metal bits necessary. For that I reinforced the belly of the model and I now think it can take the model weight just fine.
The resin parts fit OK for the tail boom modifications but not perfectly, so putty will be required. AMTech provides nice photos of the real thing and it helps for scribing panel lines.
I decided to sand down the reinforcement strips in the rear fuselage section. One reason was that the fuselage fit was so atrocious that it would make it impossible to sand between the strips without damaging them. The other reason was that the reinforcements are totally out of scale. They barely stick out on the real plane. So I sanded them down and rescribed them and I will accent them with washes and pastels.
I painted the engines based on the images provided here and in publications for that era.
Late into the build and with the guidance of fellow modeler and 135 family expert Jennings it was pointed out to me that this ARIA had a double cooling intake for its electronics in the belly area. I had not planned for it and some extra attention and surgery was required. Some carving took place and some styrene reconstruction but in the end, it looks OK.
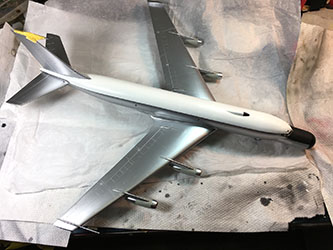
The model was primed and sand numerous times to fix blemishes. I applied two coats of white gloss paint and wet sanded the paint in between coats. I glued the engines on and remembered from earlier builds how delicate and temperamental this model is. I made sure that the engine pylons were perpendicular to the wings and used superglue for re-enforcement. Putty and Mr. Surfacer were used to make the joints more acceptable. After careful sanding and polishing, I rescribed the panel lines and applied silver paint to see how my work came out.
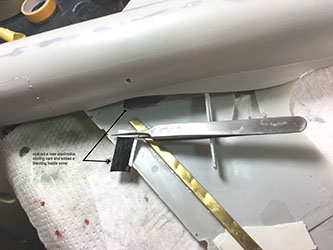
The model is nearing completion. The masking came off and the landing gear went on. The display stand seems to work fine and is pretty secure. The last hurdle is to build the VLF antenna housing that goes on the belly, near the main landing gear (thanks Jennings for the great references). Then after that the decals go on and the tail antenna loses the toothpick support!
The last big task was to try and recreate the belly fairing for the low frequency antenna. I first tried to use wax, the kind you melt and make copies of things, the kind you see at the fair where people make copies of their hands. I turned the model upside down and tried to copy the top fuselage fairing behind the cockpit, thinking that it is very close in shape the bottom fairing I needed to recreate. The wax copy came out OK but when I poured resin in it and the resin started curing and heated up, it messed up the wax. So out came the Milliput and I tried to recreate the part myself. It came out OK and fits well between the main landing gear wheel wells.
Lastly came the decal placement the model. Unfortunately, the decals completely fell apart on me. So instead of finishing the model I am going to buy liquid decal film and see if I can save what I have left.
The ARIA continued after attempting to save the kit decals with liquid decal film. I was somewhat successful but I still had problems with coming apart here and there. The belly antenna fairing was painted and put into place. It is not very accurate but it is present and it should look OK when the model is displayed.
I did spray a light coat of semi-gloss varnish to protect the model since it is going to be in an exposed display environment. Thankfully it did not dull the finish. There is a small detail that needs to be added. I need to custom print the crew names on the side of the plane once I get hold of them.
This was a tough build with lots of issues but I like the end result.
A few years ago, I completed the ARIA model that participated as a communication relay for the Apollo 11 mission. What made this model special was that my coworker's father was the Mission Commander on that plane during the Apollo 11 mission time frame and it was supposed to be a birthday gift for the father. Time and opportunities being what they are, we never coordinated properly, and the gift was not delivered.
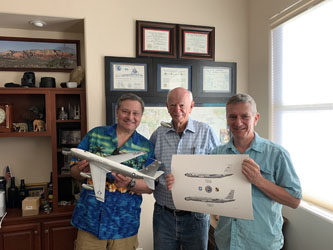
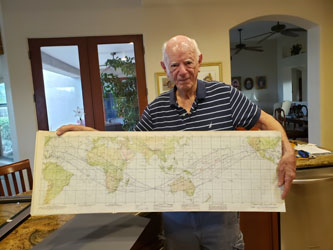
So time went by and a few interesting things happened. Spacefest 2019 happened again this summer and Michael Collins (Command Module Pilot of Apollo 11) was one of the guests. It was a great opportunity to have the ARIA Mission Commander meet the astronaut he helped maintain radio contact with earth!
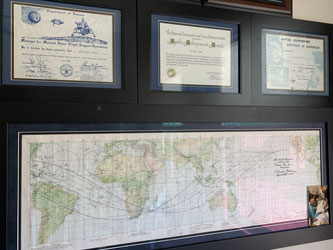
One more cool thing was that Jennings Heilig became a Tucsonan and wanted to meet the Mission Commander and contribute some his amazing aircraft profile artwork. So, it all finally came together and here are some images of the get together. It was a great meeting with so many stories told about those days and the plane and the missions.
Note the handwritten dedication by Michael Collins to Hugh Redmon on the mission map. Please take the time to record as much as you can whenever you get a chance to meet with history.


